

Before you start
- A Photon project with an existing, voice-eligible SMS number, WhatsApp number, or dedicated iMessage line. Shared iMessage assignments do not support Voice.
- Permission to manage the project’s Voice profiles.
- A Twilio account with permission to configure SIP Domains and call handling.
- For call forwarding, a destination phone you can answer and a caller ID that is either a Twilio number or a number verified with Twilio. To display your Photon number, verify it with Twilio first.
- To test forwarding, access to a separate calling endpoint, such as another person’s phone or a computer app that can call phone numbers. Two physical phones are not required.
1. Prepare your Photon Voice profile
Choose a profile
A Voice profile stores the call settings for one or more numbers in your project.
Create the default before creating an additional profile. Creating an additional
profile does not move any numbers; assign the intended numbers to it afterward.
The screenshots below show default-profile setup. If your number uses an
additional profile, apply the connection settings to that profile instead.
Changes affect new calls on every number using the edited profile. Check its
Lines count to see how many numbers share the settings.
Open Voice
Select your Photon project and open Voice in the sidebar. Under Lines, find the number you want to connect to Twilio. If your number already uses a SIP Voice profile, open that profile and continue to Understand your profile below. Otherwise, create the default profile.Create the default profile
In the Default profile section, select Set up default.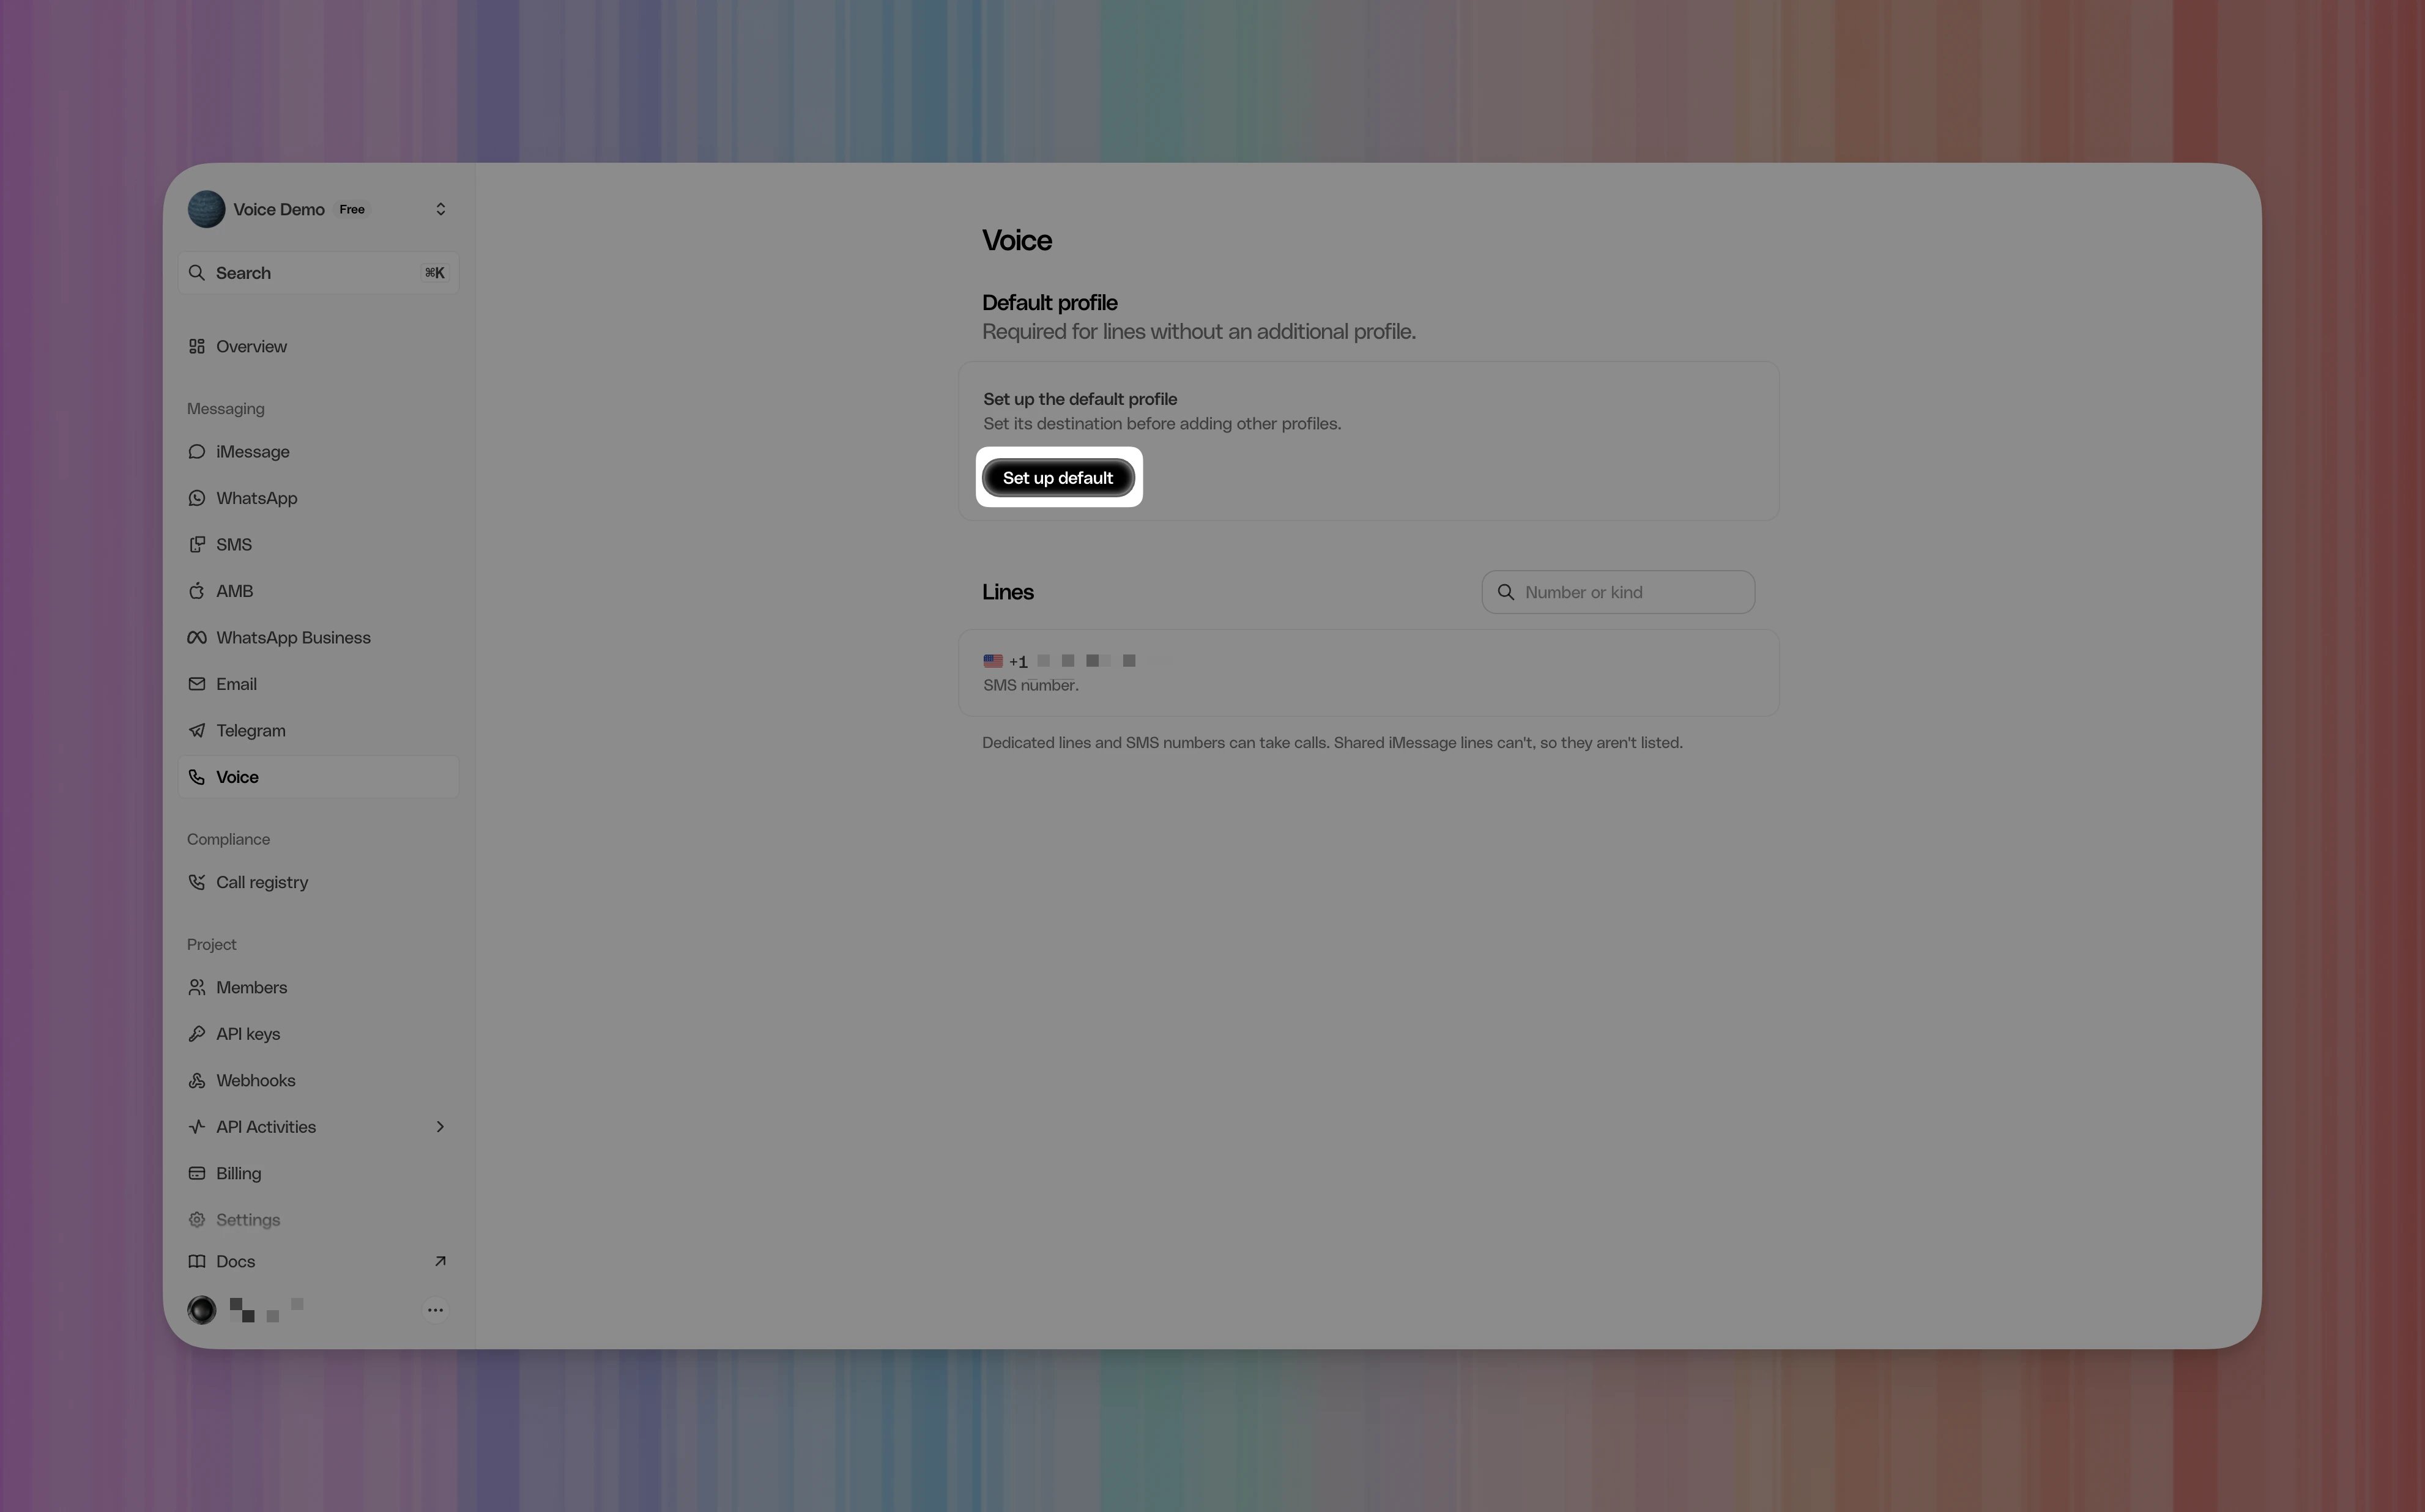
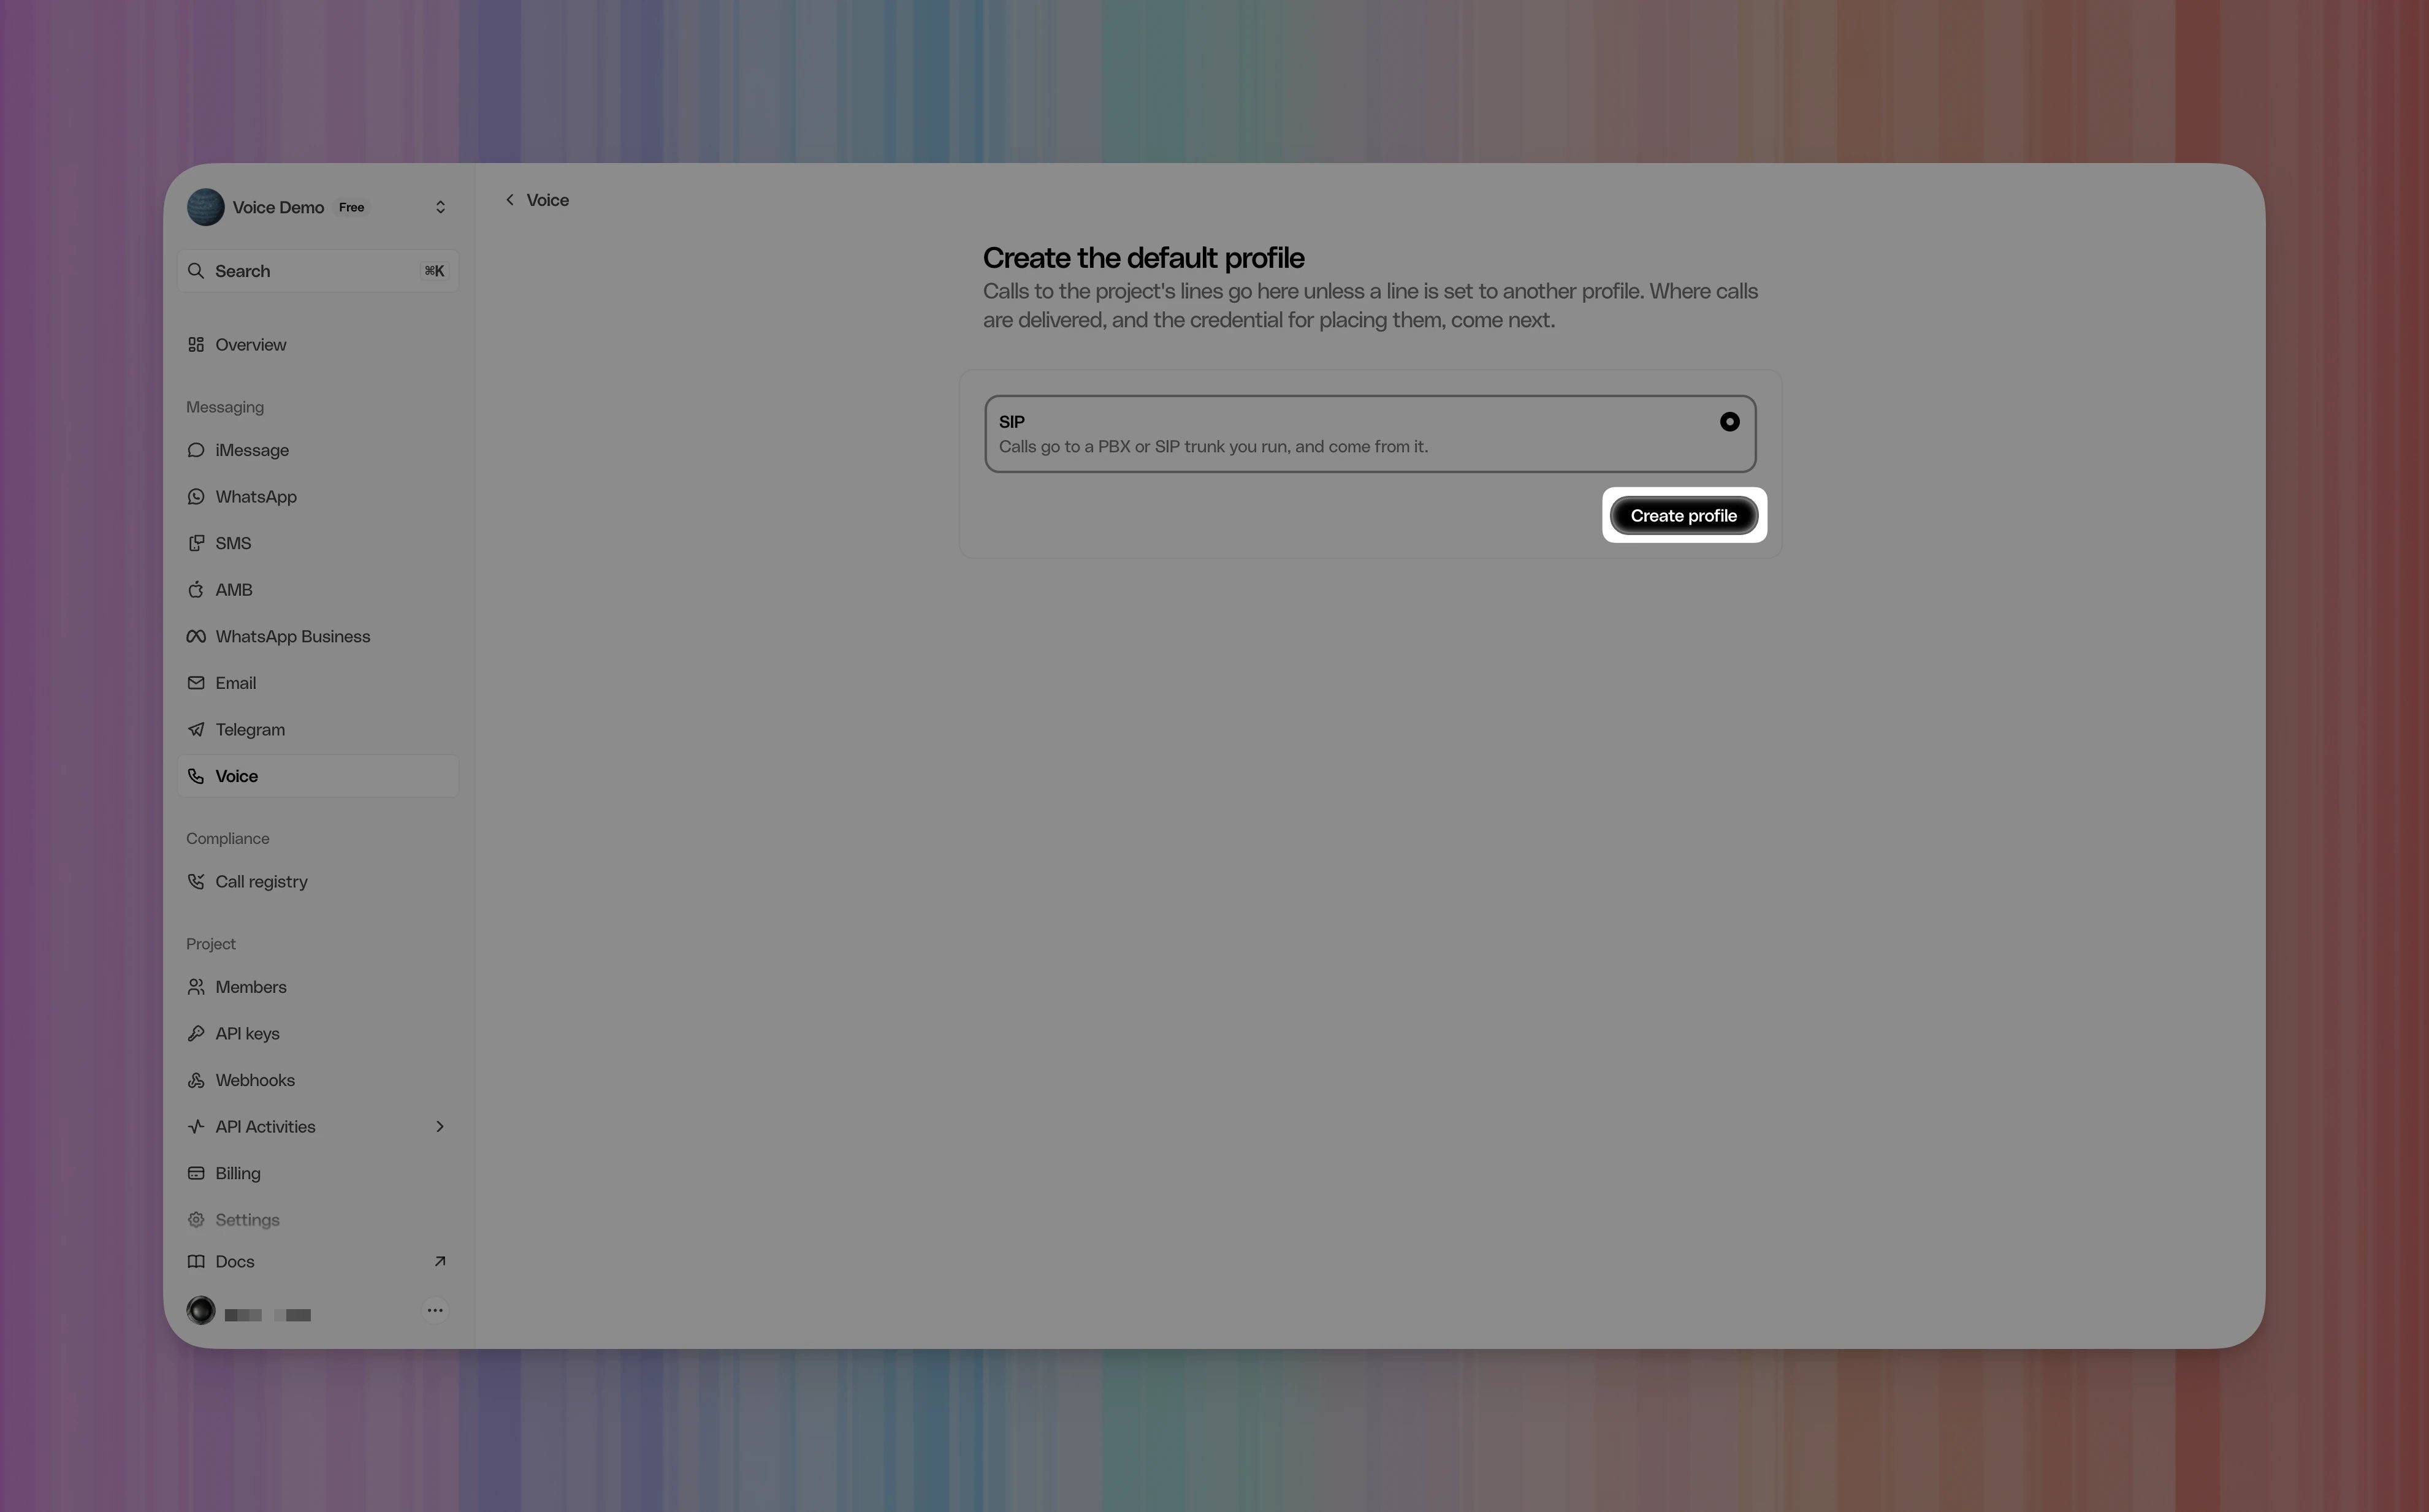
Understand your profile
After creation, Photon opens Default profile. The example shows SIP as the protocol and 1 line using the profile.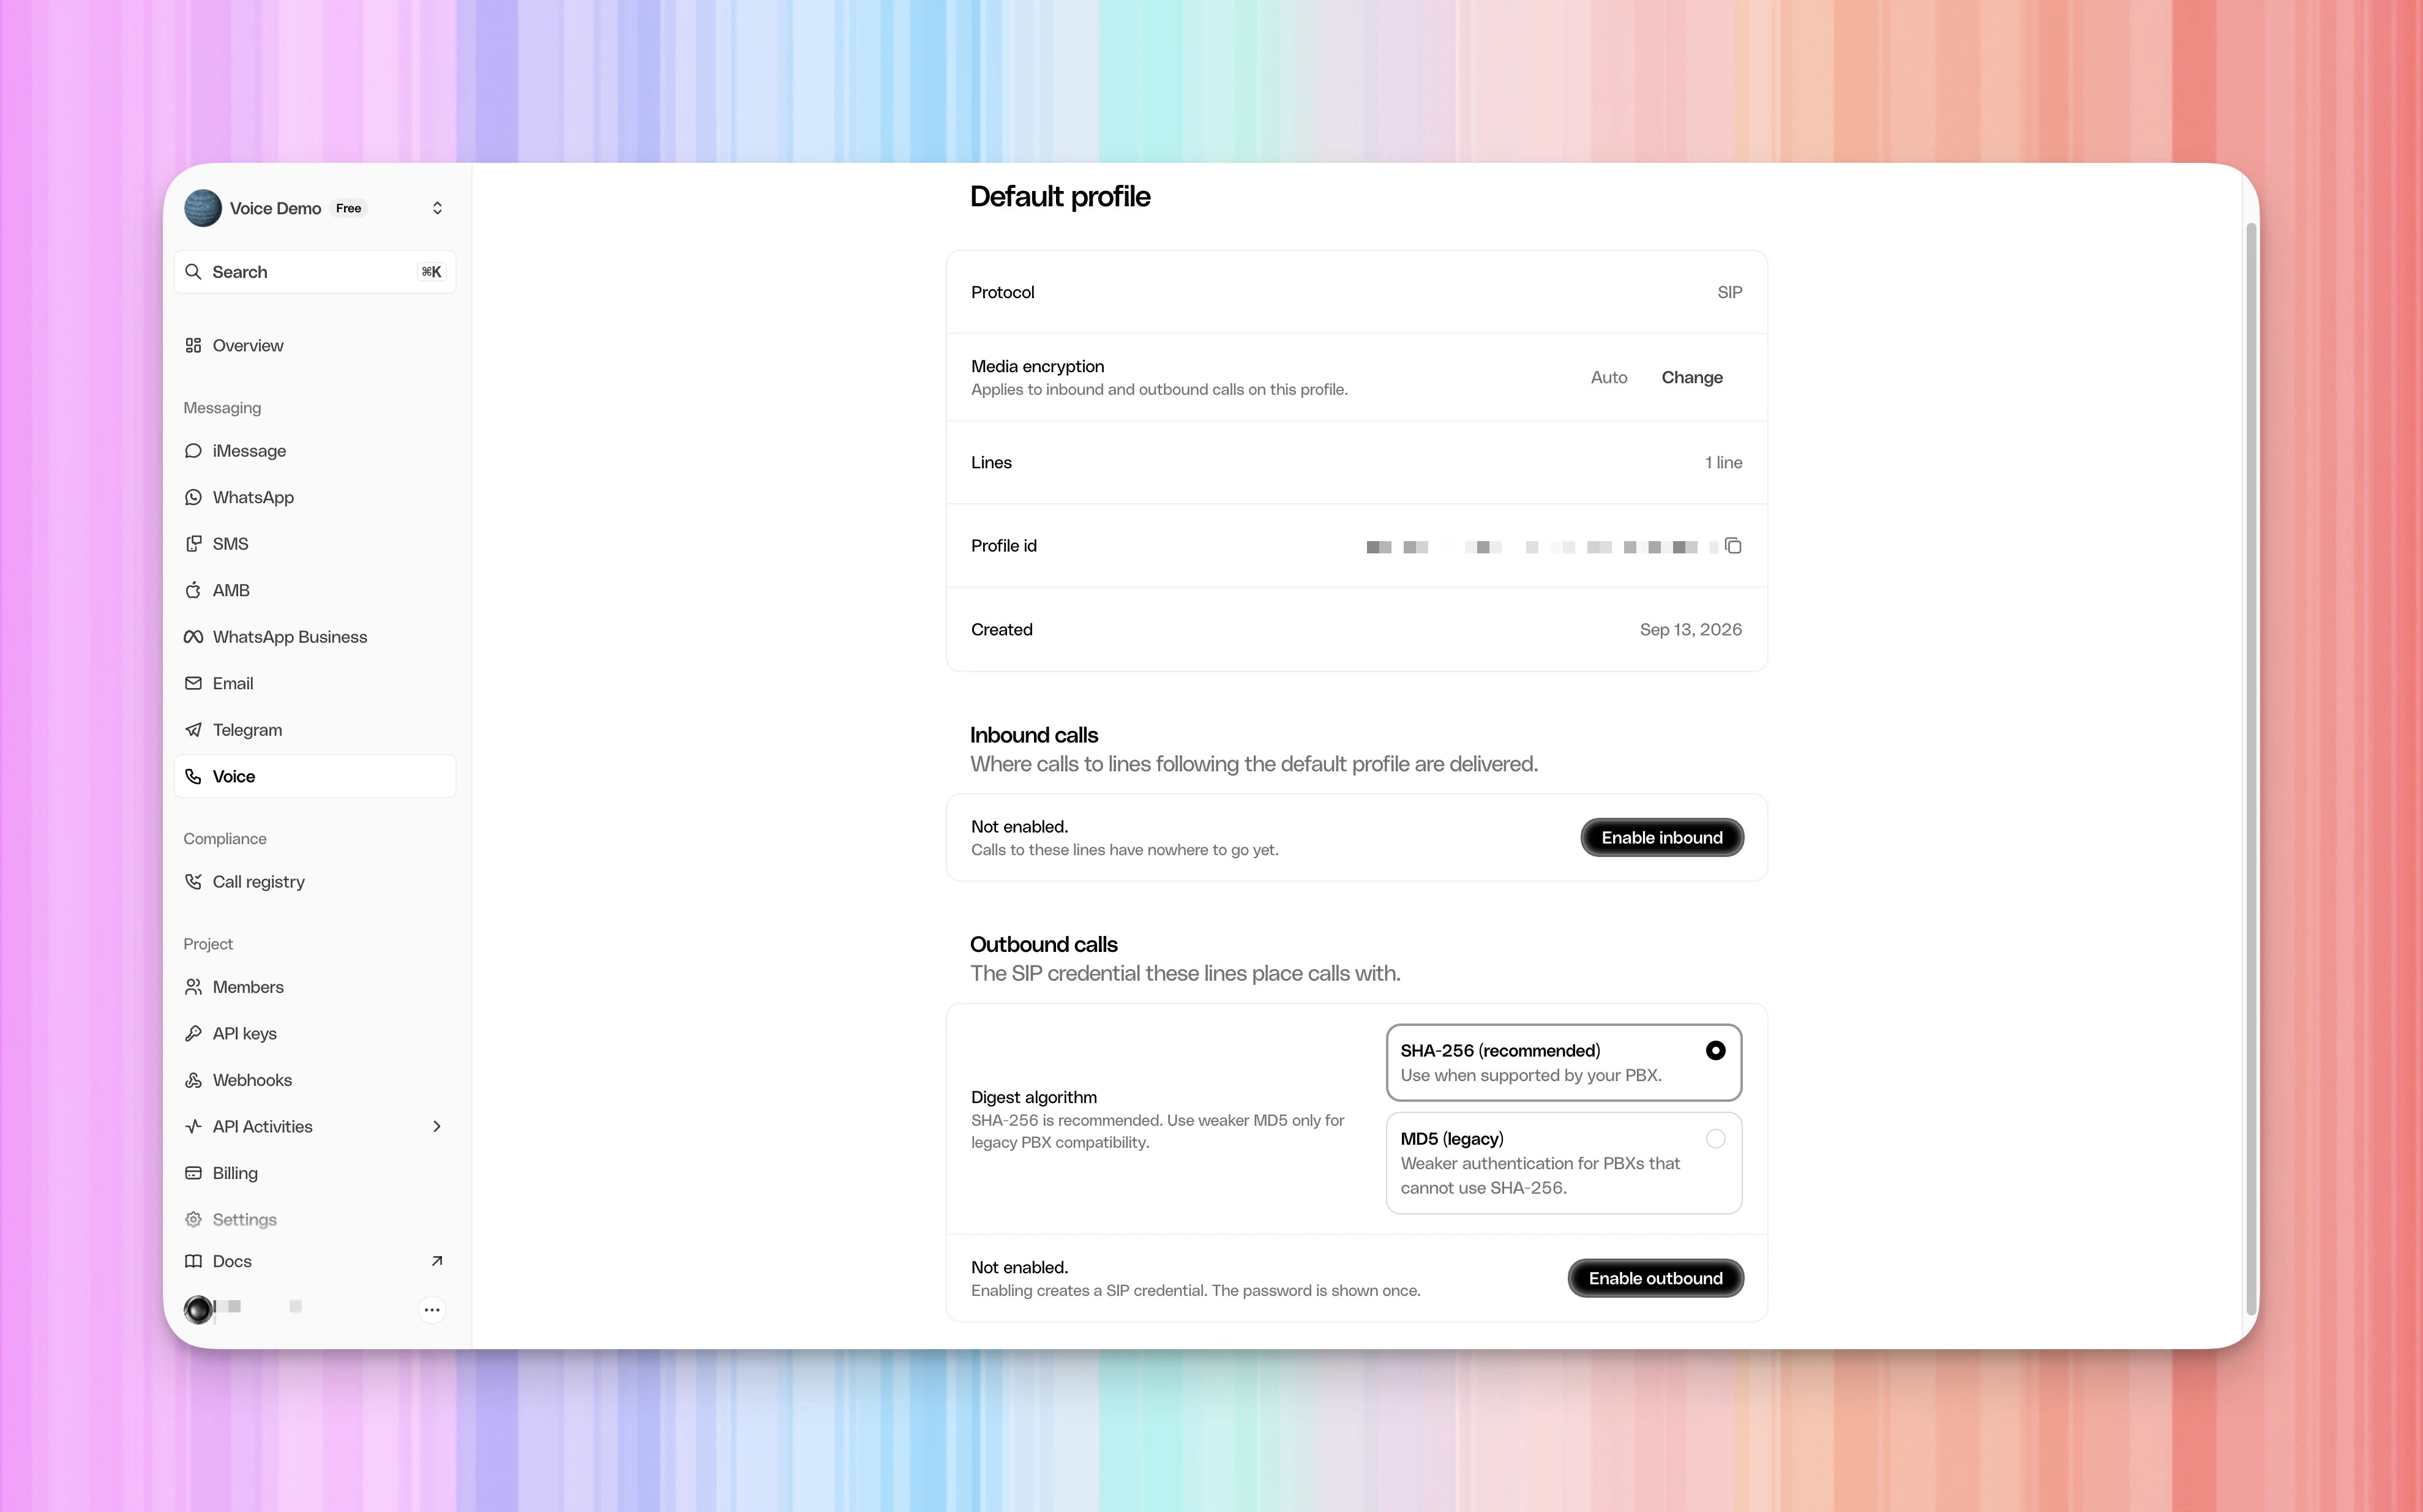
Both sections show Not enabled in a new profile. You will configure them
later in this walkthrough. Keep this profile available while you set up Twilio;
you will return to it for both directions.
2. Create a Twilio credential list
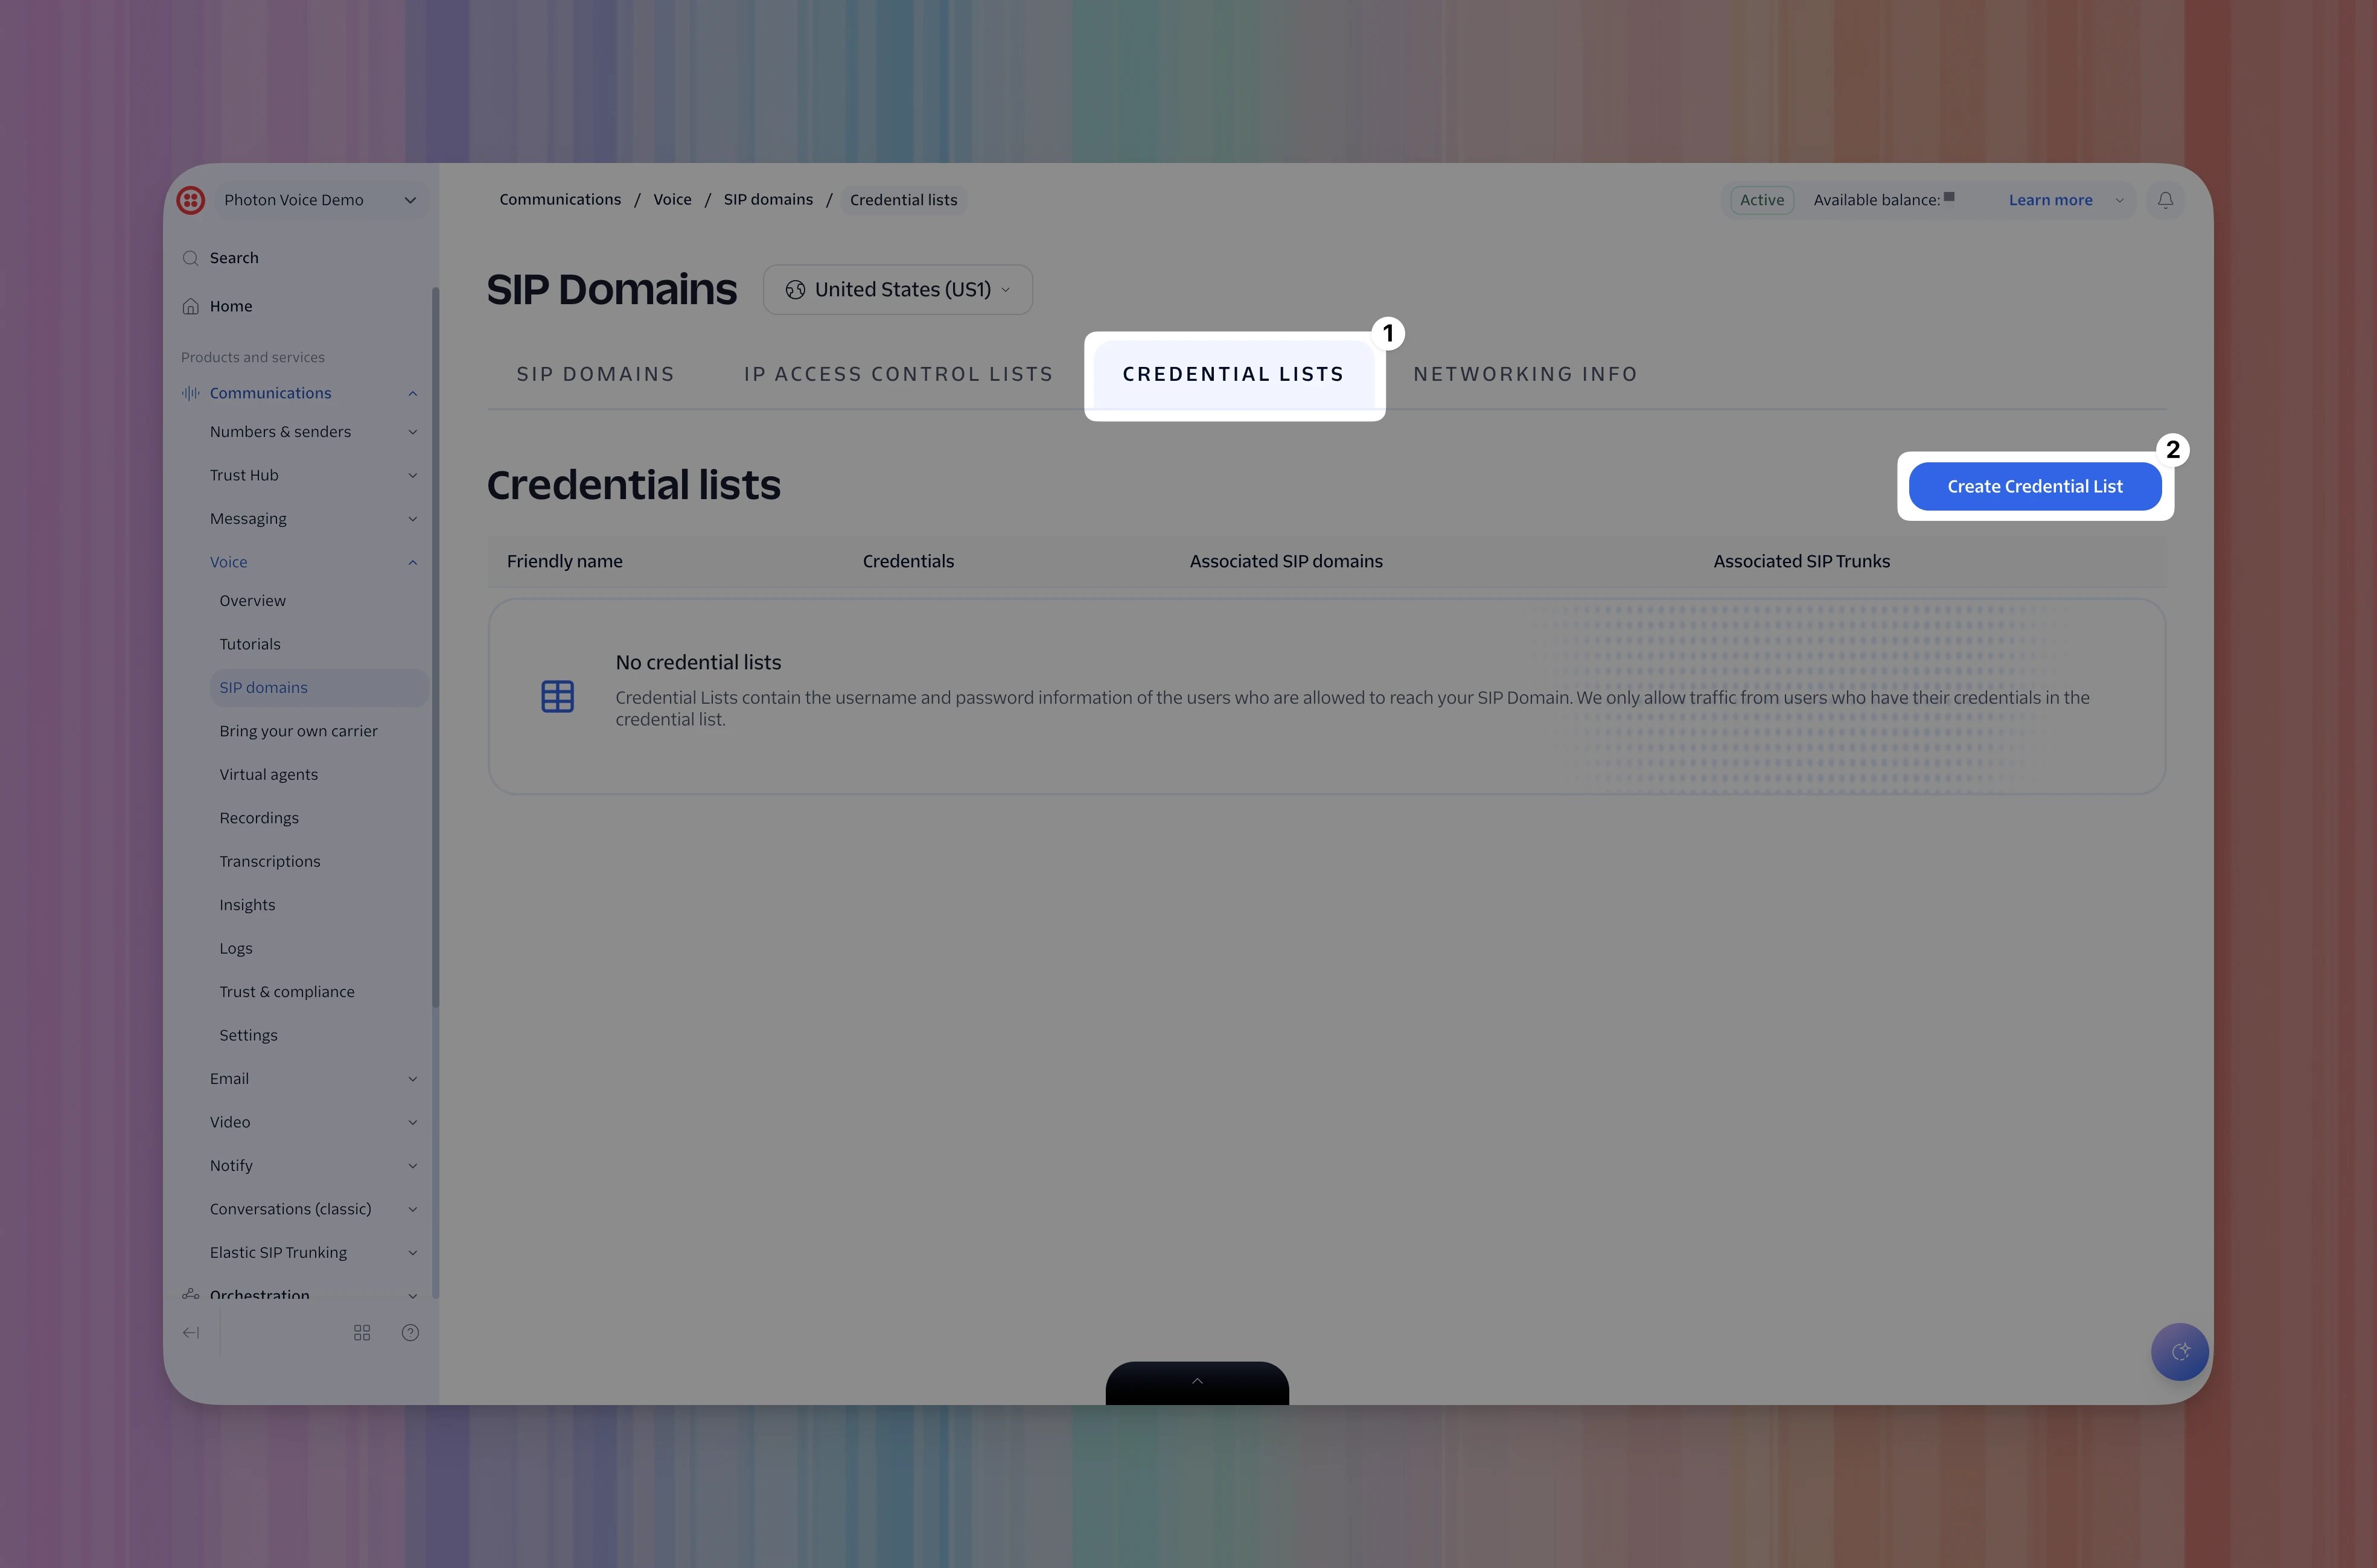
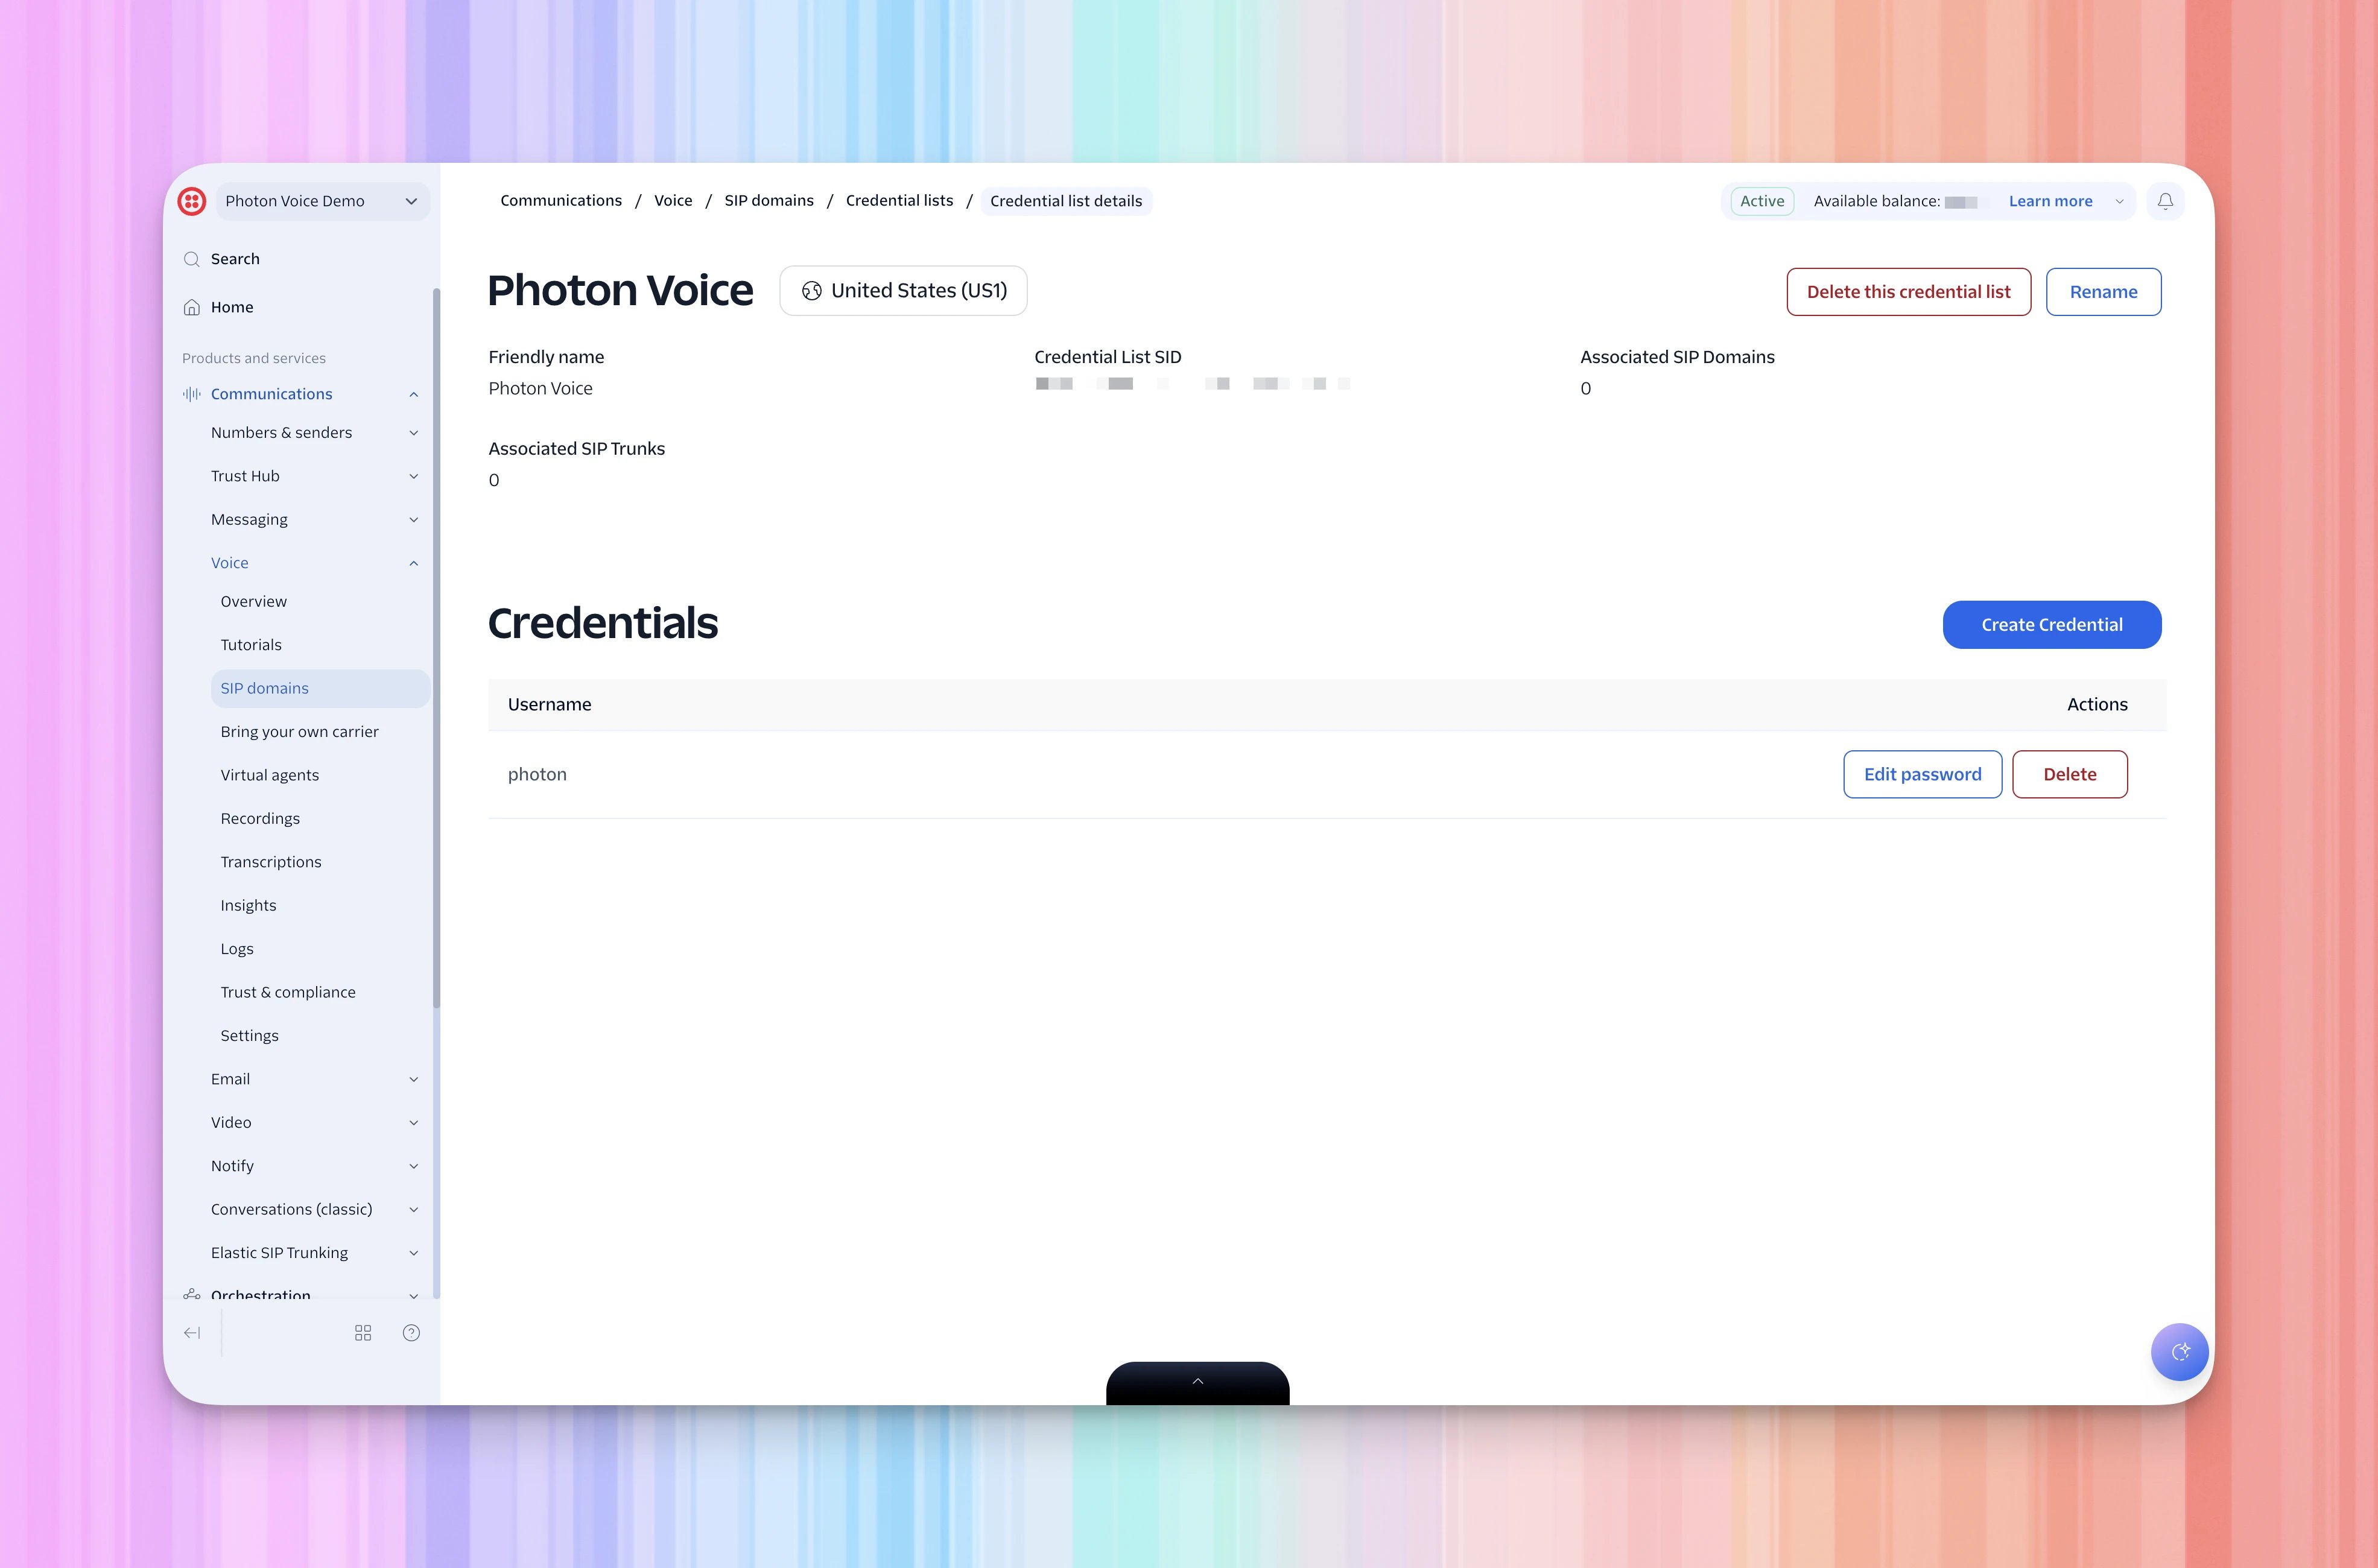
Twilio needs a way to check that Photon is allowed to send calls to your account. You will create a SIP username and password for this connection. The receiving platform determines whether you need these credentials. Twilio SIP Domains require a credential list, a list of approved source IP addresses, or both. This guide uses a credential list, so you will fill in Photon’s SIP username and SIP password fields for inbound delivery to Twilio. These credentials identify Photon to Twilio; people calling your number dial as usual. Twilio authentication requirements. Twilio stores these login details in a credential list: a named collection of usernames and passwords allowed to connect. This walkthrough needs one entry for Photon. Later, you will select this list on your Twilio SIP Domain and enter the same username and password in Photon’s Inbound calls settings. When Photon delivers a call, Twilio checks those details before accepting it.- In Twilio Console, open Communications → Voice → SIP domains.
- Select the Credential Lists tab, then Create Credential List.
- Enter a Credential list friendly name you will recognize, such as
Photon Voice. You will use this label to find the list later. - Under Add credentials, choose a Username, such as
photon. Save your chosen username; you will enter that exact value in Photon later. - Generate a unique Password with at least 12 characters, uppercase and lowercase letters, and a digit. Save it with the username in your password manager; you will need both in Photon.
- Select Create.
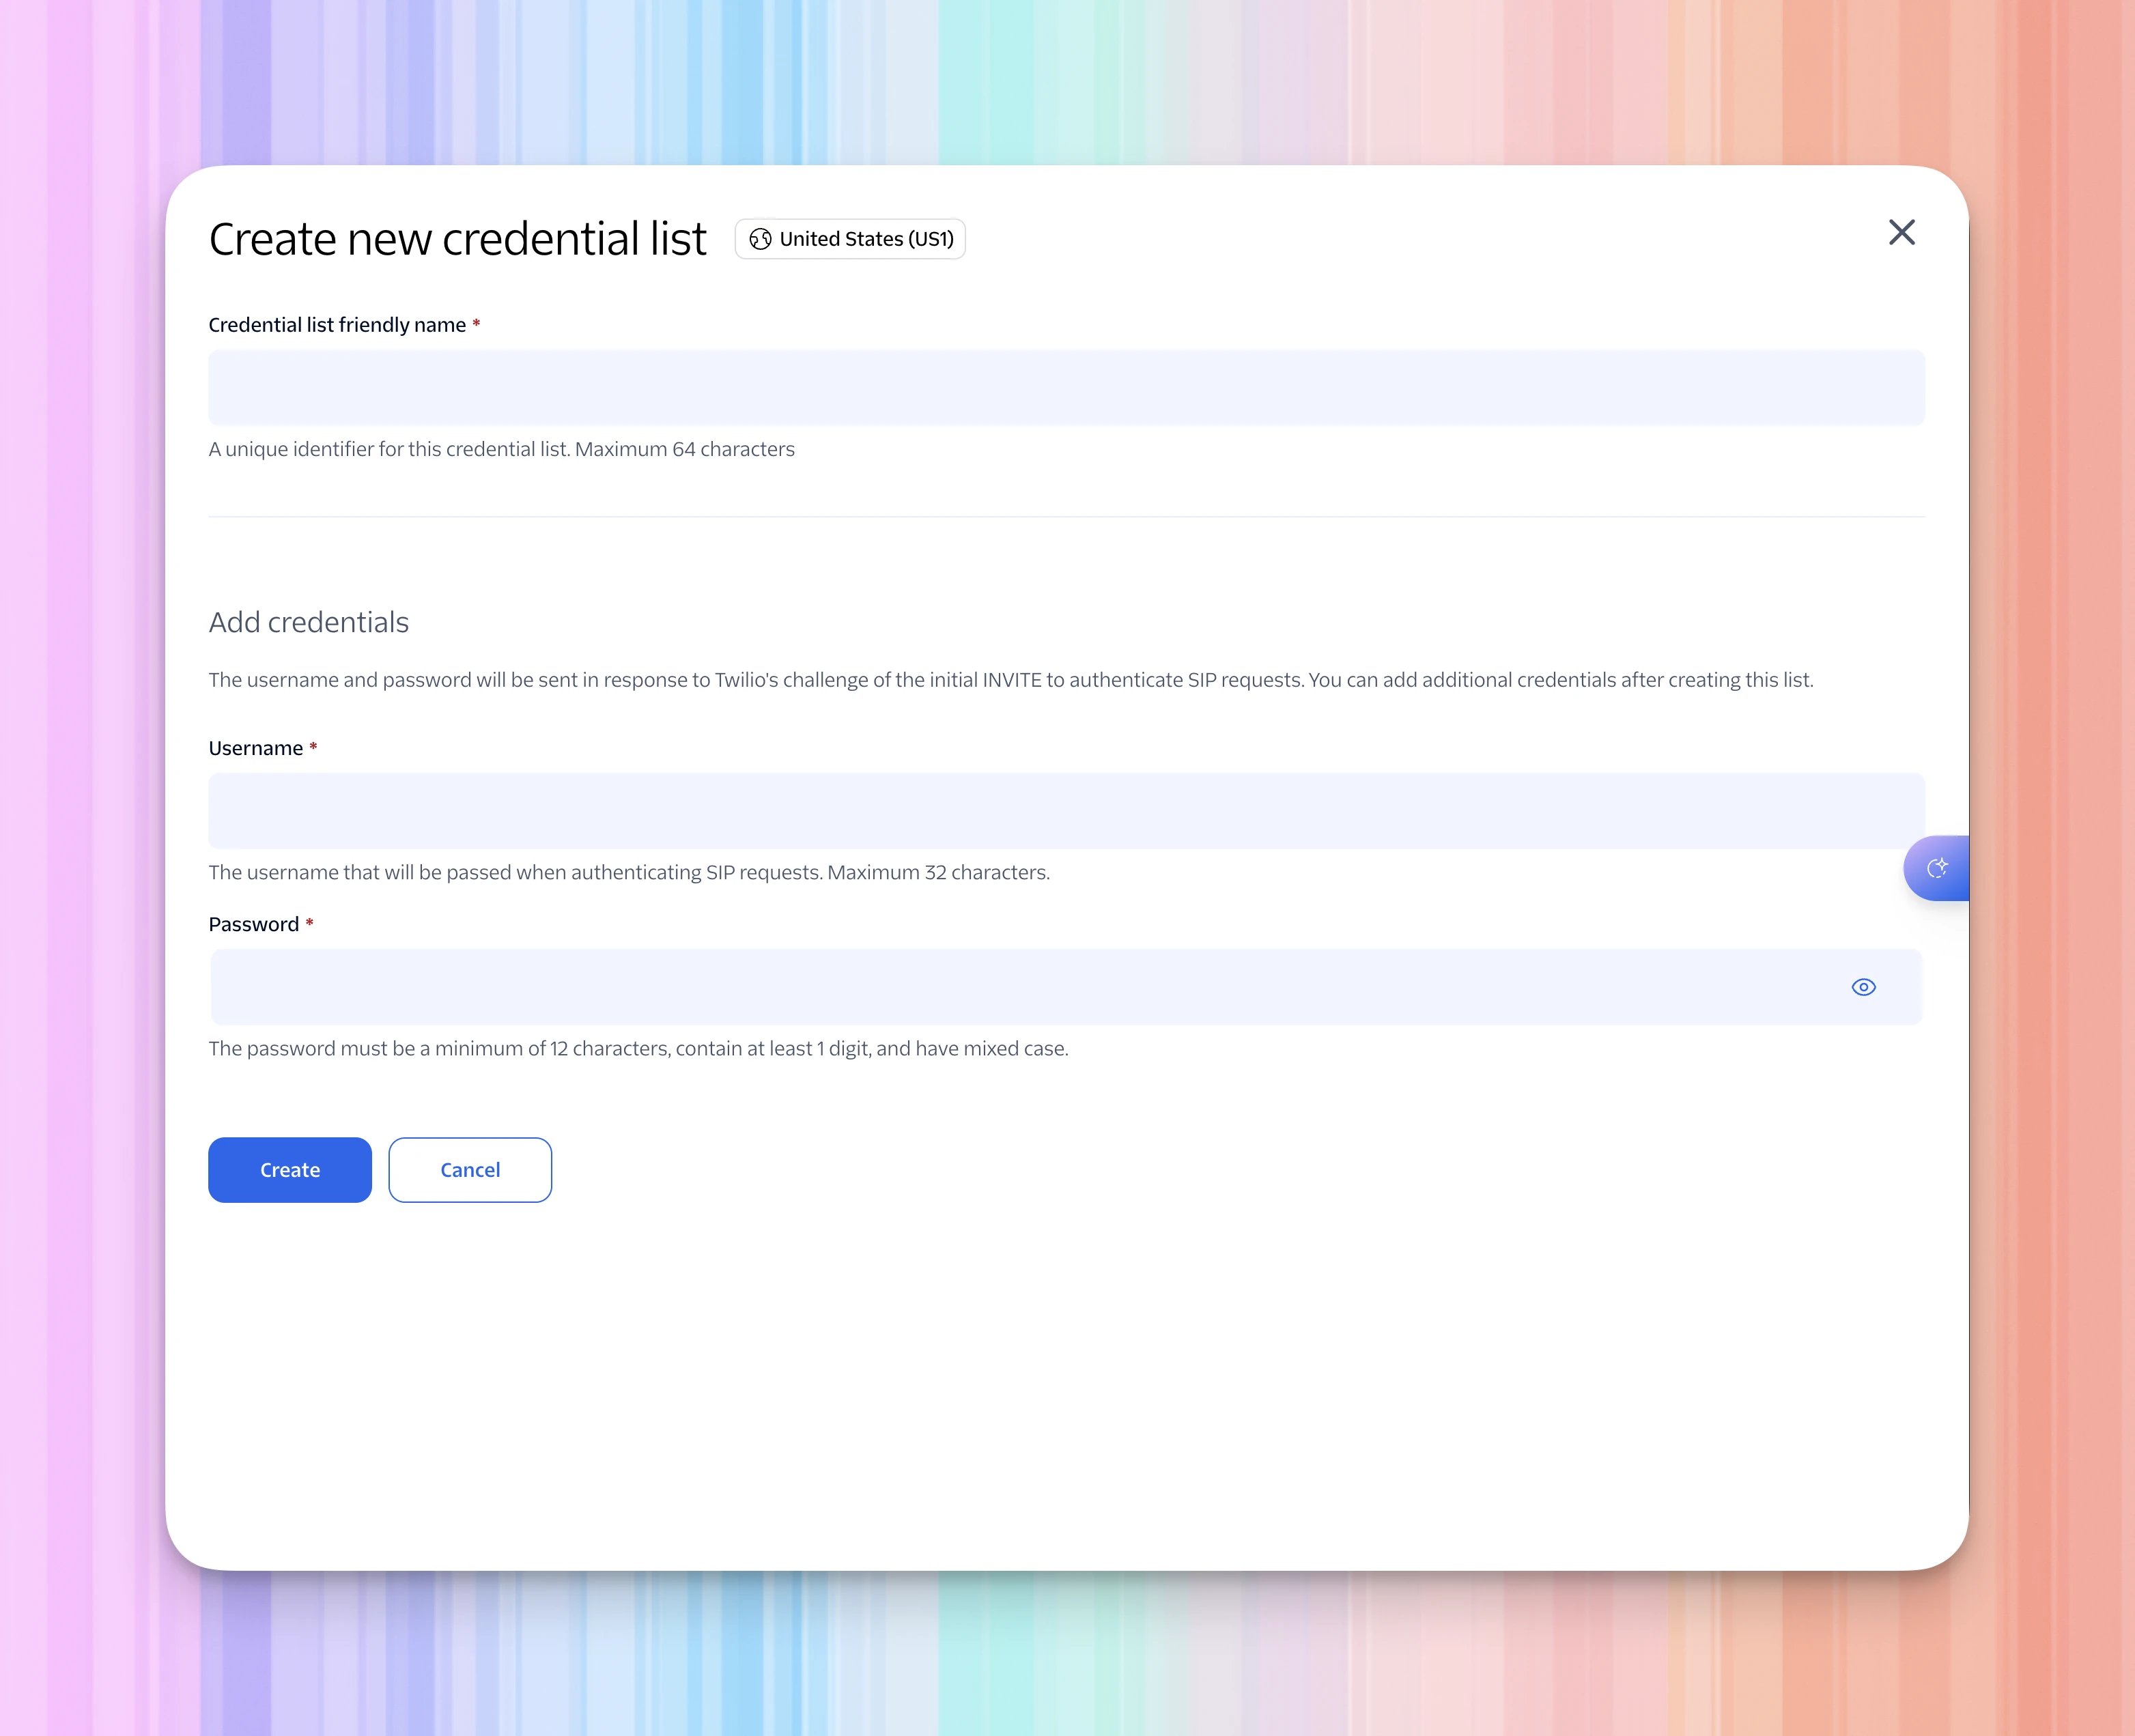
Photon Voice as the list name and photon as the username; yours can differ.
Twilio credential-list setup.
Twilio password requirements.
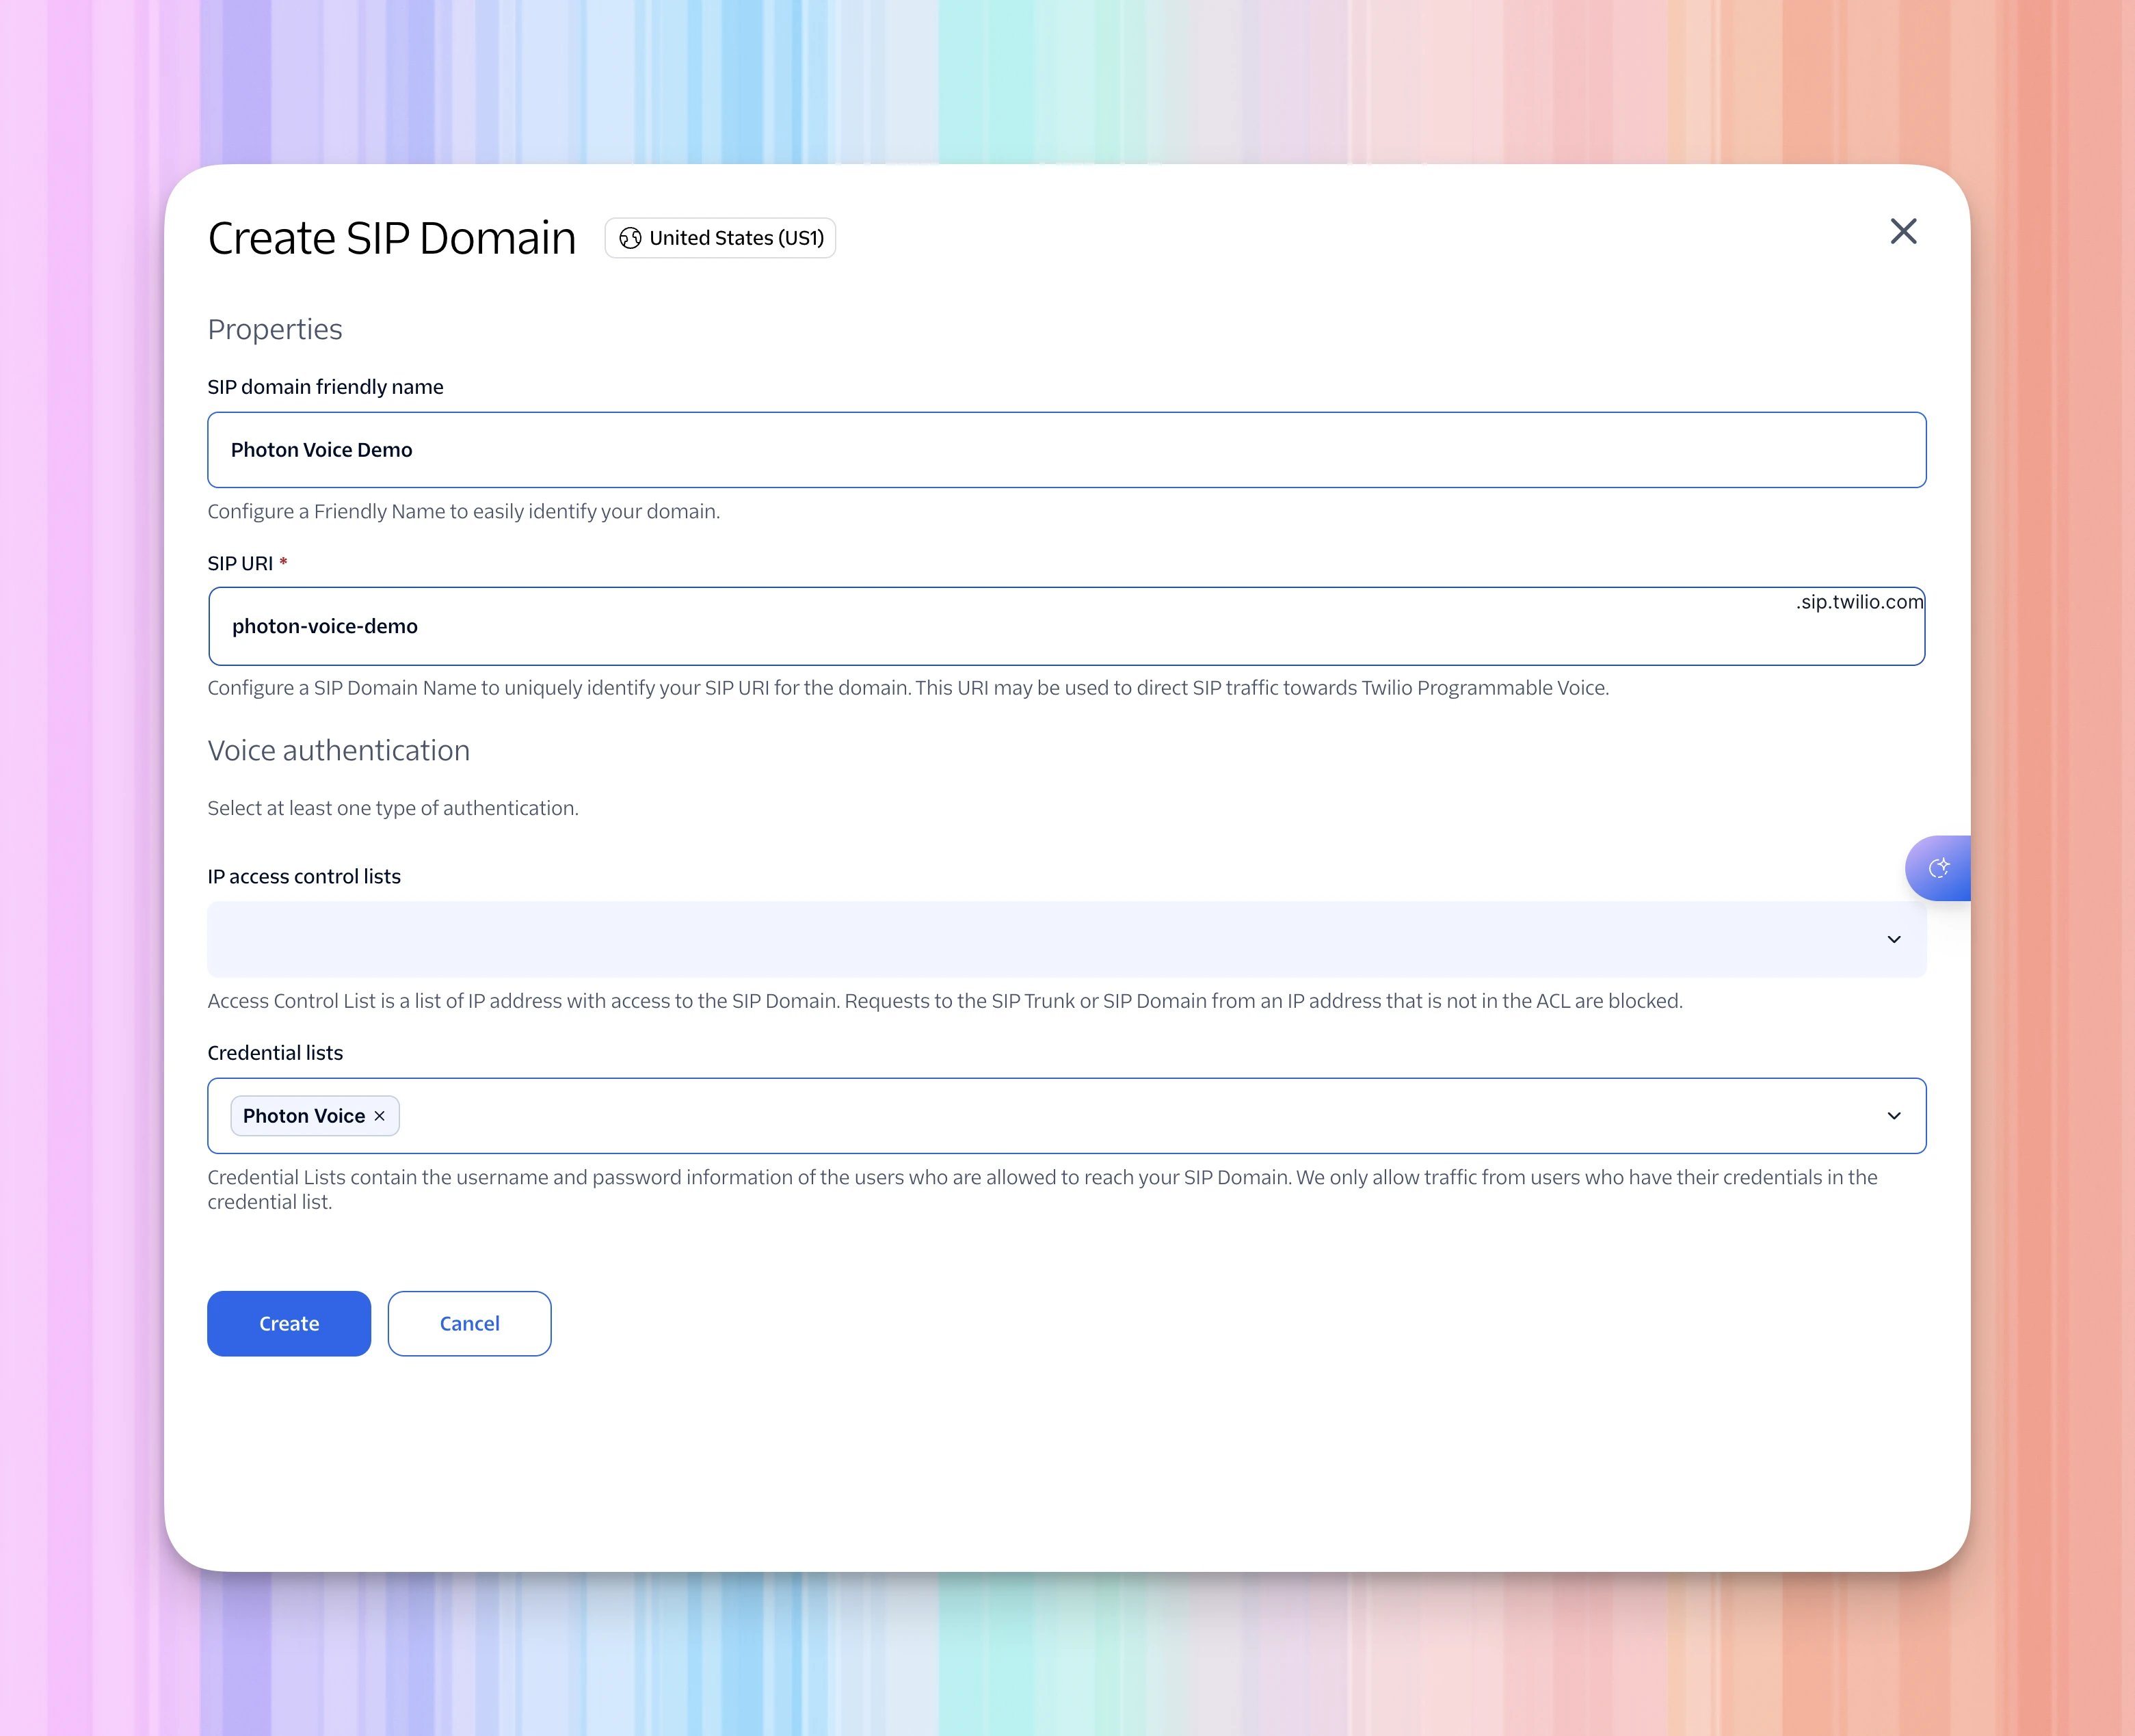
3. Create your Twilio SIP Domain
Return to Communications → Voice → SIP domains. Select the SIP Domains tab, then Create SIP Domain. This example uses the United States (US1) region.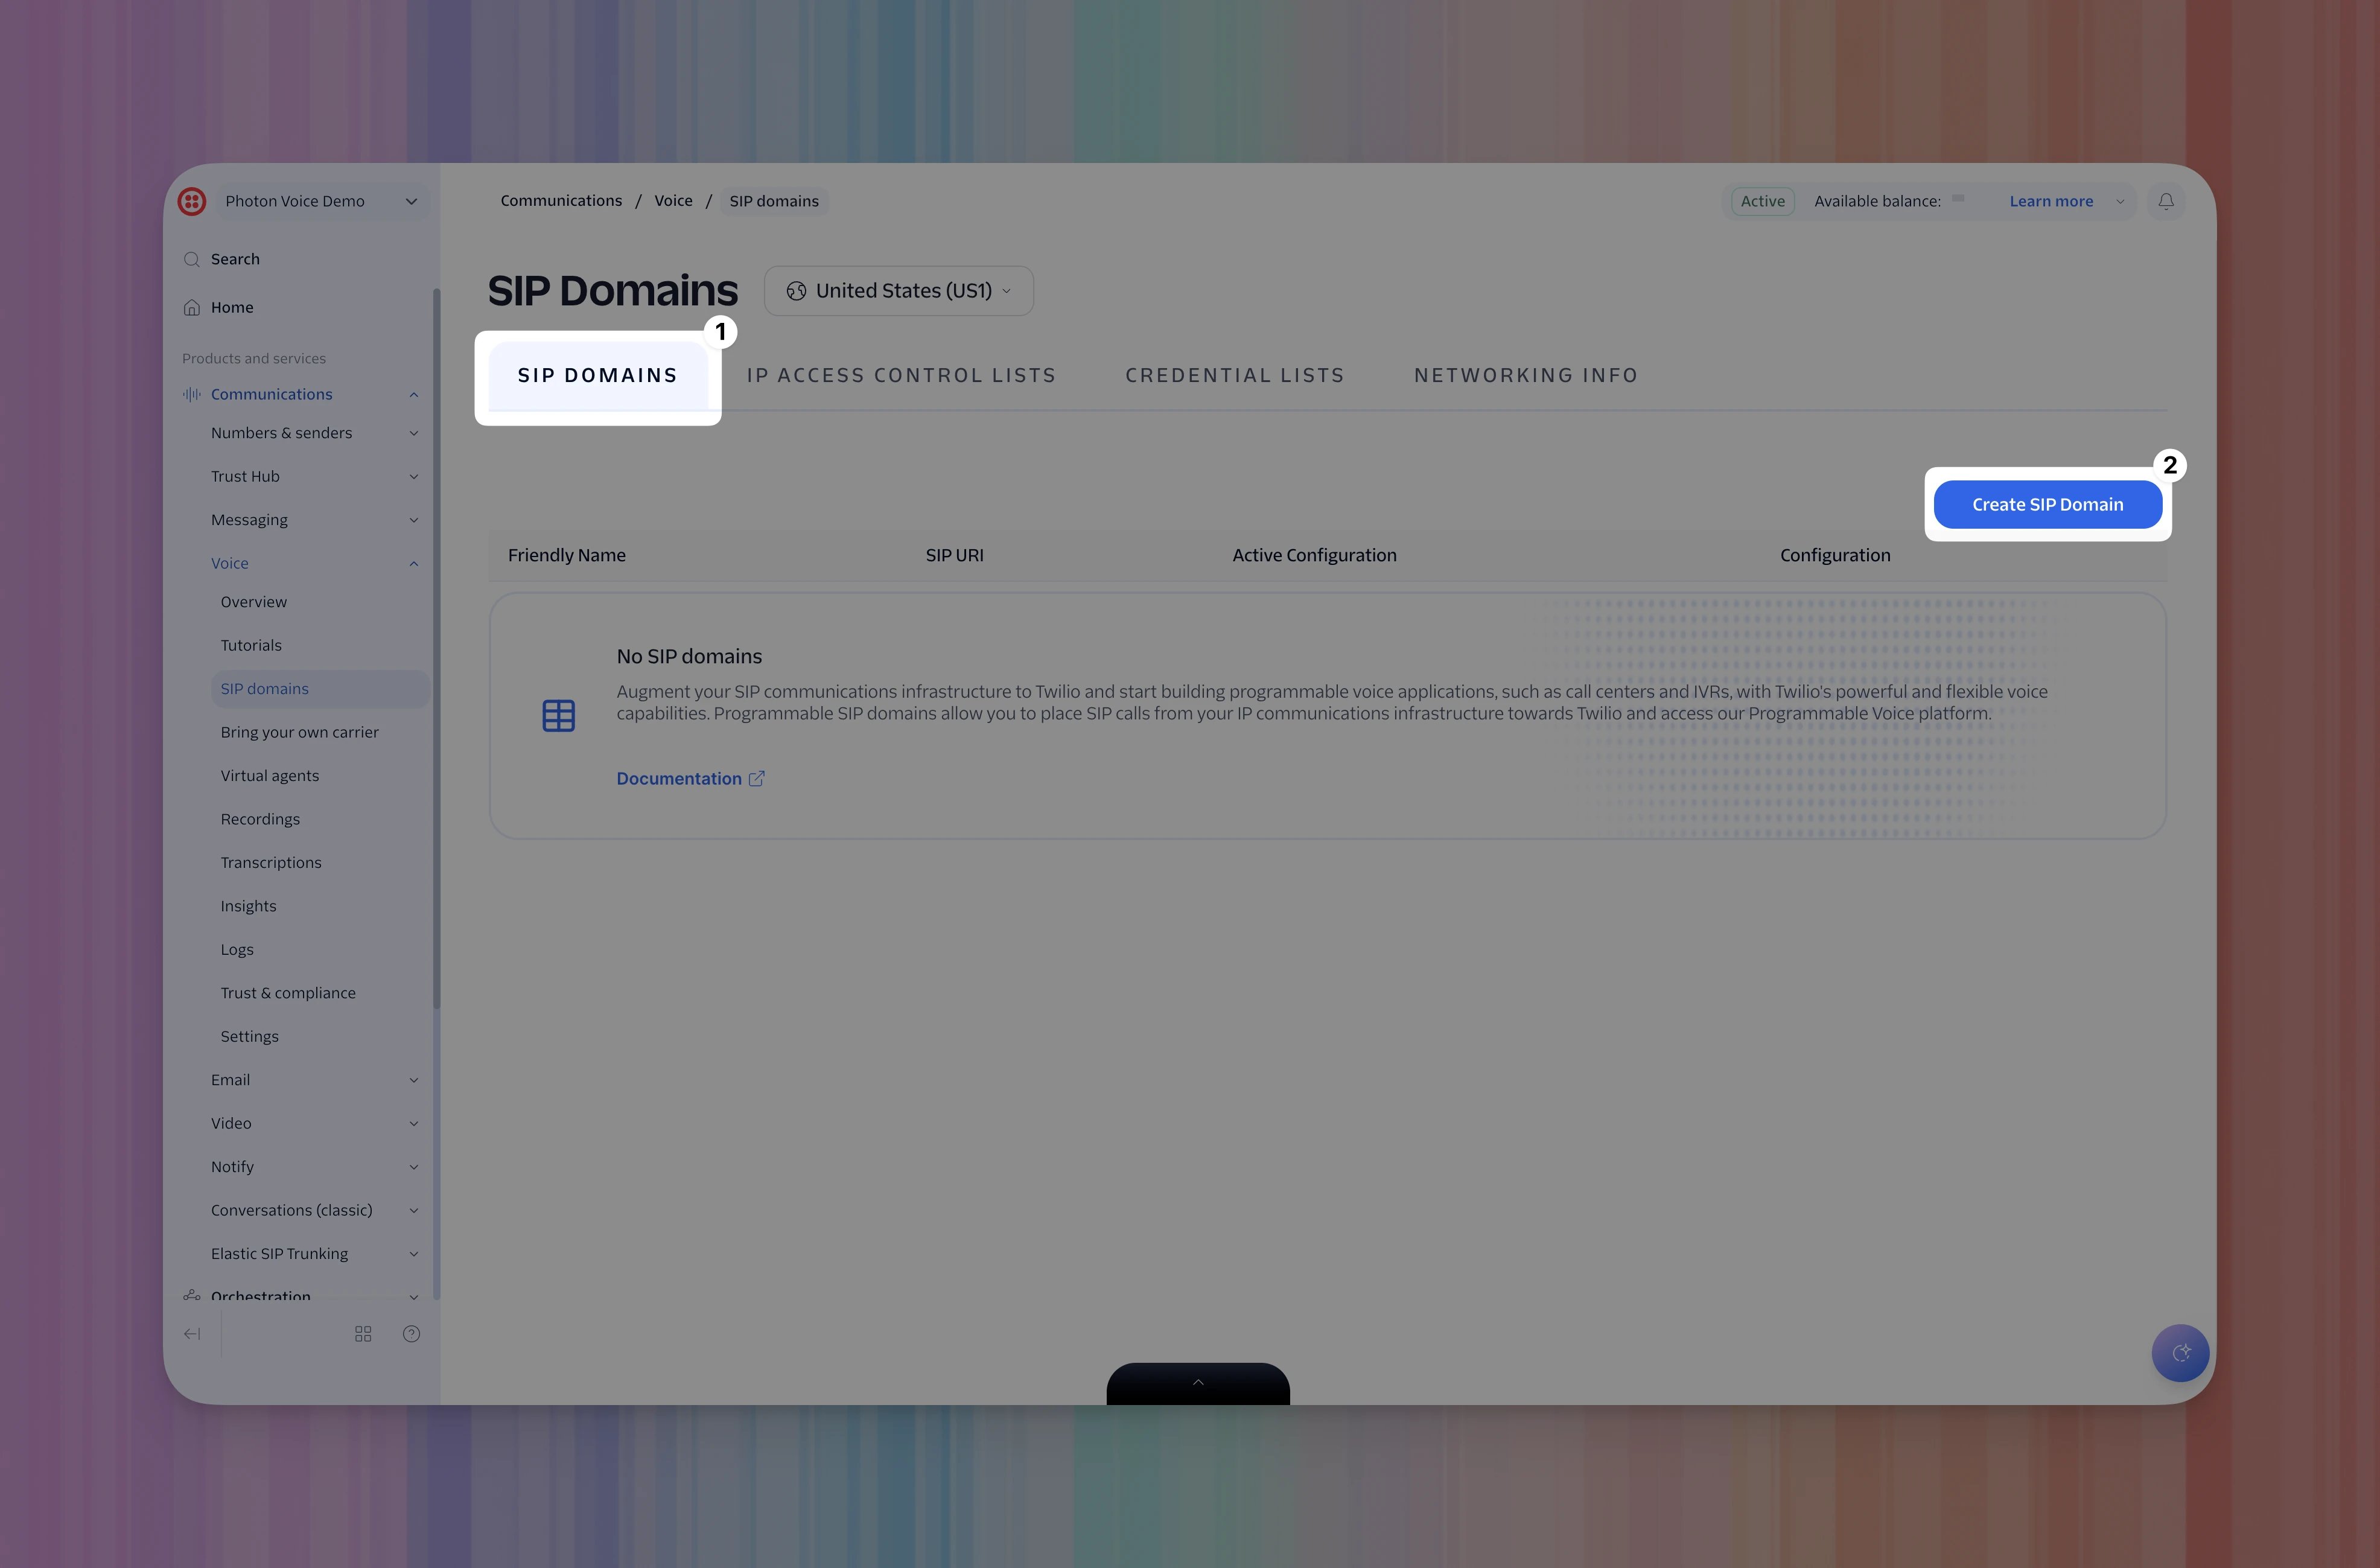
4. Create a TwiML Bin for call forwarding
Your SIP Domain provides an address where Twilio can receive calls. Next, give Twilio instructions for what to do when a call arrives. For call forwarding, you will use a TwiML Bin: a small document containing call instructions that Twilio hosts for you. TwiML is Twilio’s XML format for those instructions. This example tells Twilio to dial your destination phone and connect the caller when you answer. About TwiML Bins.Open TwiML Bins
- Open Builder tools → TwiML host & config → TwiML bins in Twilio Console. You can also open TwiML Bins directly.
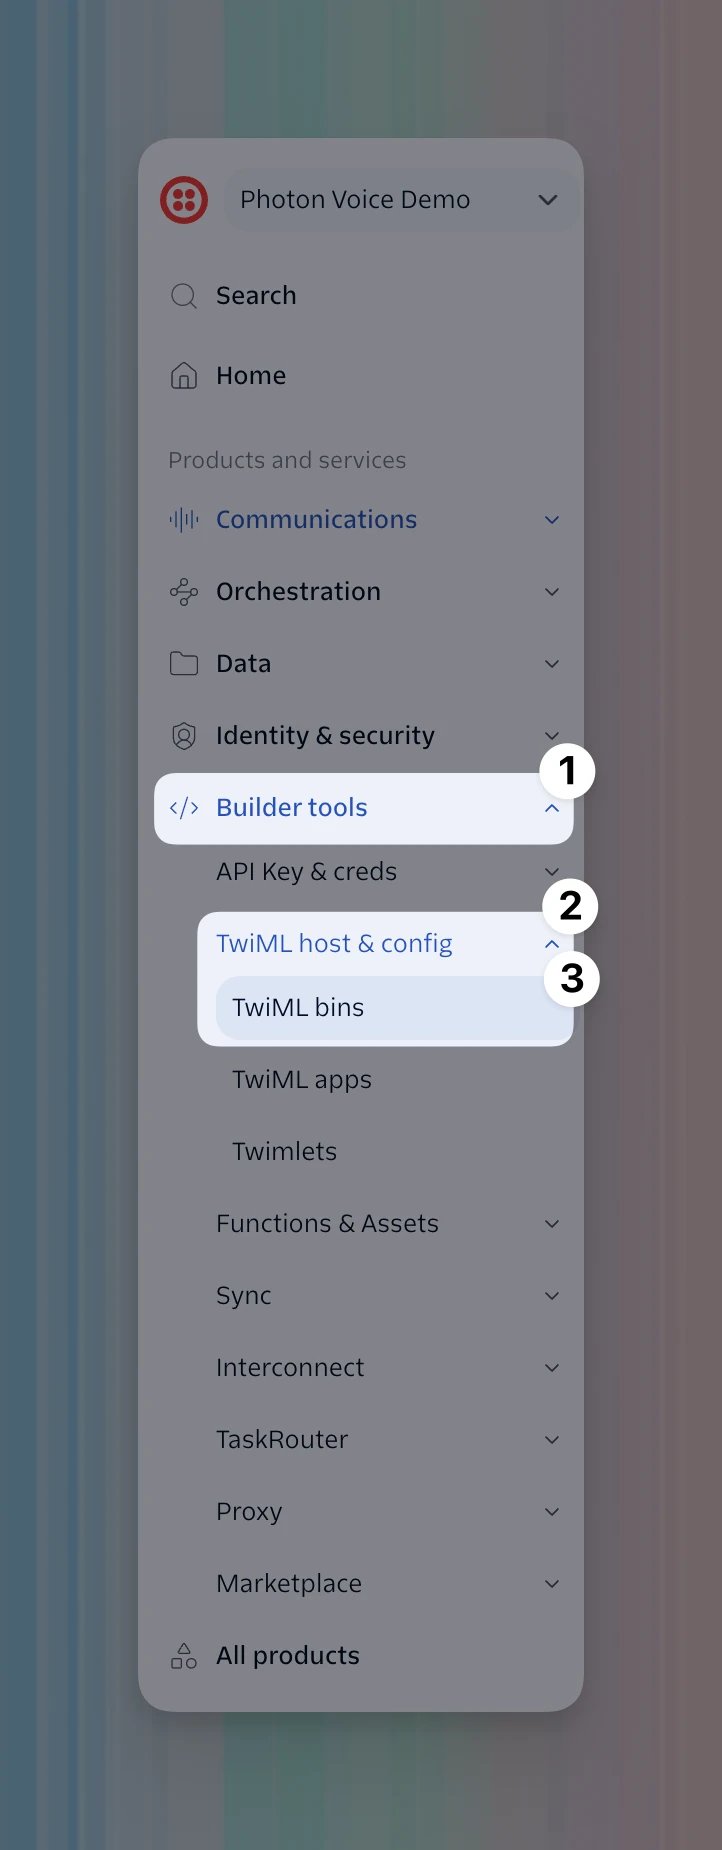
- Select Create a new TwiML Bin, or the + button if you already have bins.
Add your forwarding instructions
- Enter a Friendly Name you will recognize, such as
Photon Voice Demo. This label identifies the bin when you select it for your SIP Domain. It can differ from your domain’s friendly name and your credential list’s name. - Replace the TwiML editor’s contents with the following, including the XML declaration:
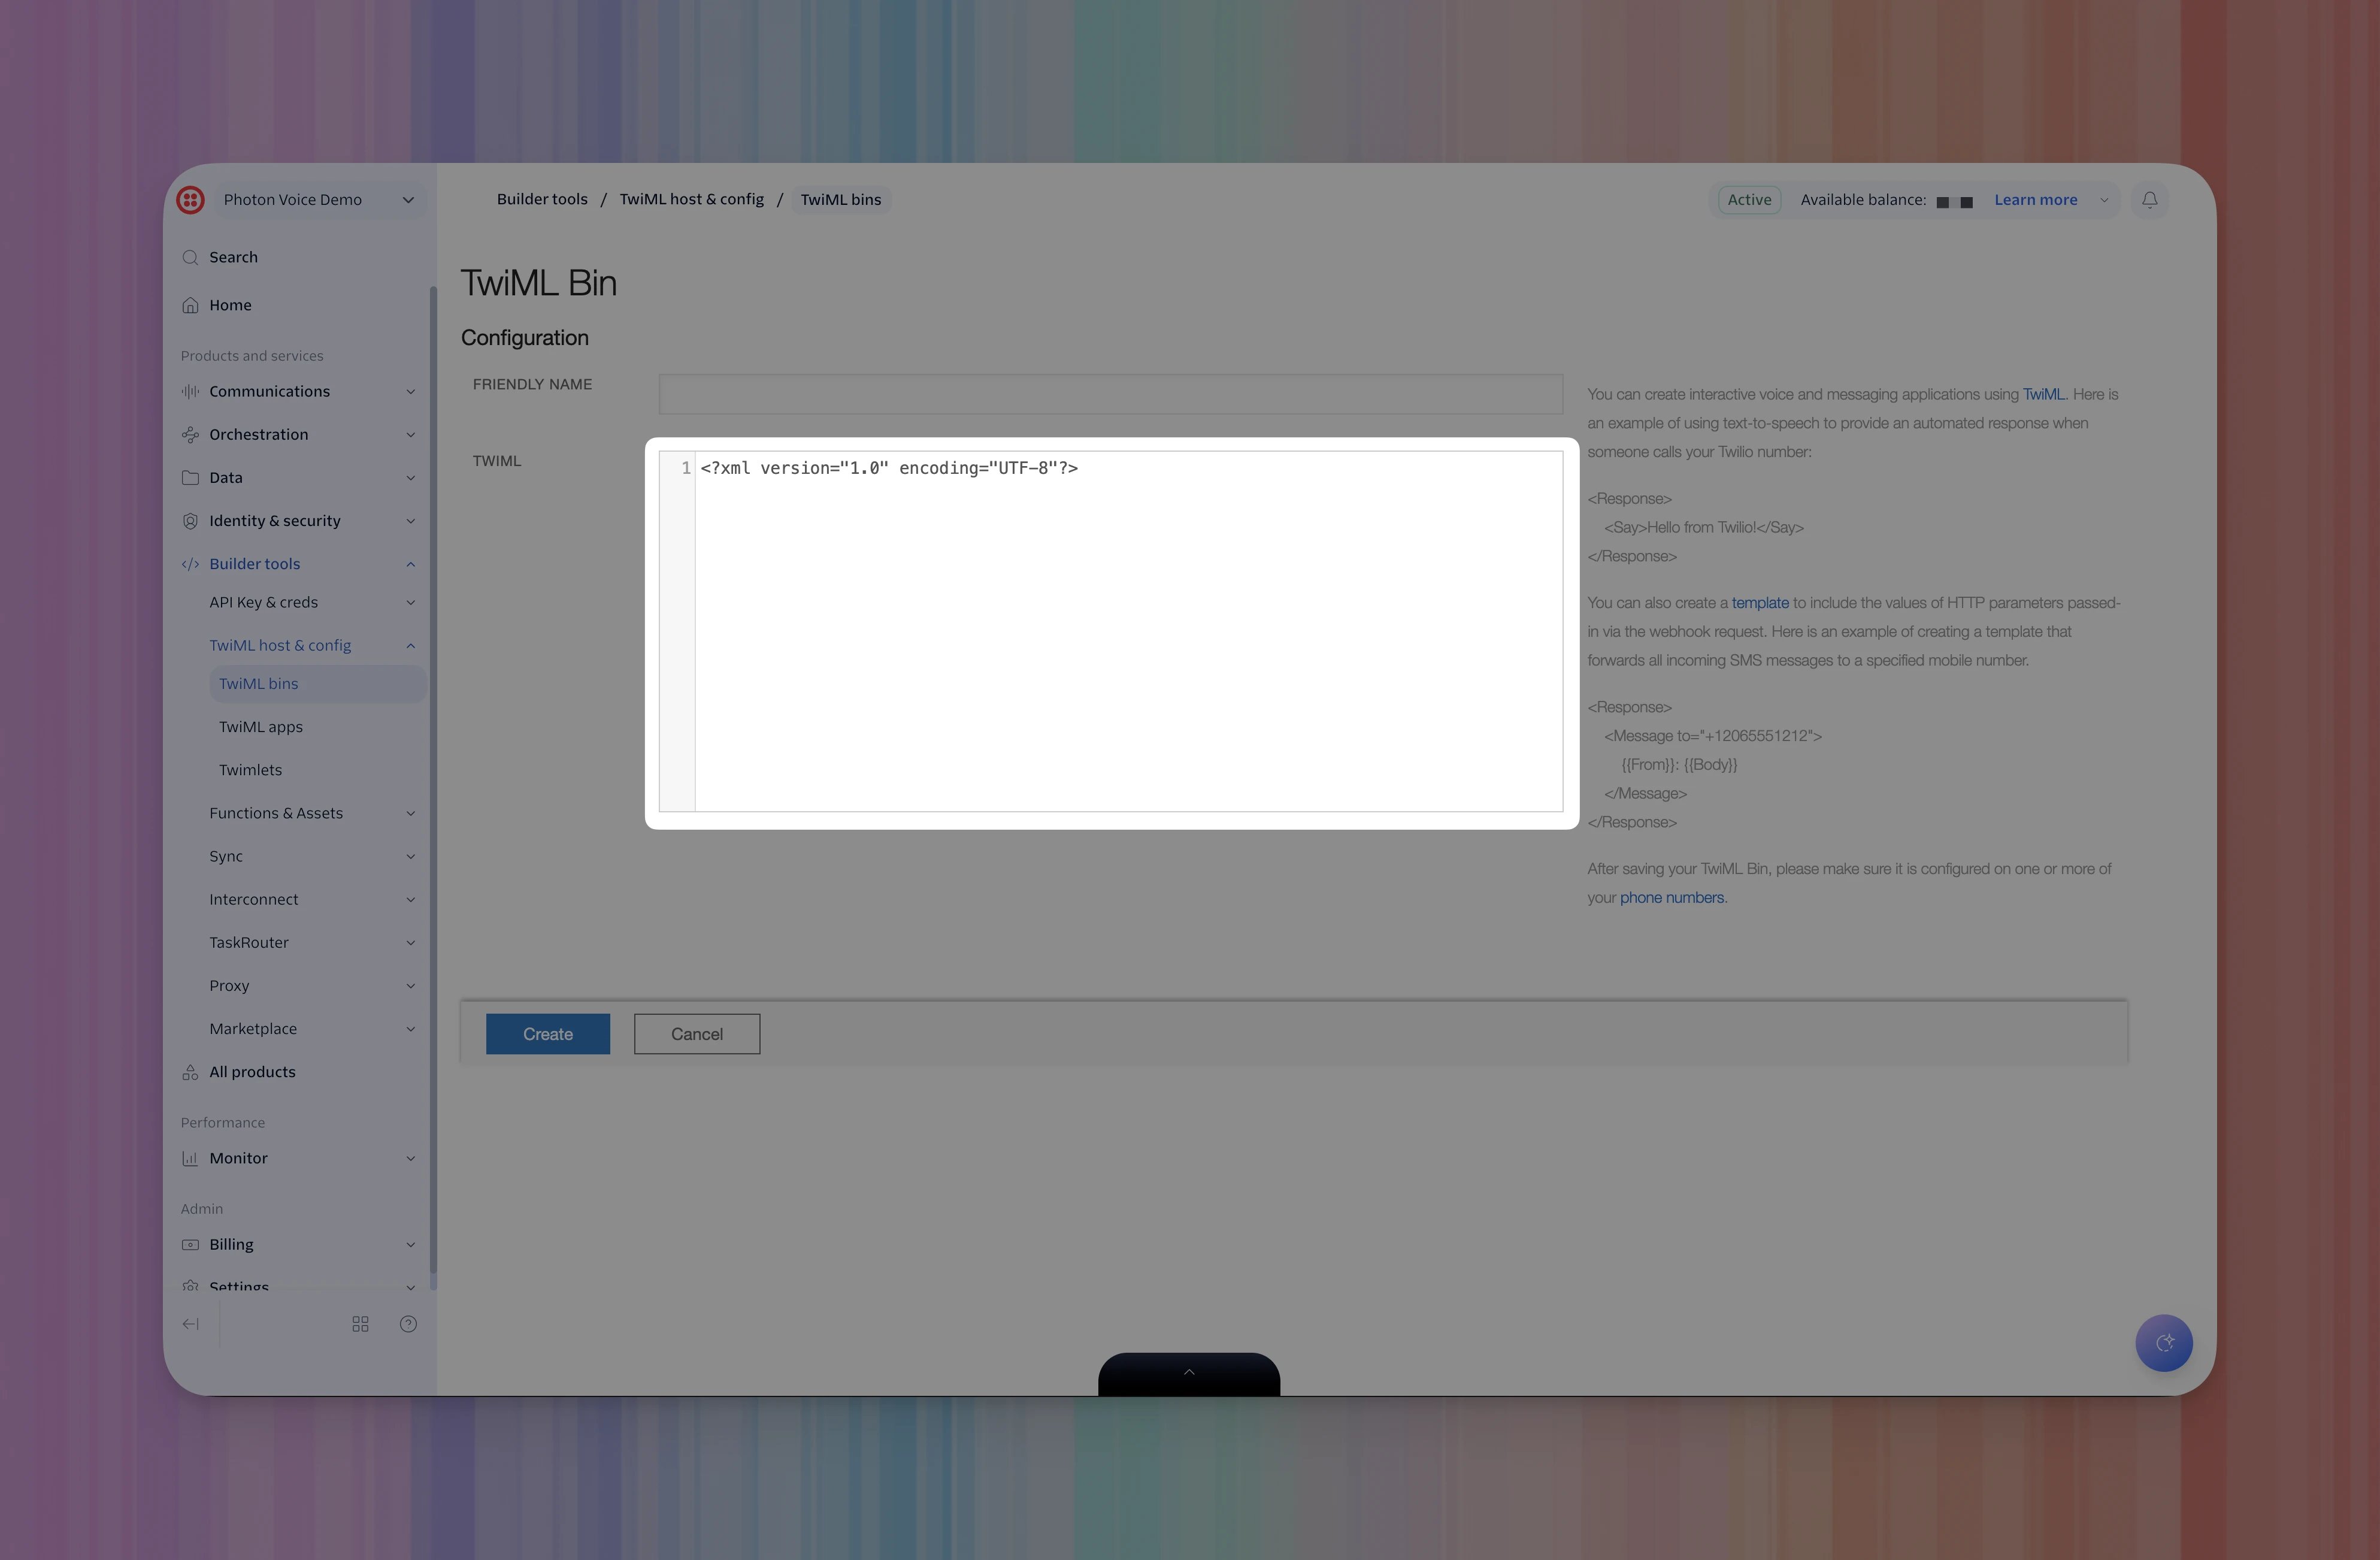
Use international E.164 format for both values:
+, country code, and number,
such as +12025550123. For calls received over SIP, Twilio requires an eligible
caller ID even when the call originally arrived at a Photon number.
Twilio caller ID requirements.
- After replacing both placeholders, check that Twilio reports valid TwiML, then select Create. Create a TwiML Bin.
5. Connect the TwiML Bin to your SIP Domain
Choose the instructions Twilio will run when Photon delivers a call to your SIP Domain. Use the bin you created and saved under your chosen name in step 4. Its<Number> value
determines which phone Twilio rings.
The primary configuration handles incoming calls normally. The fallback
configuration supplies instructions if Twilio encounters an error retrieving
or executing the primary instructions, such as a timeout or invalid TwiML.
Twilio call control and fallback.
- Open Voice → SIP Domains and select the domain you created.
- Under Voice authentication, confirm that Credential lists shows the list you created in step 2.
- Under Call control configuration, select Edit configuration.
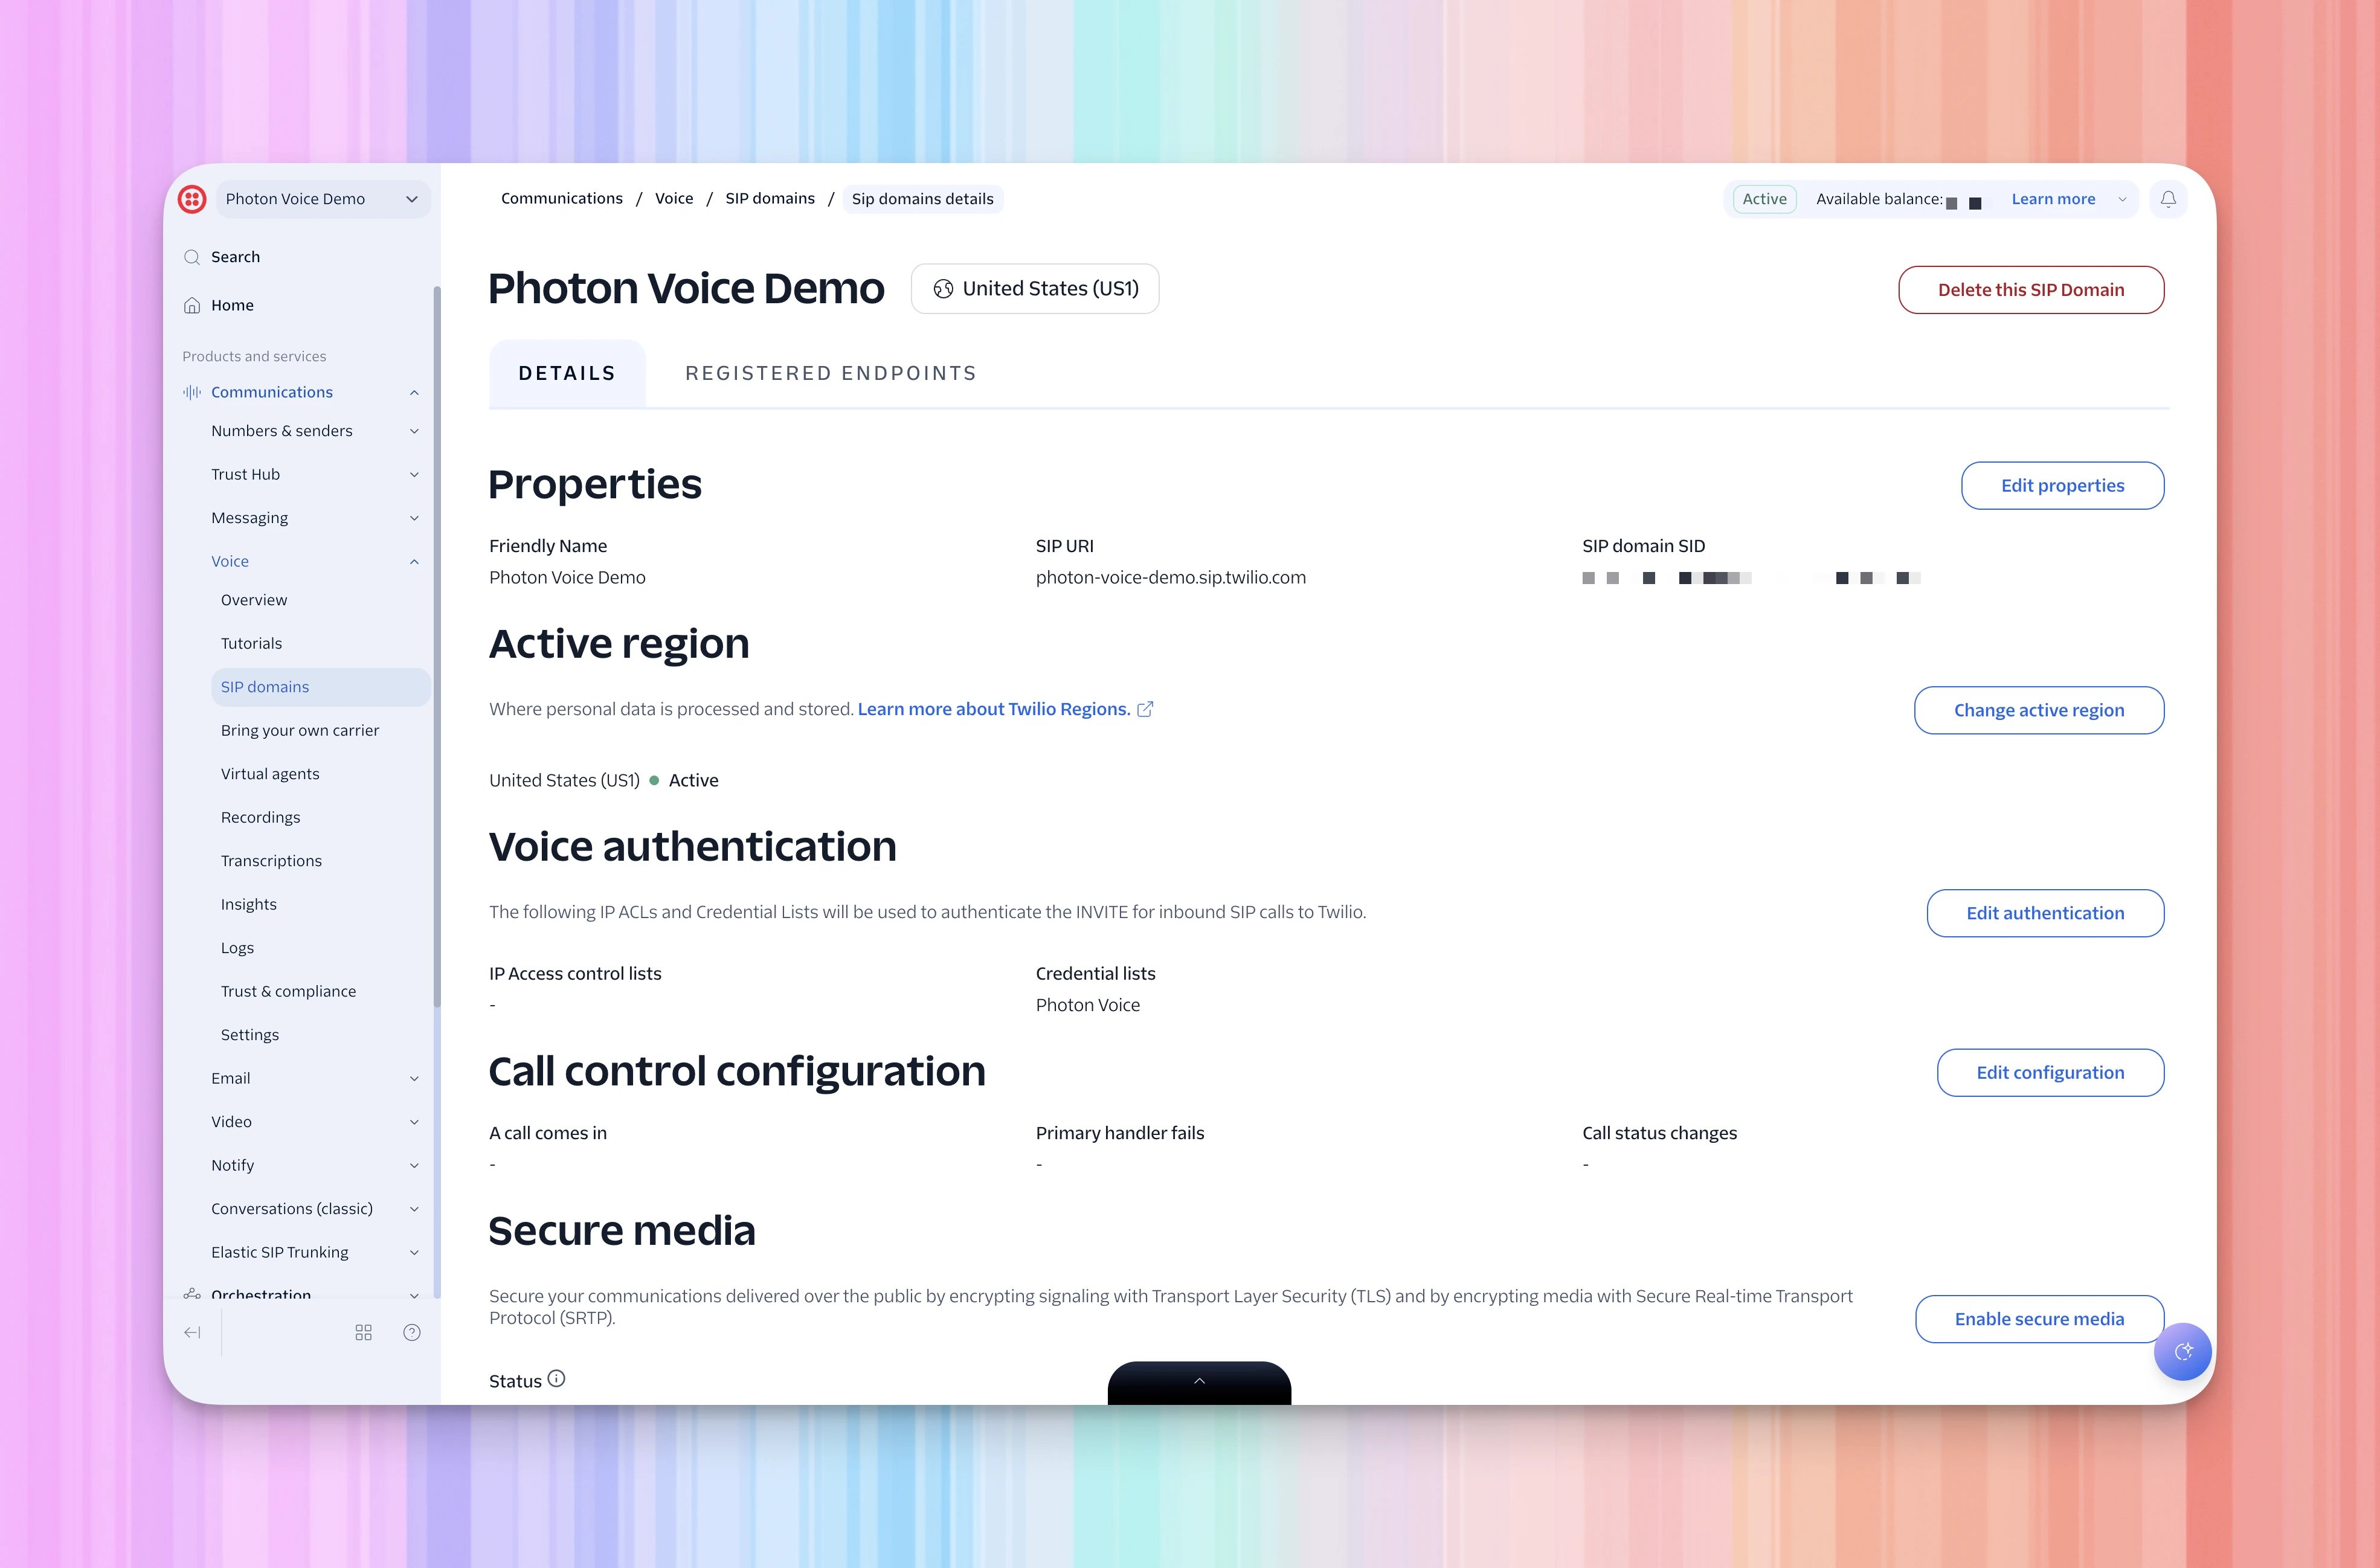
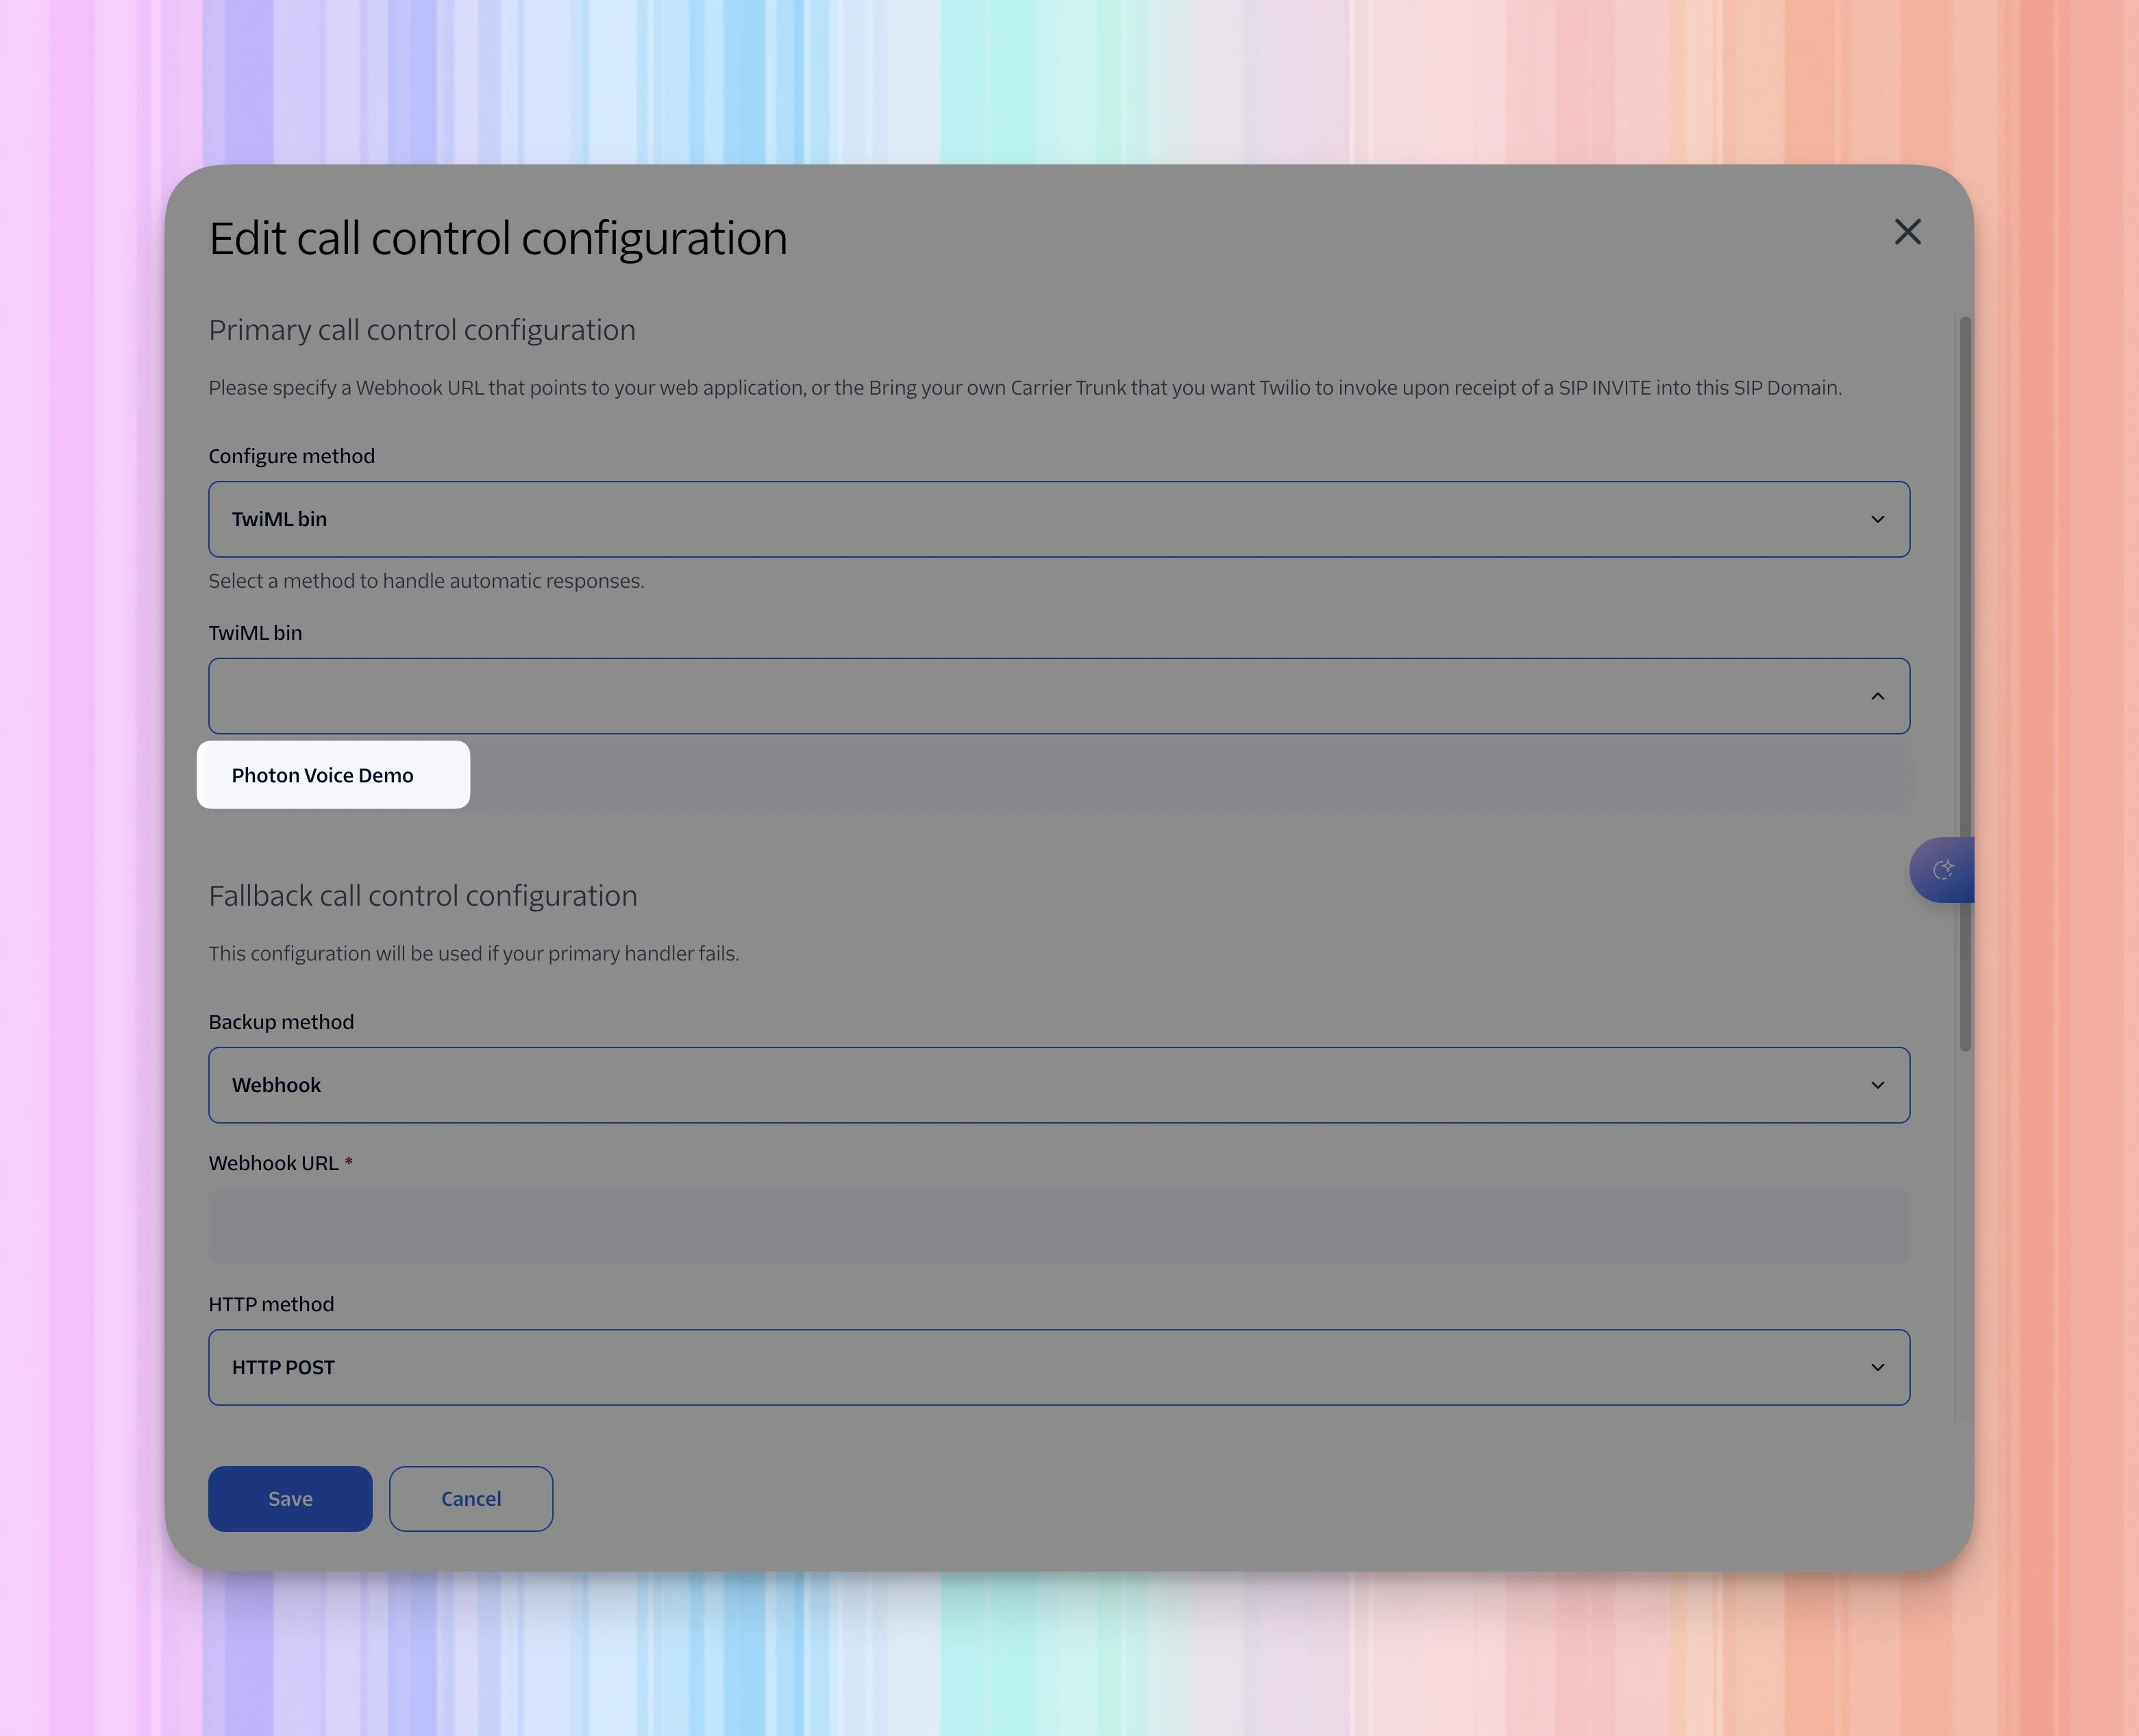
- In Edit call control configuration, find Primary call control configuration.
- Open Configure method and select TwiML bin.
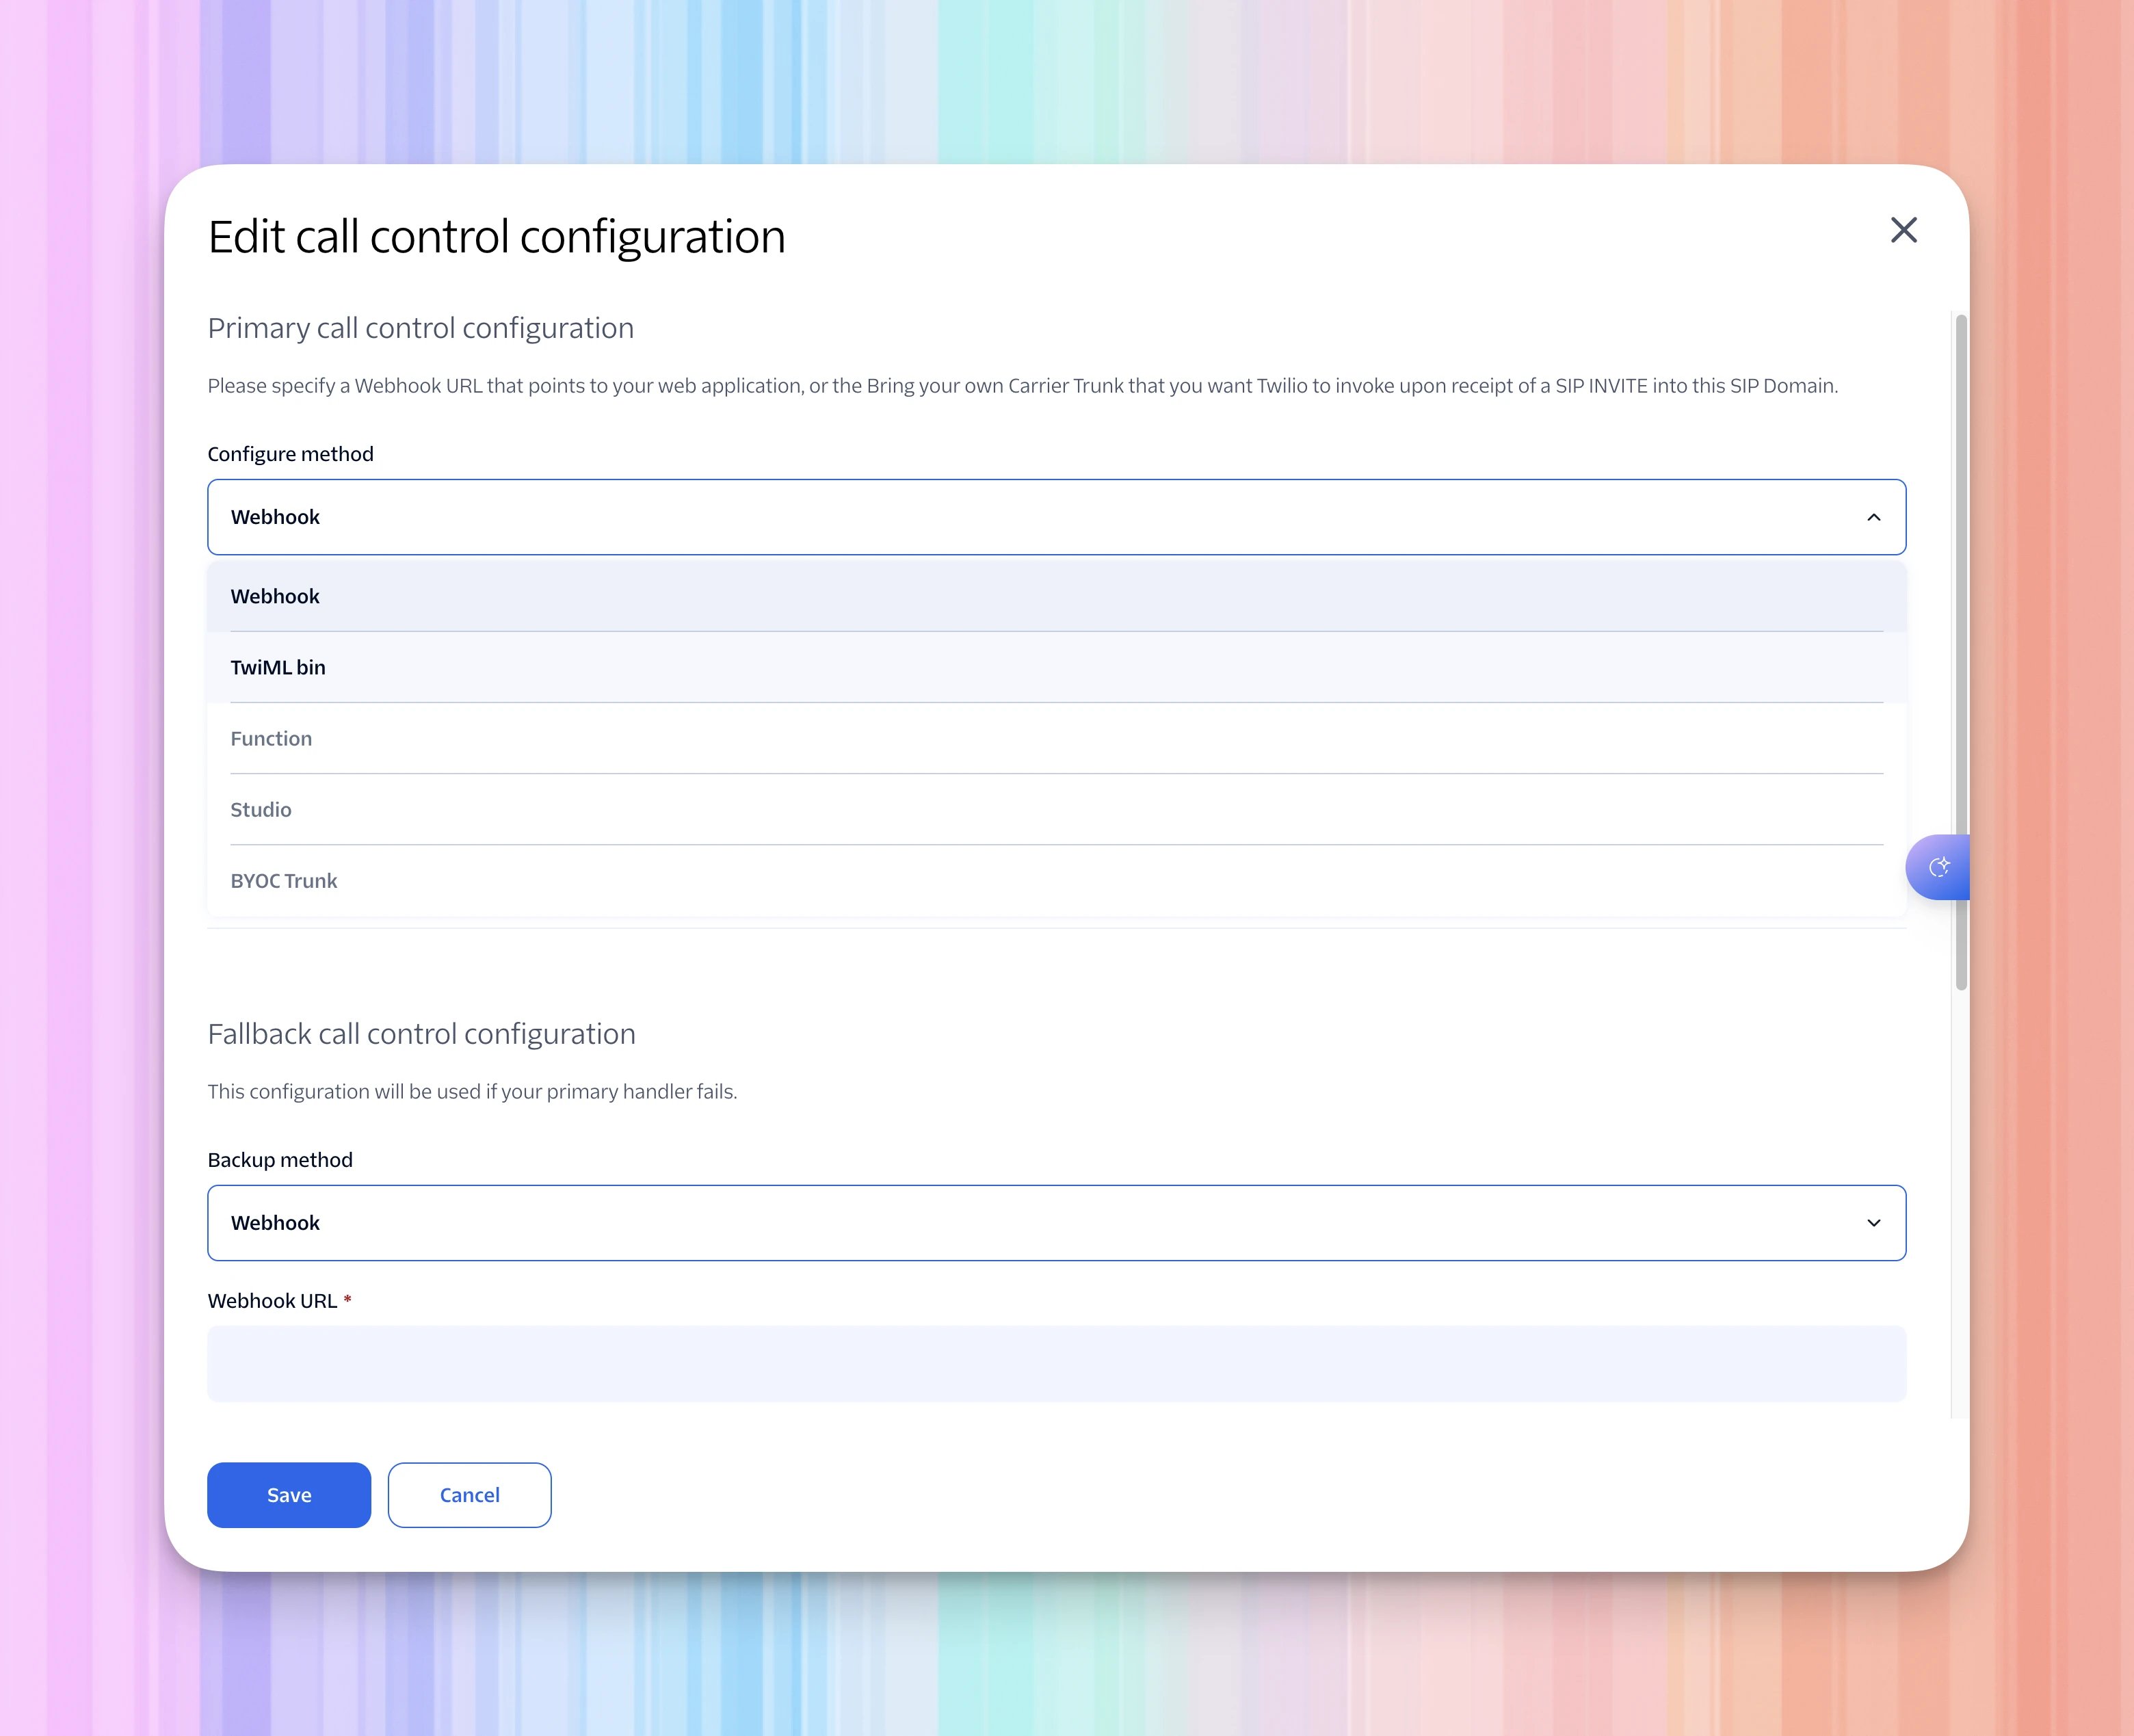
- In TwiML bin, select your saved forwarding bin by the name you gave it.
The screenshot shows
Photon Voice Demoas an example. Twilio hosts the bin, so you do not need to enter a webhook URL for this method.
Set the fallback fields
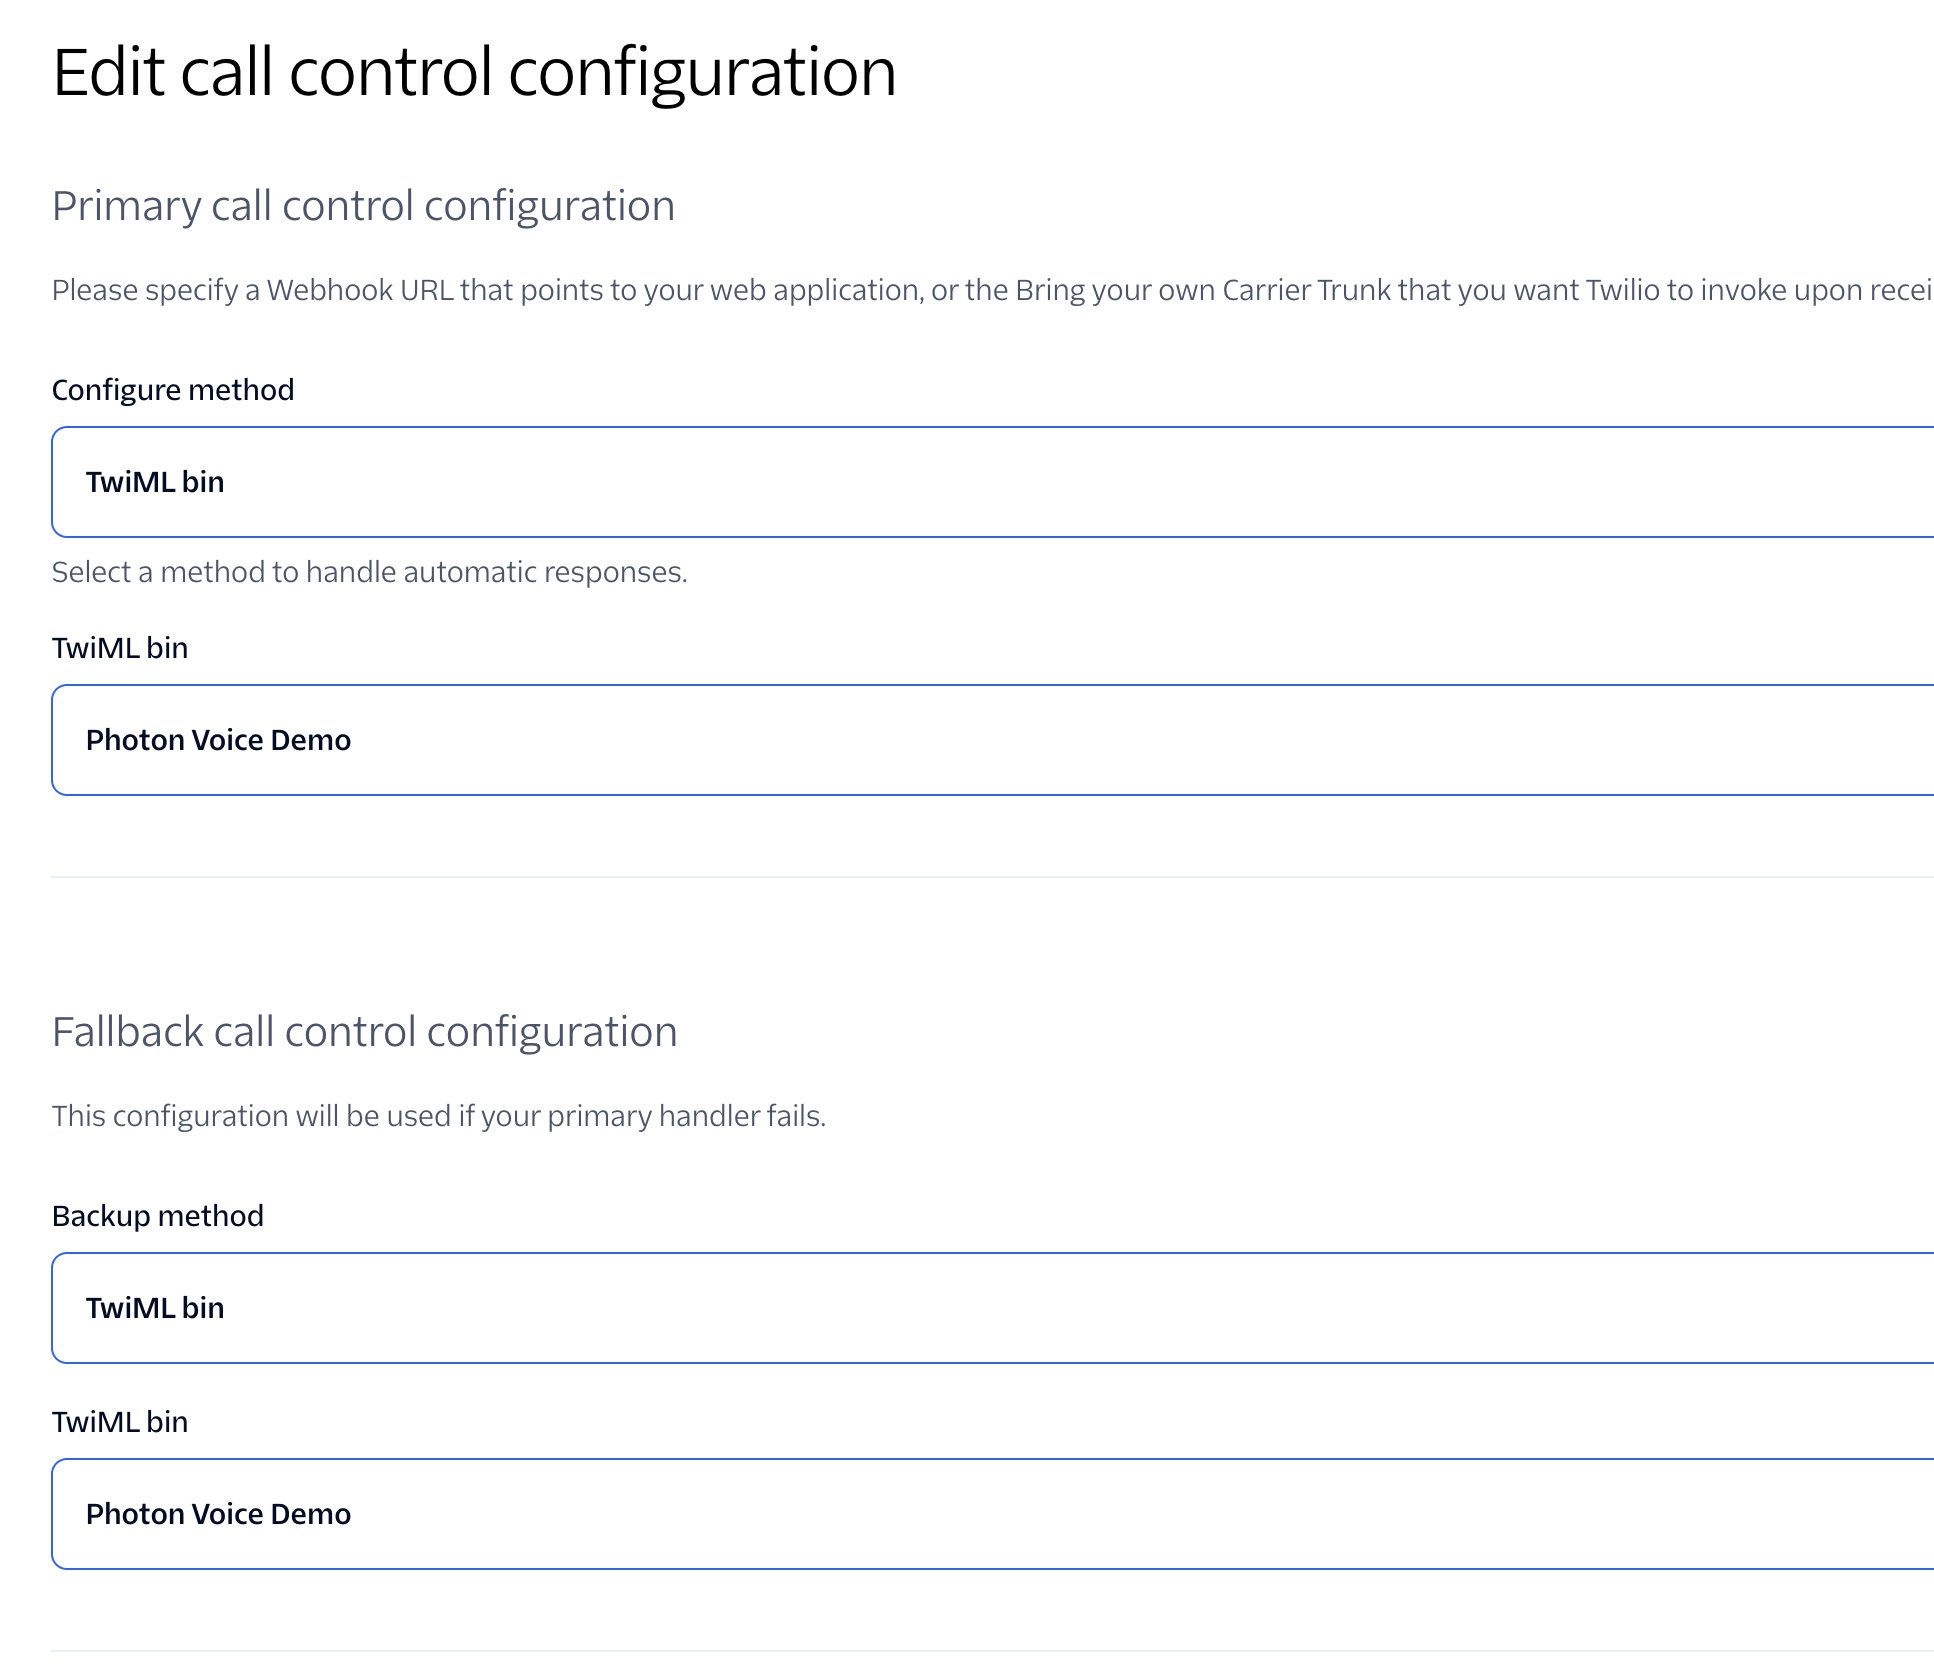
Twilio documents fallback as optional. If the Console asks you to complete the fallback fields before saving, you can reuse the existing bin for this walkthrough:
You do not need to create a second bin to match this example. Both settings
point to the same instructions, so an error in that bin can also cause the
fallback to fail. To provide different behavior after a primary-handler error,
you would configure a separate fallback, such as instructions that play an
unavailability message.
Fallback does not define what happens when the destination phone is busy or
unanswered. Configure that behavior in your call instructions if you need it.
6. Set Photon’s receiving destination
In Photon, Inbound calls controls where calls arriving at your Photon number are delivered. Point it to the Twilio SIP Domain, then supply the login from the credential list attached to that domain.- Return to the Photon SIP profile you prepared in step 1.
- Under Inbound calls, select Enable inbound if it is not enabled yet.
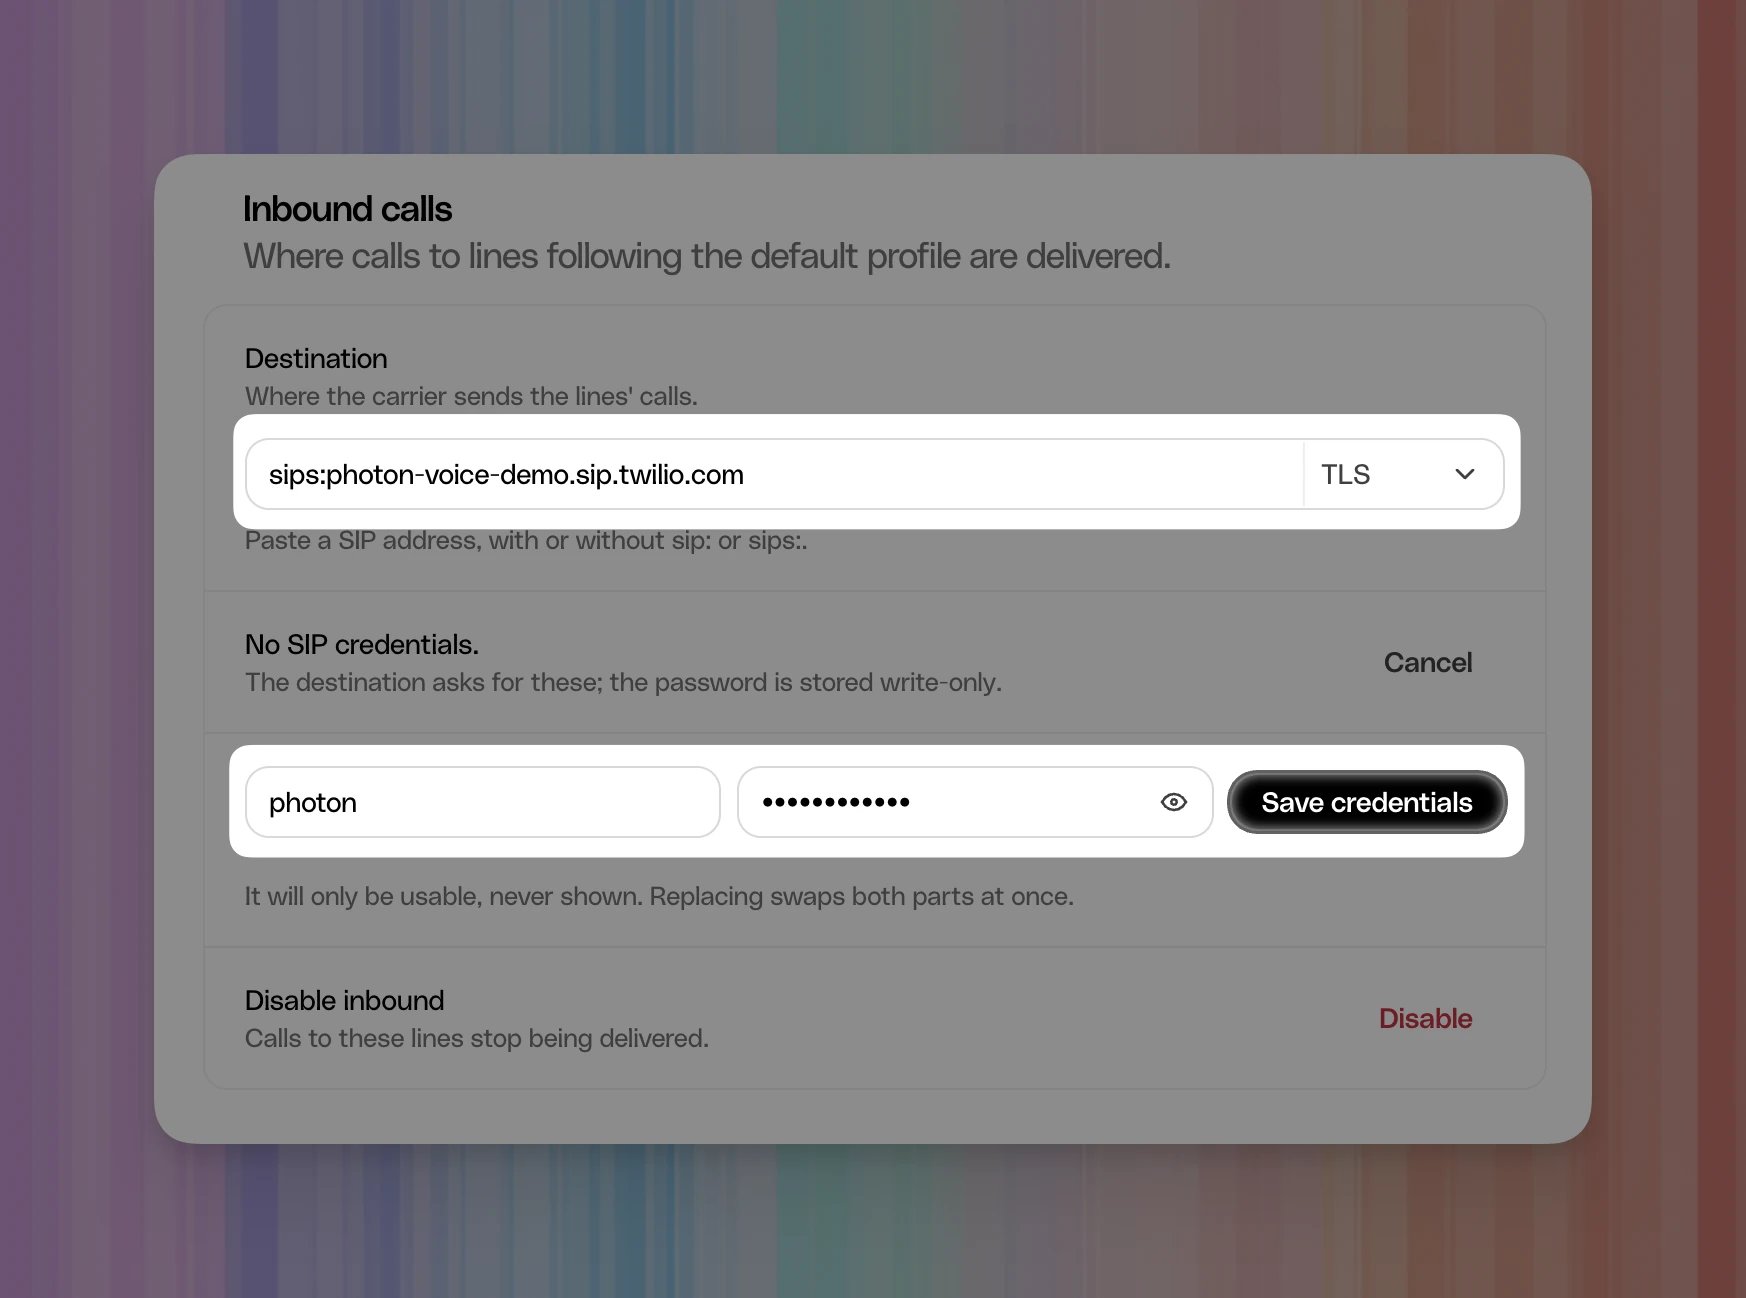
- Enter your Twilio domain in SIP address, or Destination when editing,
and select TLS as the transport. Use the full domain copied from Twilio,
such as
photon-voice-demo.sip.twilio.com. Photon displays the example assips:photon-voice-demo.sip.twilio.comwith TLS selected. - Enter the credentials you created in Twilio:
The credential list’s friendly name is a label. Use the username inside that
list and its matching password in Photon so Twilio can authenticate incoming
calls. In the screenshot, the username is
photon; enter the one you chose.
If you are enabling inbound calls for the first time, finish with Enable
inbound. If you are adding credentials to an enabled profile, as shown below,
select Save credentials. Entering a username and password in the editor
does not save them by itself.
7. Test an incoming call
Use two independent call endpoints: one to call your Photon number and one to receive the forwarded call. For example, have someone call from their phone and answer on your destination phone, or call from a computer app that supports calling phone numbers and answer on your phone. You do not need to own two physical phones.- From the calling endpoint, call your Photon number.
- Confirm that the destination phone specified in your TwiML Bin rings.
- Answer and check that both people can hear each other.
If the call fails
Start by checking the credentials on both sides:- In your Twilio SIP Domain, confirm that Credential lists includes the list containing the login you created for Photon.
- In Photon’s Inbound calls settings, use that exact username and its
matching password. The list name, such as
Photon Voice, is different from the username, such asphoton. - Select Save credentials, then make another test call.
407 is an authentication challenge; a subsequent
403 indicates rejection. Check credentials and access settings before changing
the forwarding instructions. The response alone does not identify which setting
is incorrect.
Twilio SIP authentication.
8. Make an outgoing call through Photon
Run this part in your computer’s terminal. You will send a request to Twilio that calls a separate phone through Photon and plays a short message when answered. The call instructions are included in the request, so this test does not need another TwiML Bin or an outbound configuration page in Twilio Console.Enable outbound in Photon
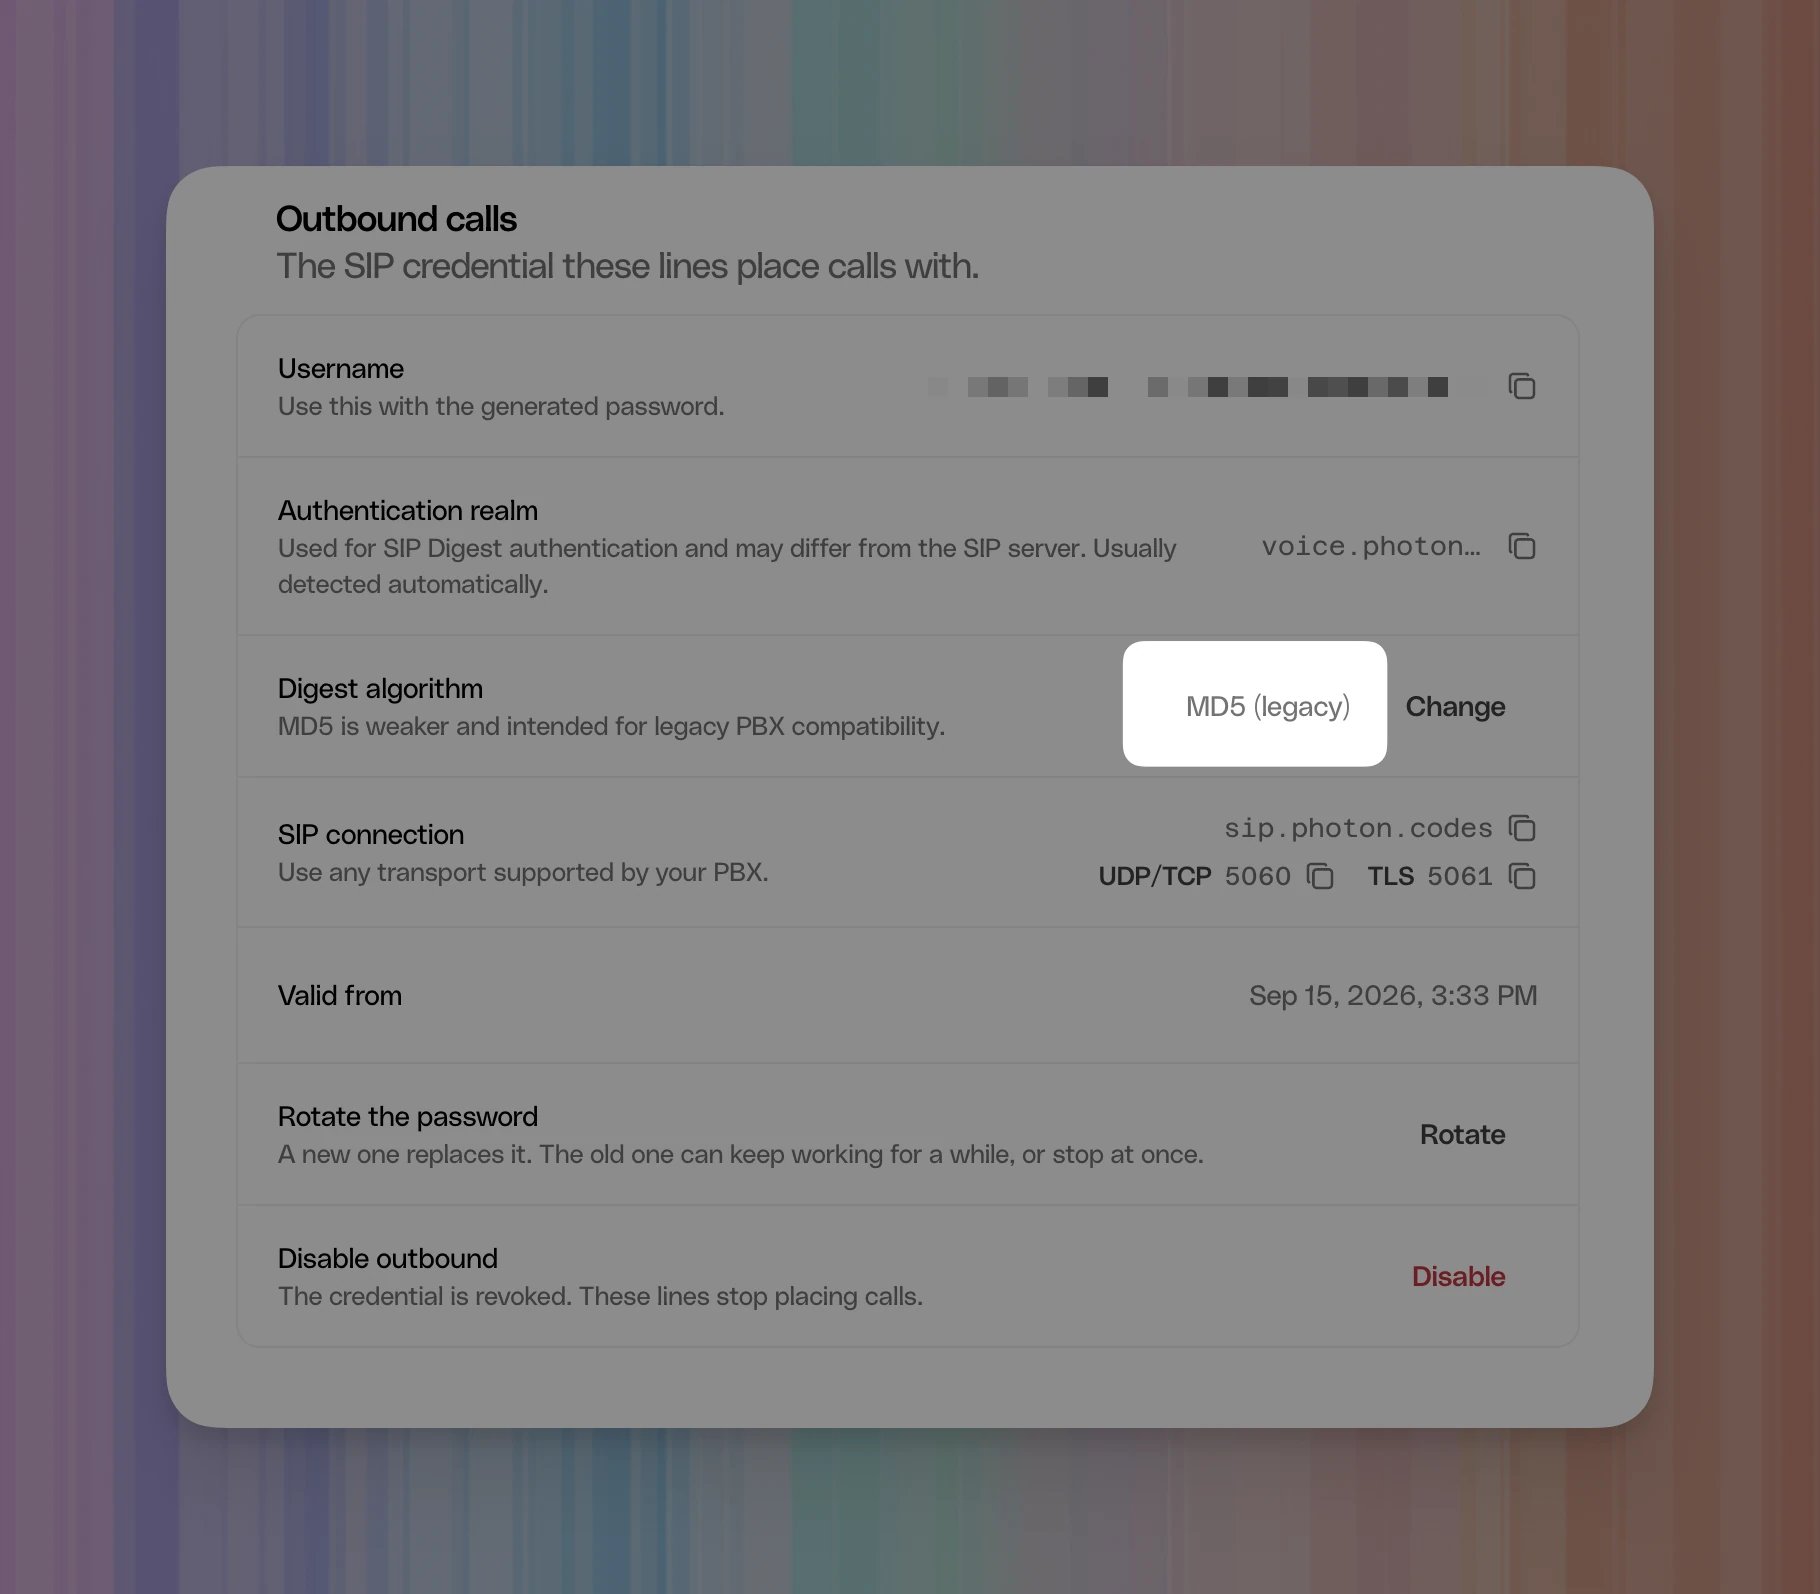
Return to the Photon SIP profile used by your caller number. Under Outbound calls, select MD5 (legacy) for Digest algorithm, then select Enable outbound. Photon opens Save the outbound password. Copy the generated password to your password manager, then select I saved it. Photon displays it only once.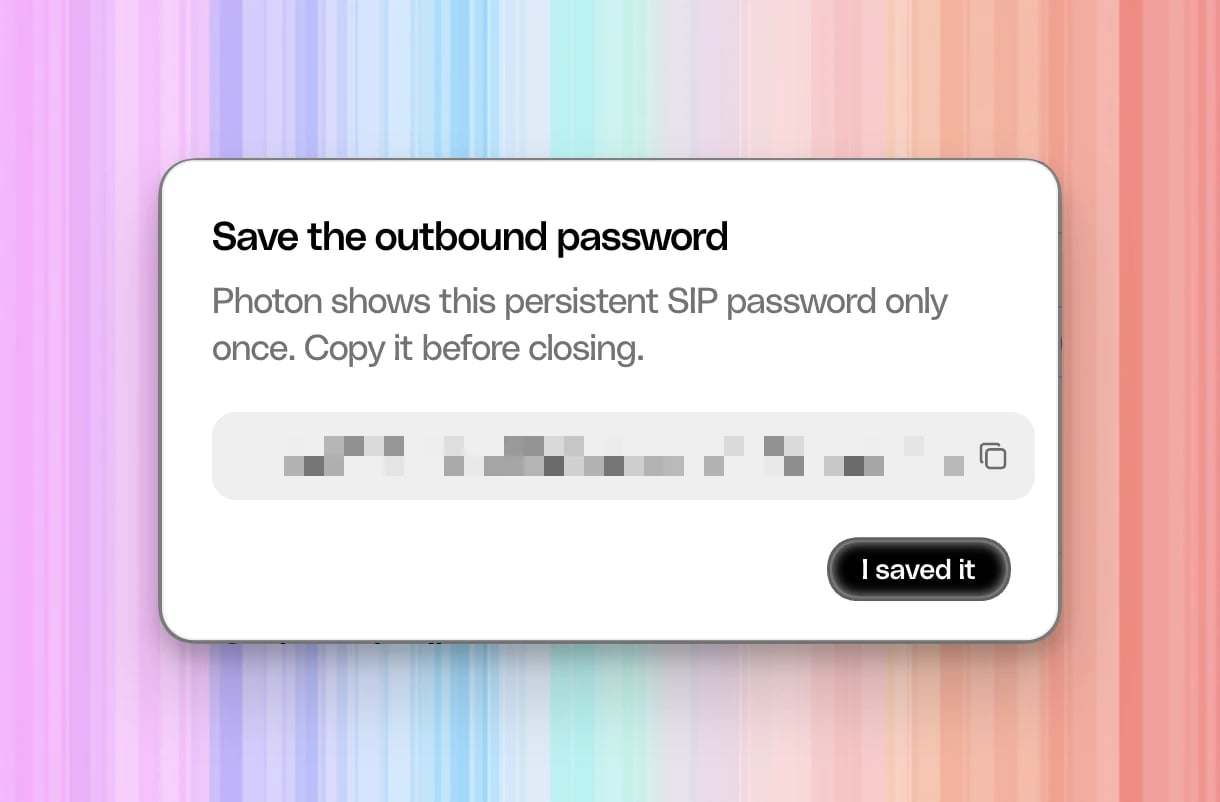
Gather your connection details
Copy the Username from Outbound calls and the SIP connection hostname and TLS port from that same profile. Use the saved outbound password. For production, the example connection issip.photon.codes:5061.
Authentication realm can differ from the SIP server; use SIP connection
for the destination address.
These Photon-generated credentials let Twilio place calls through Photon.
The Twilio credential list from step 2 authenticates calls in the other direction.
From your Twilio account dashboard, obtain the Account SID and Auth Token.
The commands prompt for the token privately. Use your eligible Photon number
as From; Photon authorizes that number against the profile’s outbound
credentials. For a SIP destination, Twilio puts From in the SIP From header.
The Twilio-verified caller ID required by the earlier forwarding bin applies
to that bin’s phone-network leg.
Twilio SIP call parameters.
Set the test values
The commands work in Bash or Zsh. Replace every placeholder, then run:
Run the following command by itself, paste your saved Photon outbound SIP
password, and press Enter. The input remains hidden:
Place the call
Run the command below. When curl prompts for the password for your Twilio Account SID, enter your Twilio Auth Token. This sends the call request:To routes the recipient’s number through Photon. transport=tls encrypts
SIP signaling, and secure=true requests encrypted audio with SRTP.
SipAuthUsername and SipAuthPassword authenticate that SIP call. Twiml
tells Twilio what to play after the recipient answers.
Twilio SIP calling and encryption.
Answer the recipient phone. Confirm that you hear the test message and see
your Photon number as the caller ID. This test needs one phone to answer;
the terminal initiates the call.
Check the result
An HTTP201 response means Twilio accepted the request. An initial queued
status does not confirm that the phone rang or the call connected. Copy the
sid beginning with CA from that response. After the call ends, replace the
placeholder and run:
status and
duration; a finished, answered test should report completed. Confirm the
audible message as well as the API status.
Twilio call status.
If the call fails, use the new call SID and test time when inspecting logs.
For a SIP 403 Forbidden, first confirm that the Photon profile’s Digest
algorithm is MD5 (legacy).
Check the outbound username/password, Photon endpoint, and caller number’s
profile next. If the request returns an HTTP error, inspect the
response’s code and message before placing another call.
When you finish testing, clear the password variable: