

Before you start
- A Photon project with an eligible SMS number, WhatsApp number, or dedicated iMessage line. Shared iMessage assignments do not support Voice.
- Permission to manage the project’s Voice profiles.
- A LiveKit Cloud project.
- For two-way audio testing, a LiveKit application or SDK client that can join the call’s room, publish audio, and play the phone participant’s audio. You can use a deployed LiveKit agent instead.
- A separate phone you can answer during testing.
- For the outgoing test, the LiveKit CLI installed on your computer.
User-entered names in the screenshots are examples. Choose your own labels
and use your own numbers. Copy generated credentials and assigned connection addresses
from your account; the field instructions identify values that must match.
1. Prepare your Photon Voice profile
Choose a profile
A Voice profile stores the call settings for one or more numbers in your project.
Create the default before creating an additional profile. Creating an additional
profile does not move any numbers; assign the intended numbers to it afterward.
The screenshots below show default-profile setup. If your number uses an
additional profile, apply the connection settings to that profile instead.
Changes affect new calls on every number using the edited profile. Check its
Lines count to see how many numbers share the settings.
Open or create your profile
Select your Photon project and open Voice. Under Lines, find the Photon number you want to connect. If it already uses a SIP Voice profile, open that profile and continue to Understand your profile below. If your project has no default profile, select Set up default, choose SIP, and select Create profile.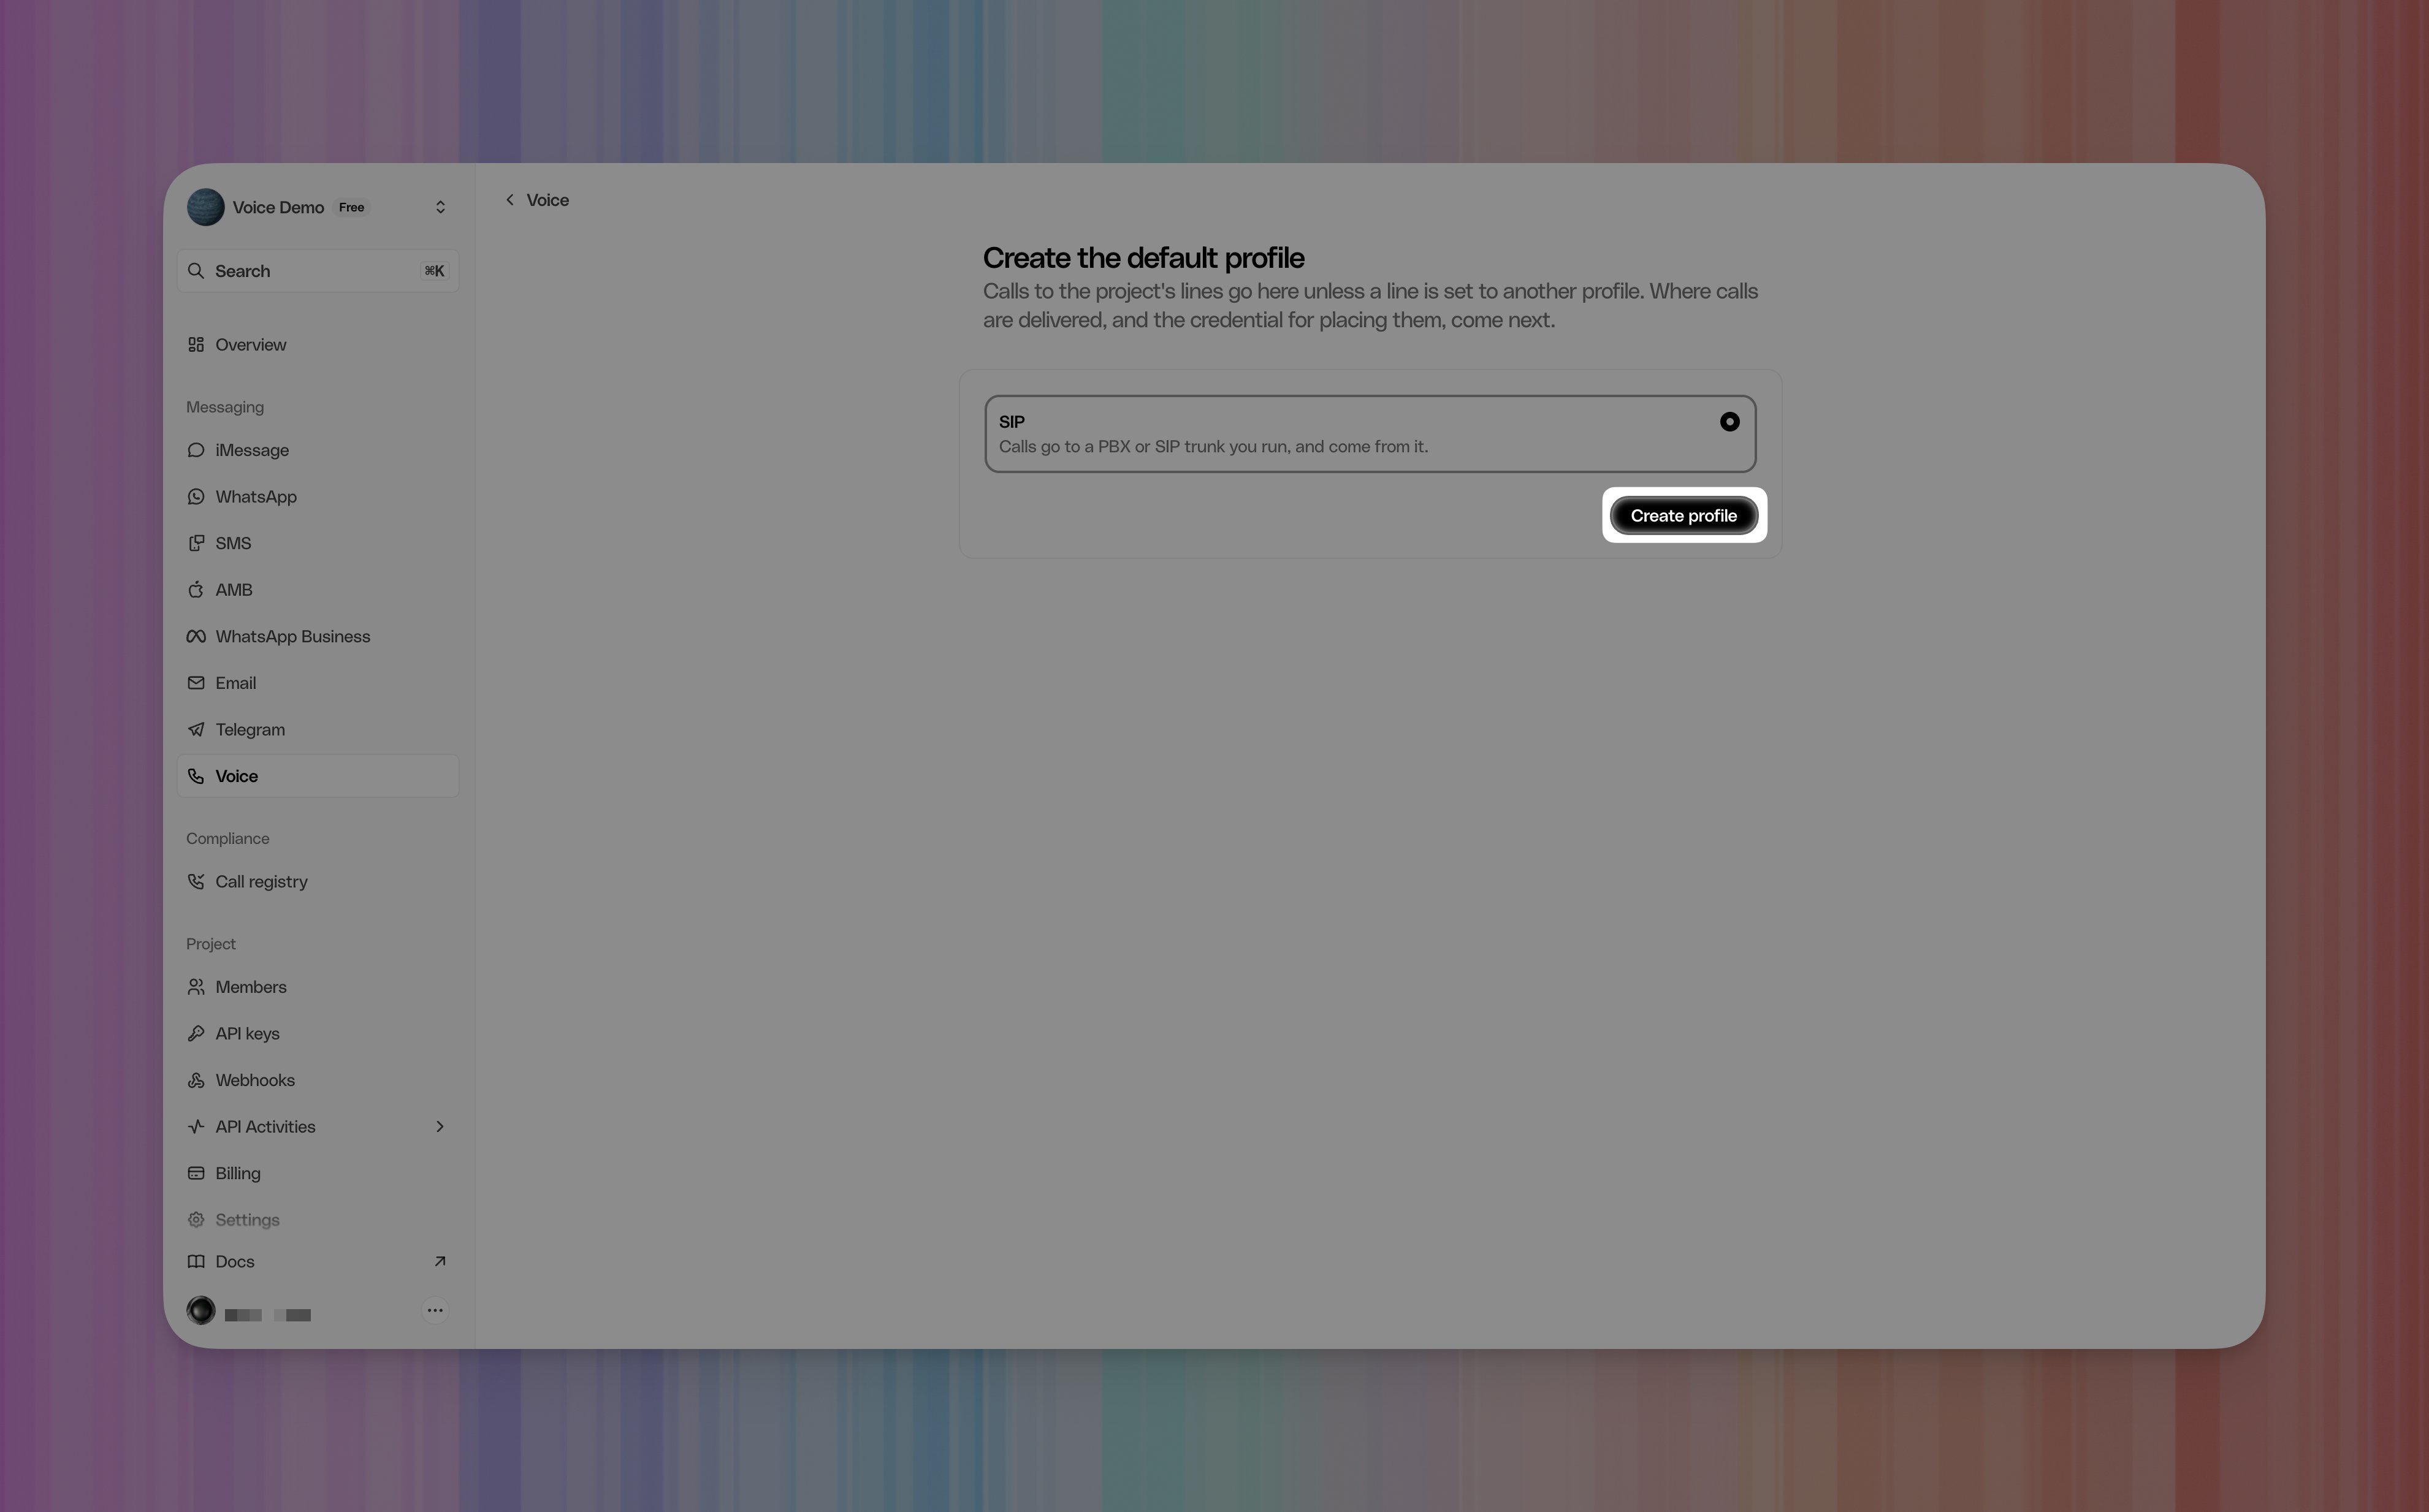
Understand your profile
The two call settings have separate purposes:
Leave Photon’s Media encryption at Auto for this walkthrough. In
LiveKit, choose Media encryption enabled on each trunk. These settings
allow encrypted audio when available. TLS encrypts SIP signaling; SRTP
encrypts the audio.
To require encrypted audio, enable Require encrypted calls in Photon’s
media settings and use Media encryption required in LiveKit. Every
configured direction must use TLS and support SRTP.
LiveKit secure trunking.
2. Create a LiveKit inbound trunk
For outgoing calls only, skip to Prepare Photon outbound credentials. In your LiveKit project, open Telephony → SIP trunks and select Create new trunk.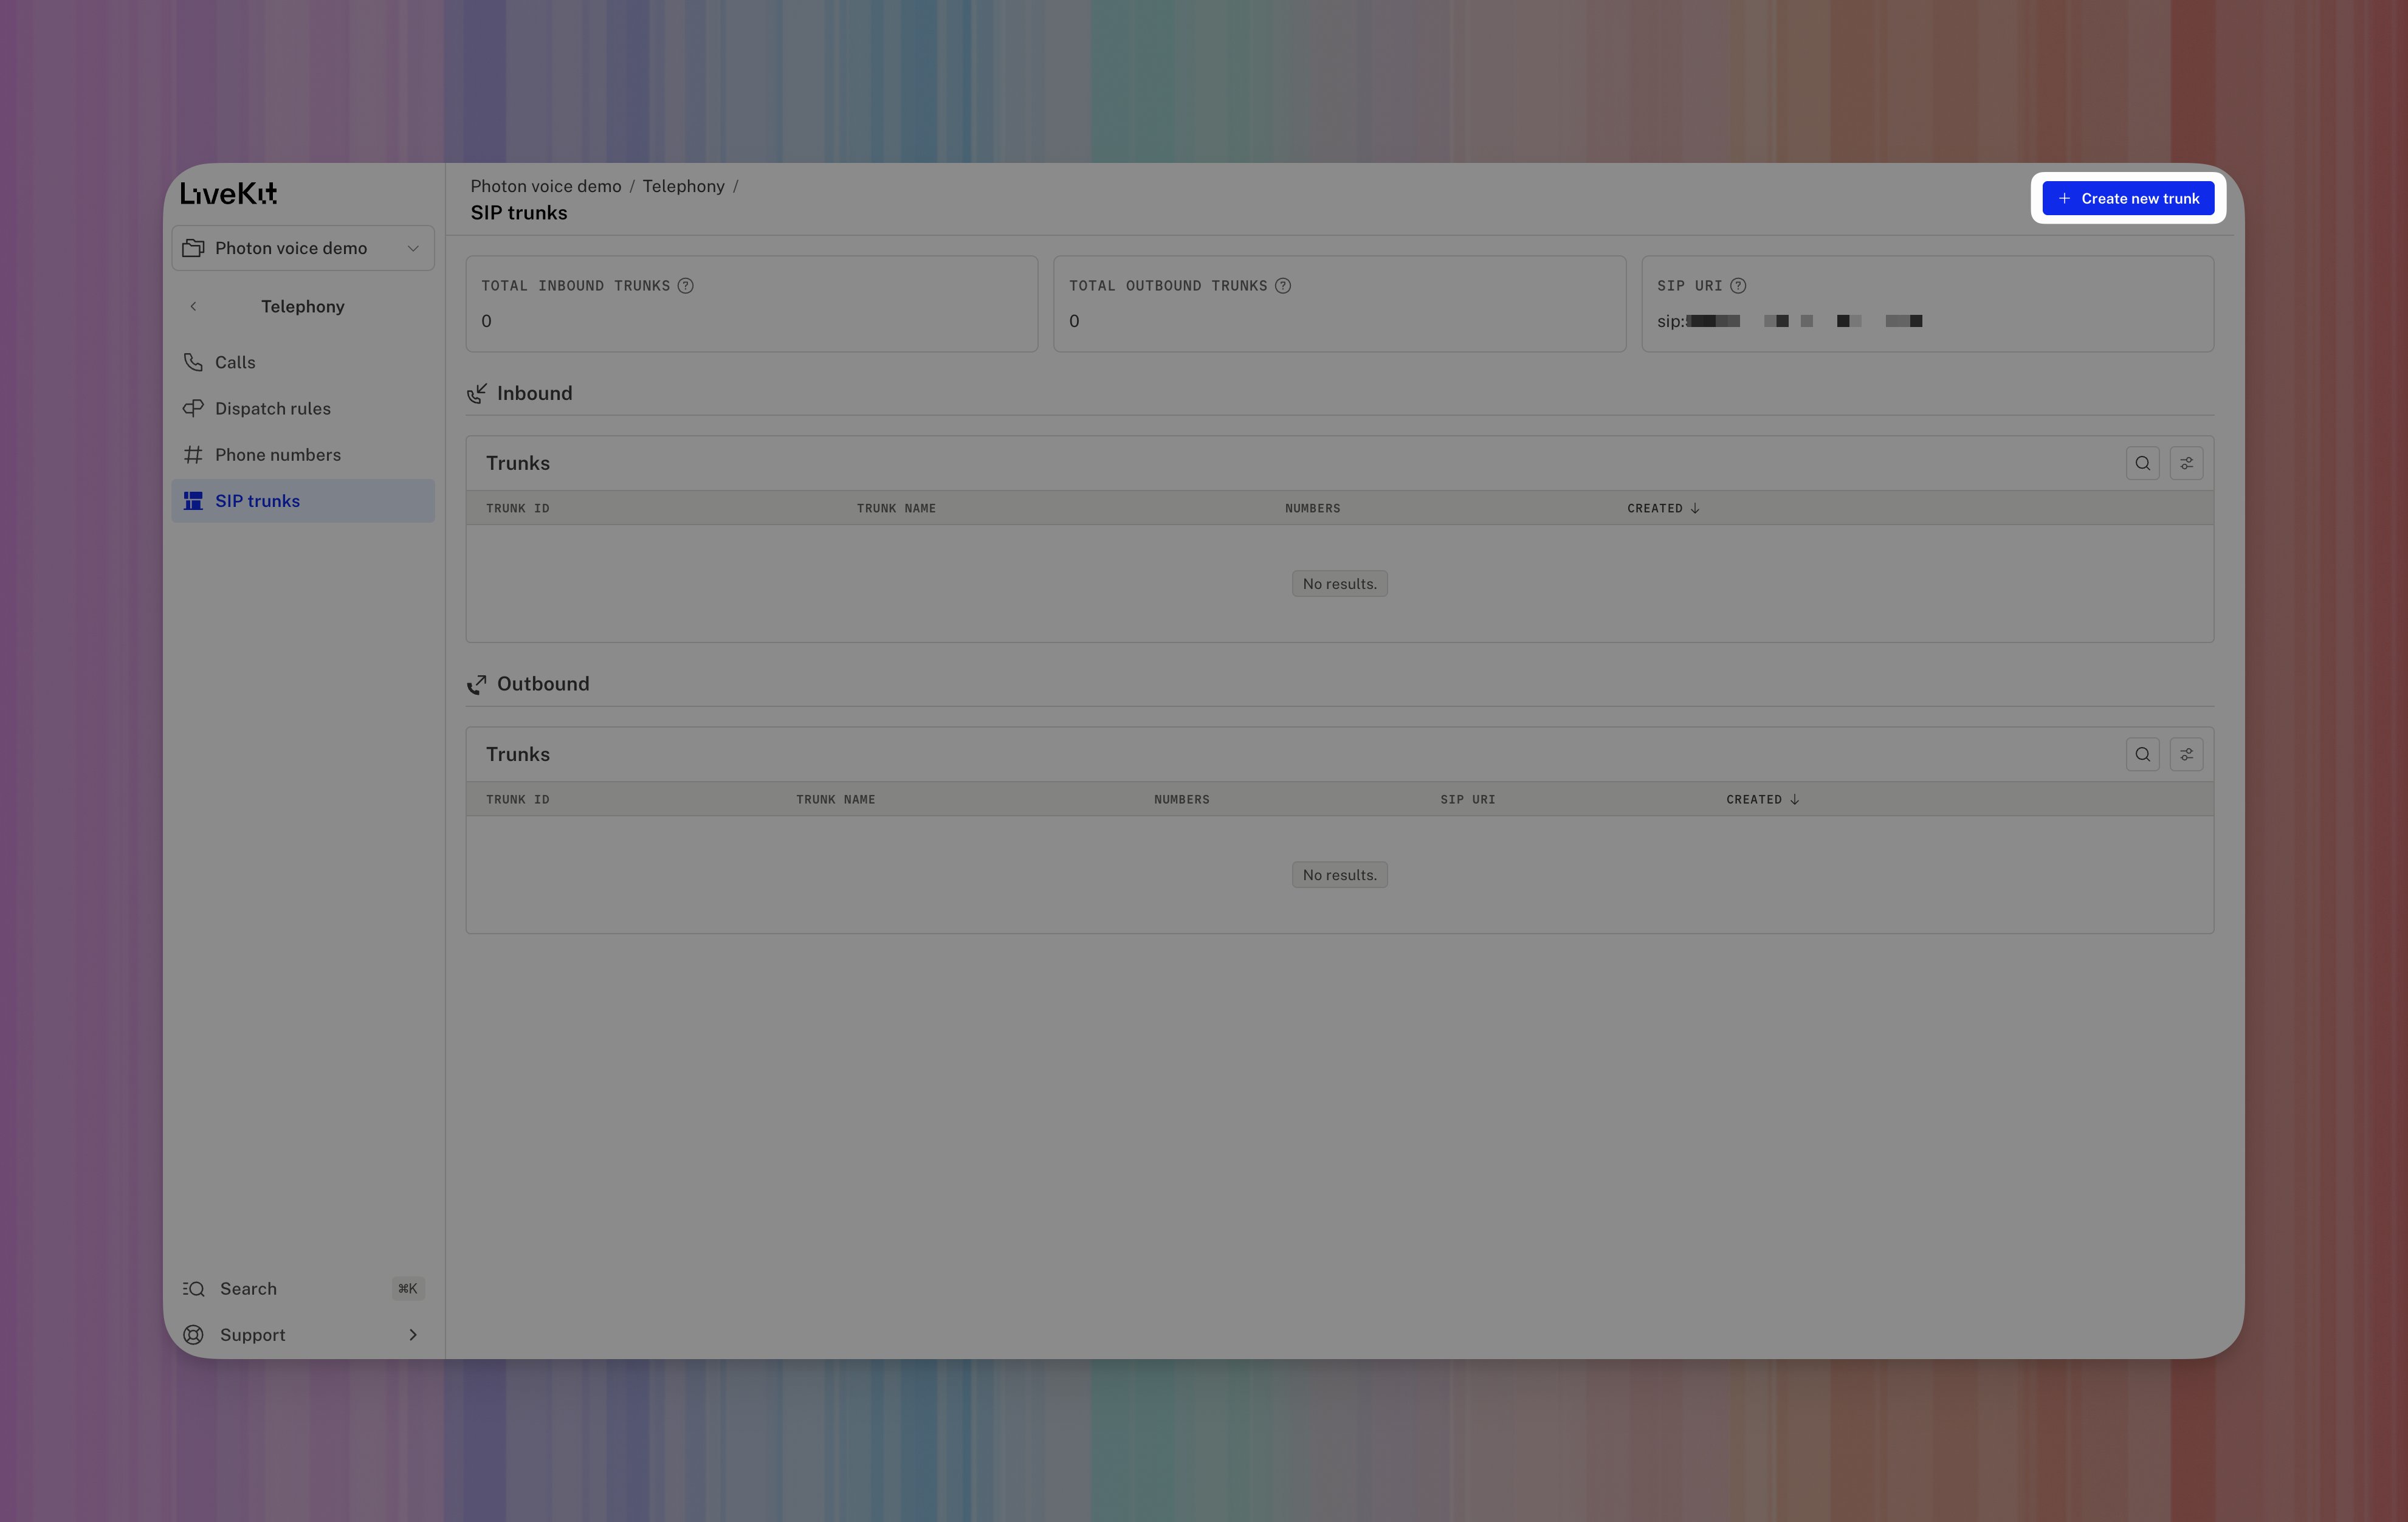
Photon Voice Demo.
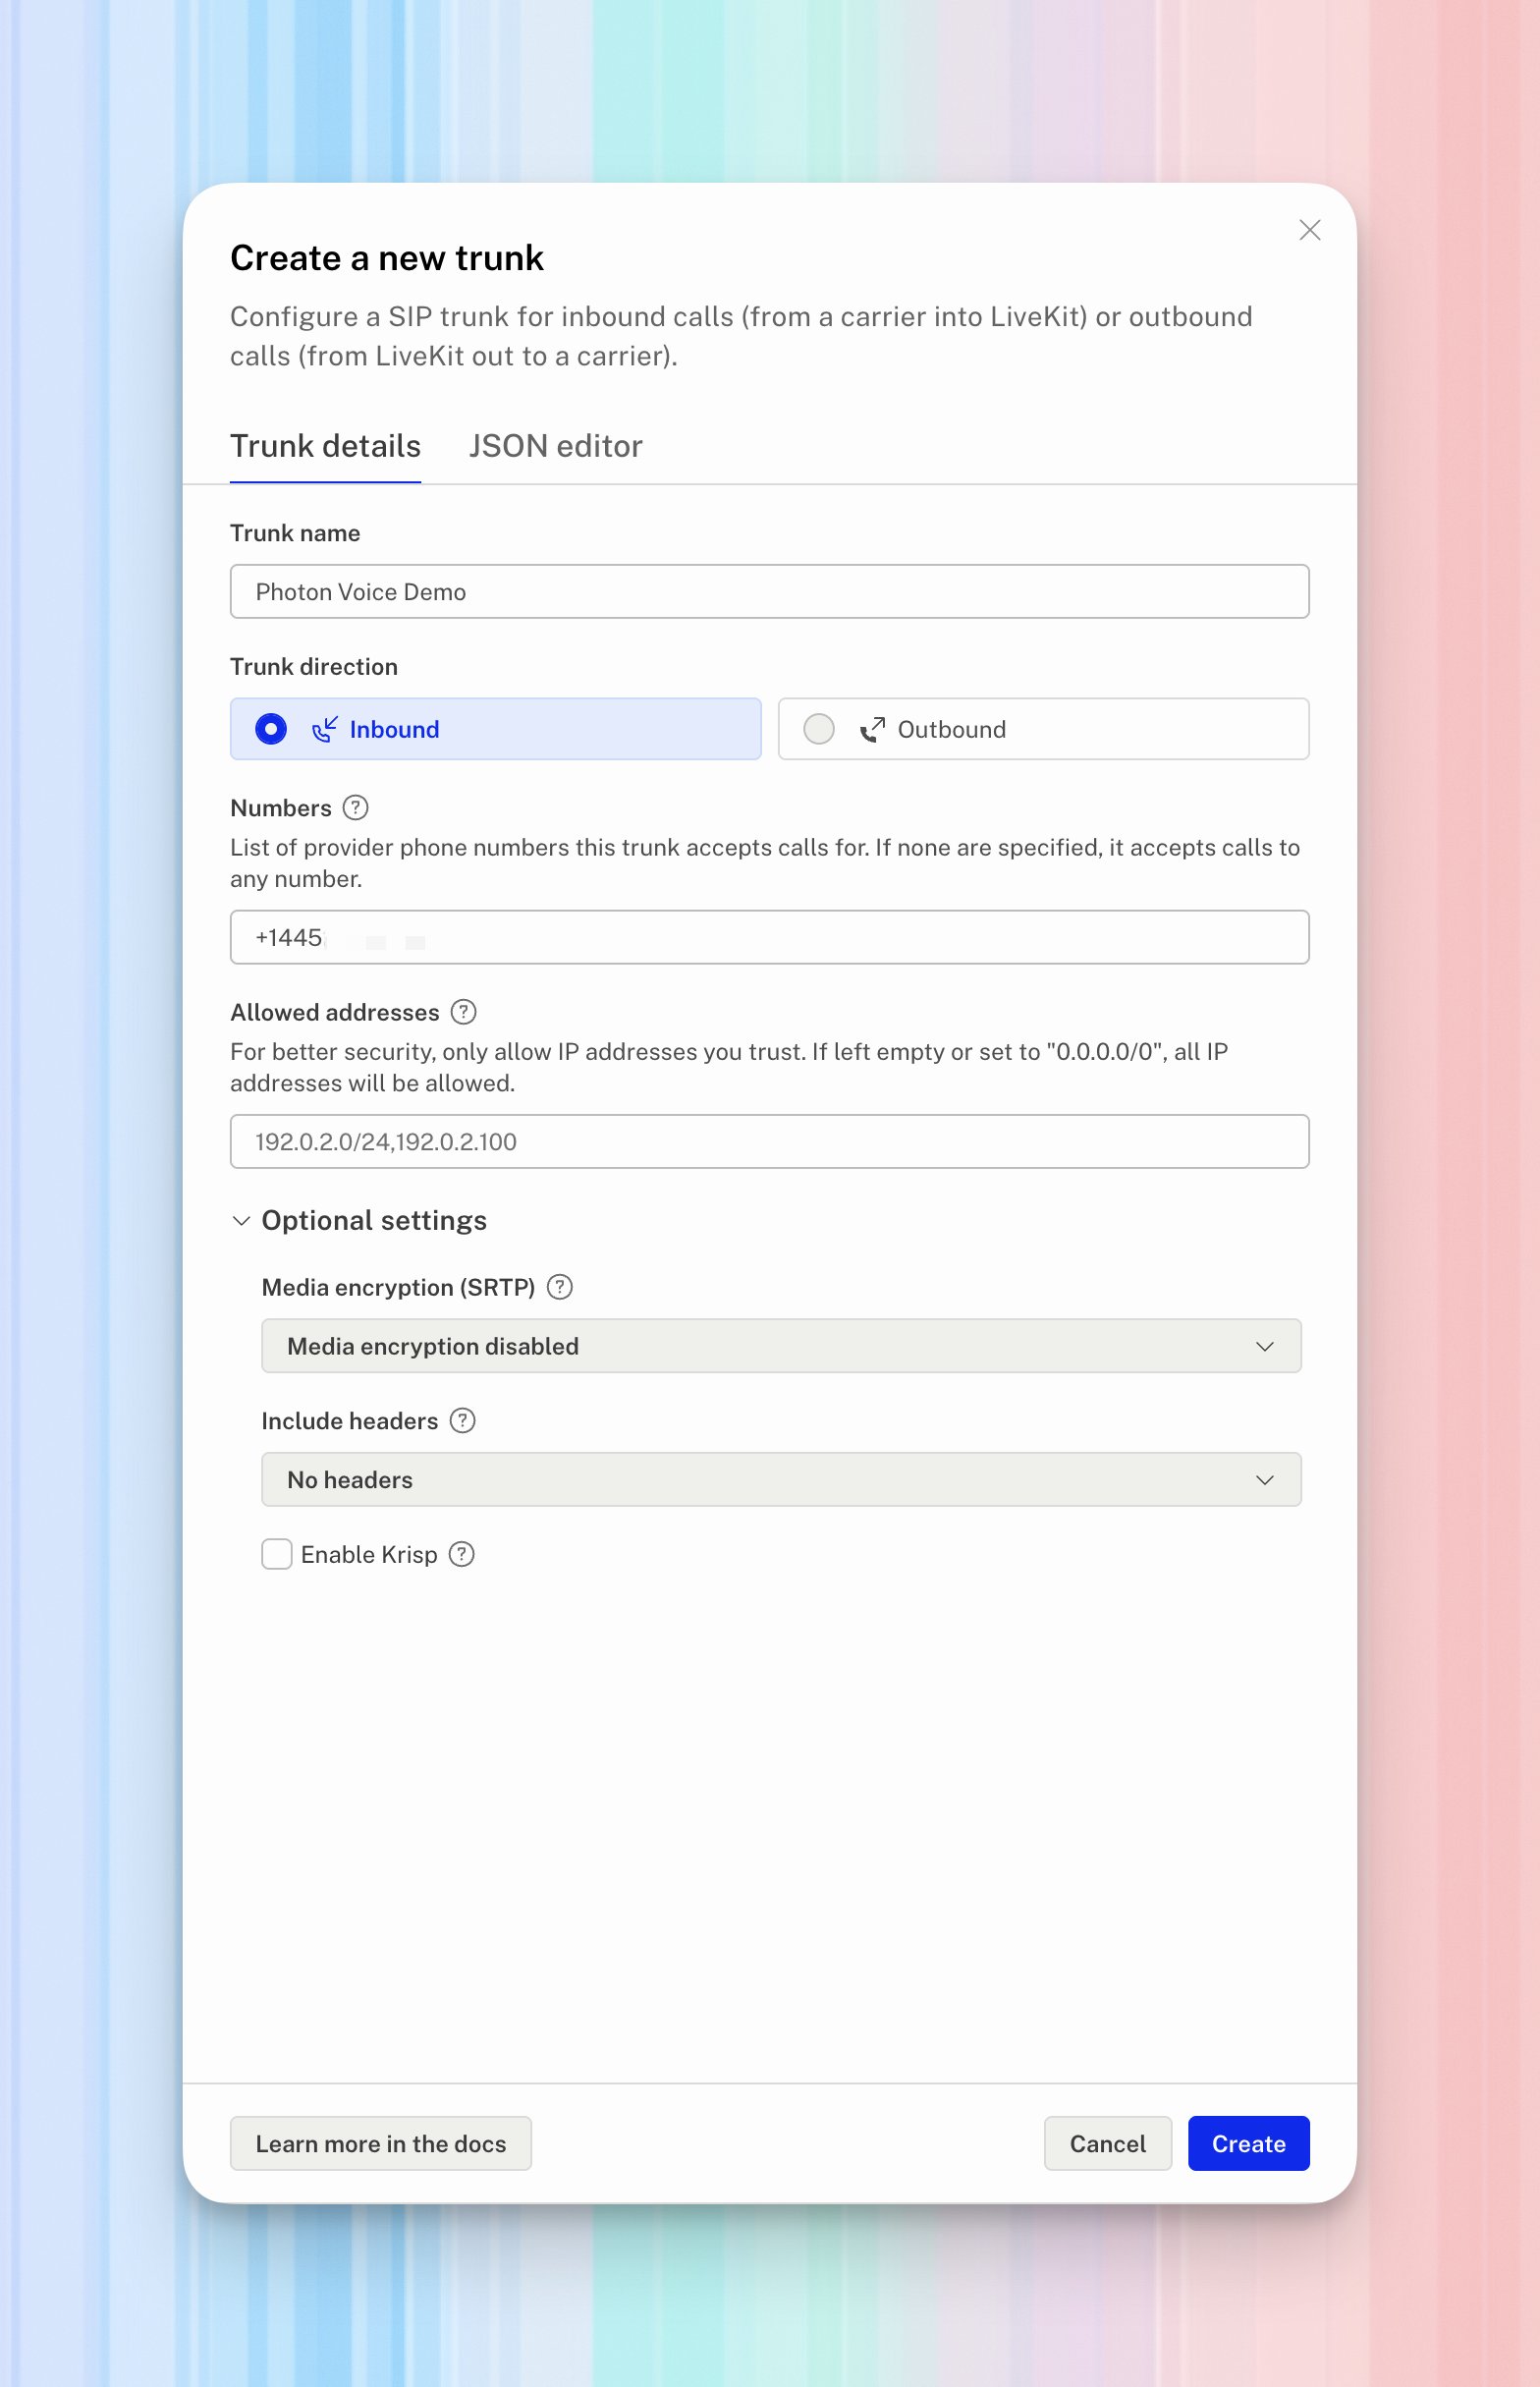
Add incoming-call authentication
Choose a username and a strong password for Photon to use when connecting to this LiveKit trunk. Save them securely; you will enter the same pair in Photon. Open JSON editor and addauthUsername and authPassword to the trunk
object. Keep the name, number, and media setting you configured. A complete
example looks like this; replace every YOUR_... placeholder before saving:
YOUR_TRUNK_NAME and your chosen SIP login for
YOUR_INBOUND_USERNAME and YOUR_INBOUND_PASSWORD. You will copy that same
username and password into Photon.
Select Create. The trunk appears under Inbound.
LiveKit inbound trunks.
3. Route incoming calls to rooms
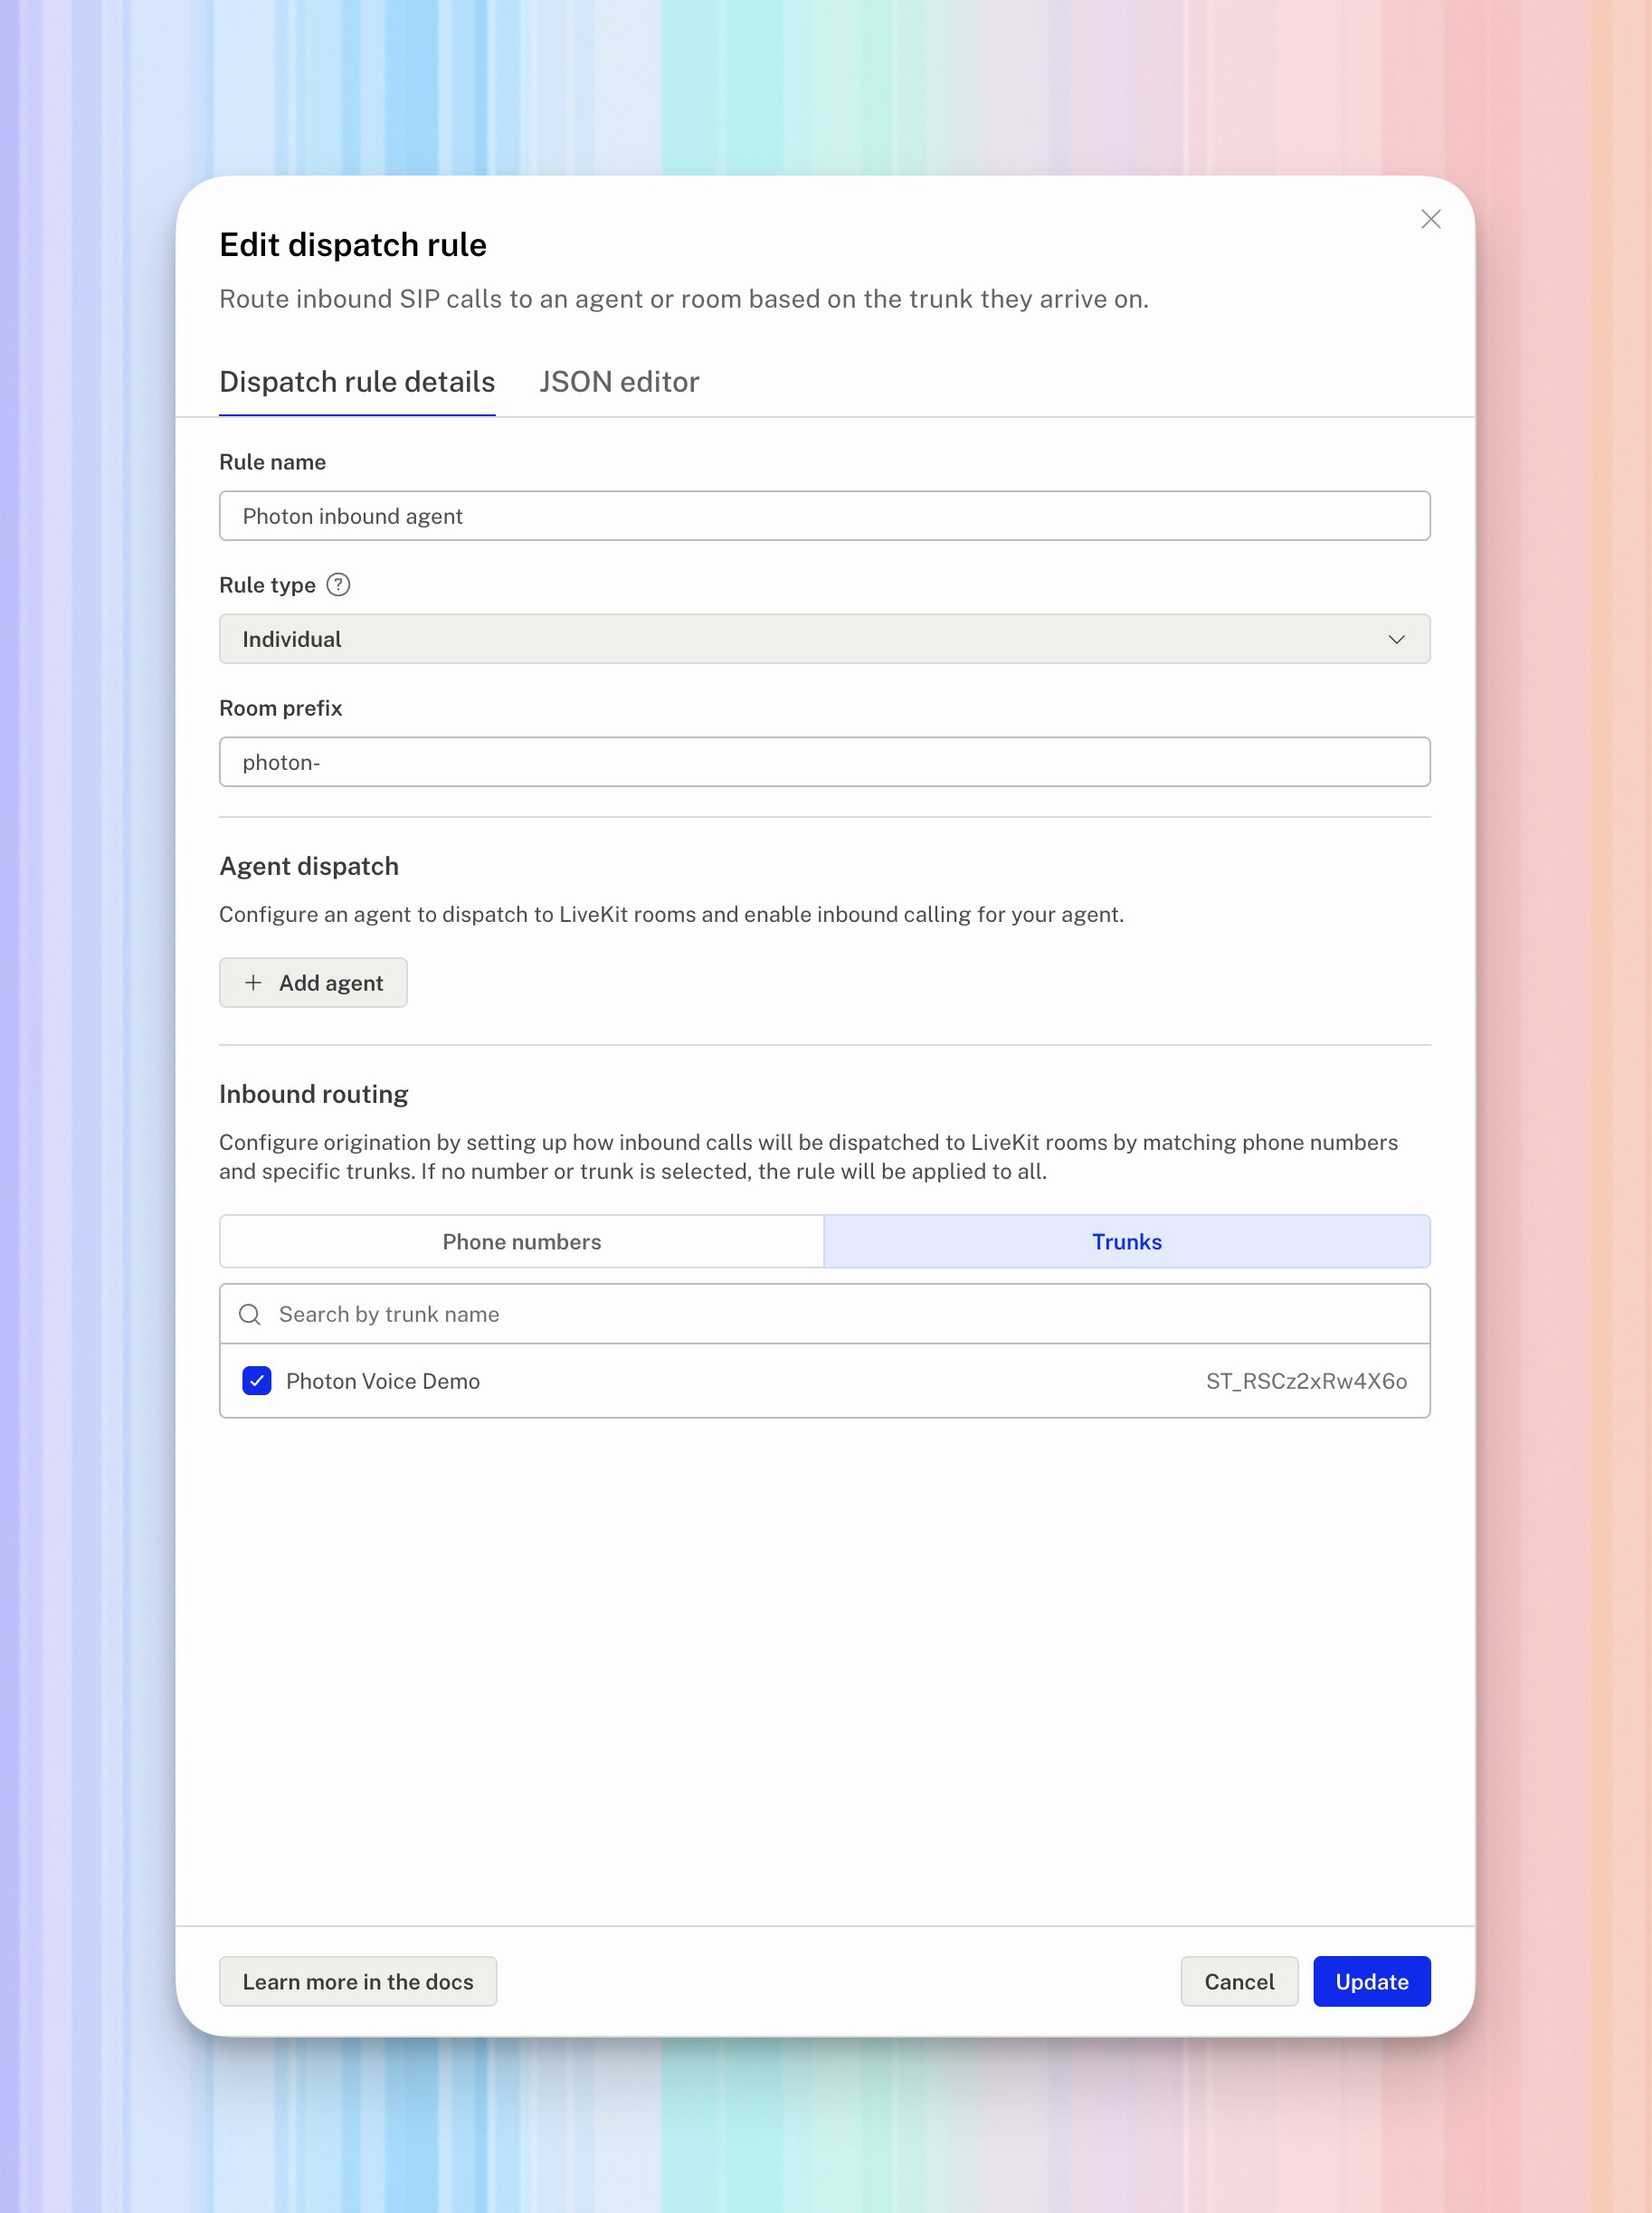
A SIP dispatch rule selects the room for calls arriving on your inbound trunk. You need this rule even when you do not use an agent. Open Telephony → Dispatch rules and select Create new dispatch rule.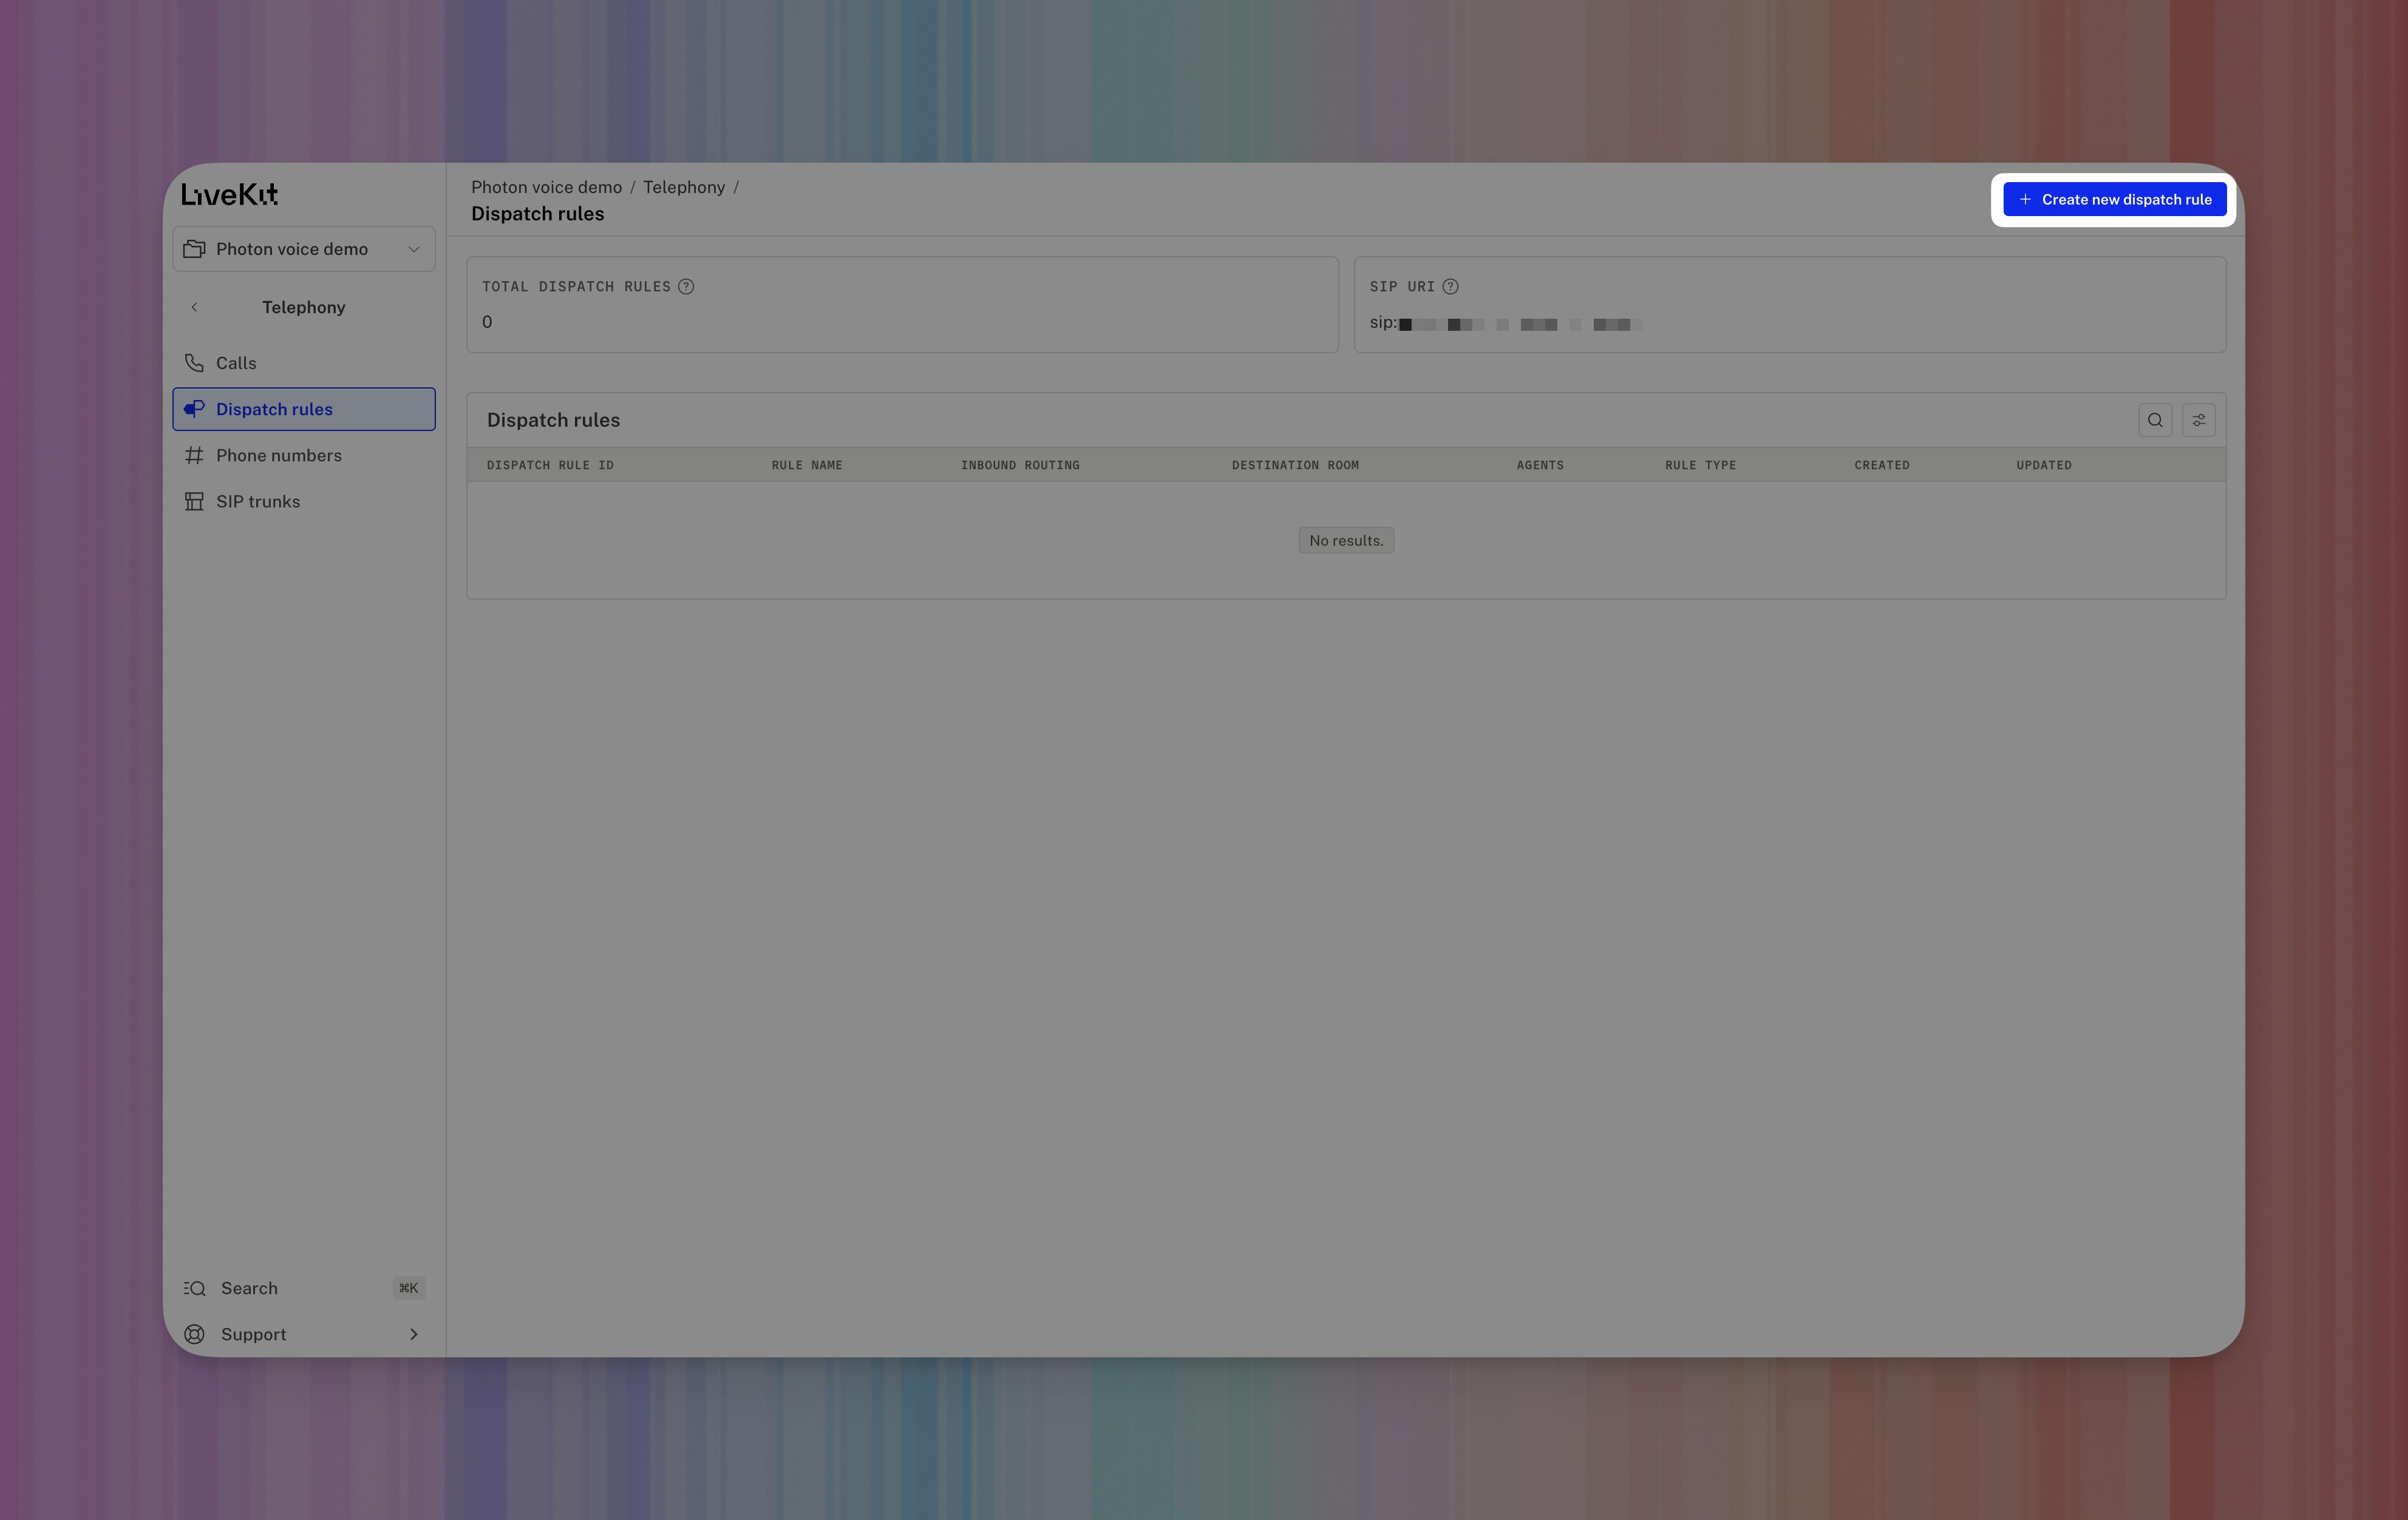
Under Inbound routing, select Trunks and check the inbound trunk you
just created. The example uses Photon Voice Demo.
Optional: dispatch a LiveKit agent
Optional: dispatch a LiveKit agent
To have an agent join each incoming call, use an existing deployed agent in
the same LiveKit project. If you need one, follow the
LiveKit voice AI quickstart.Edit the dispatch rule and select Add agent: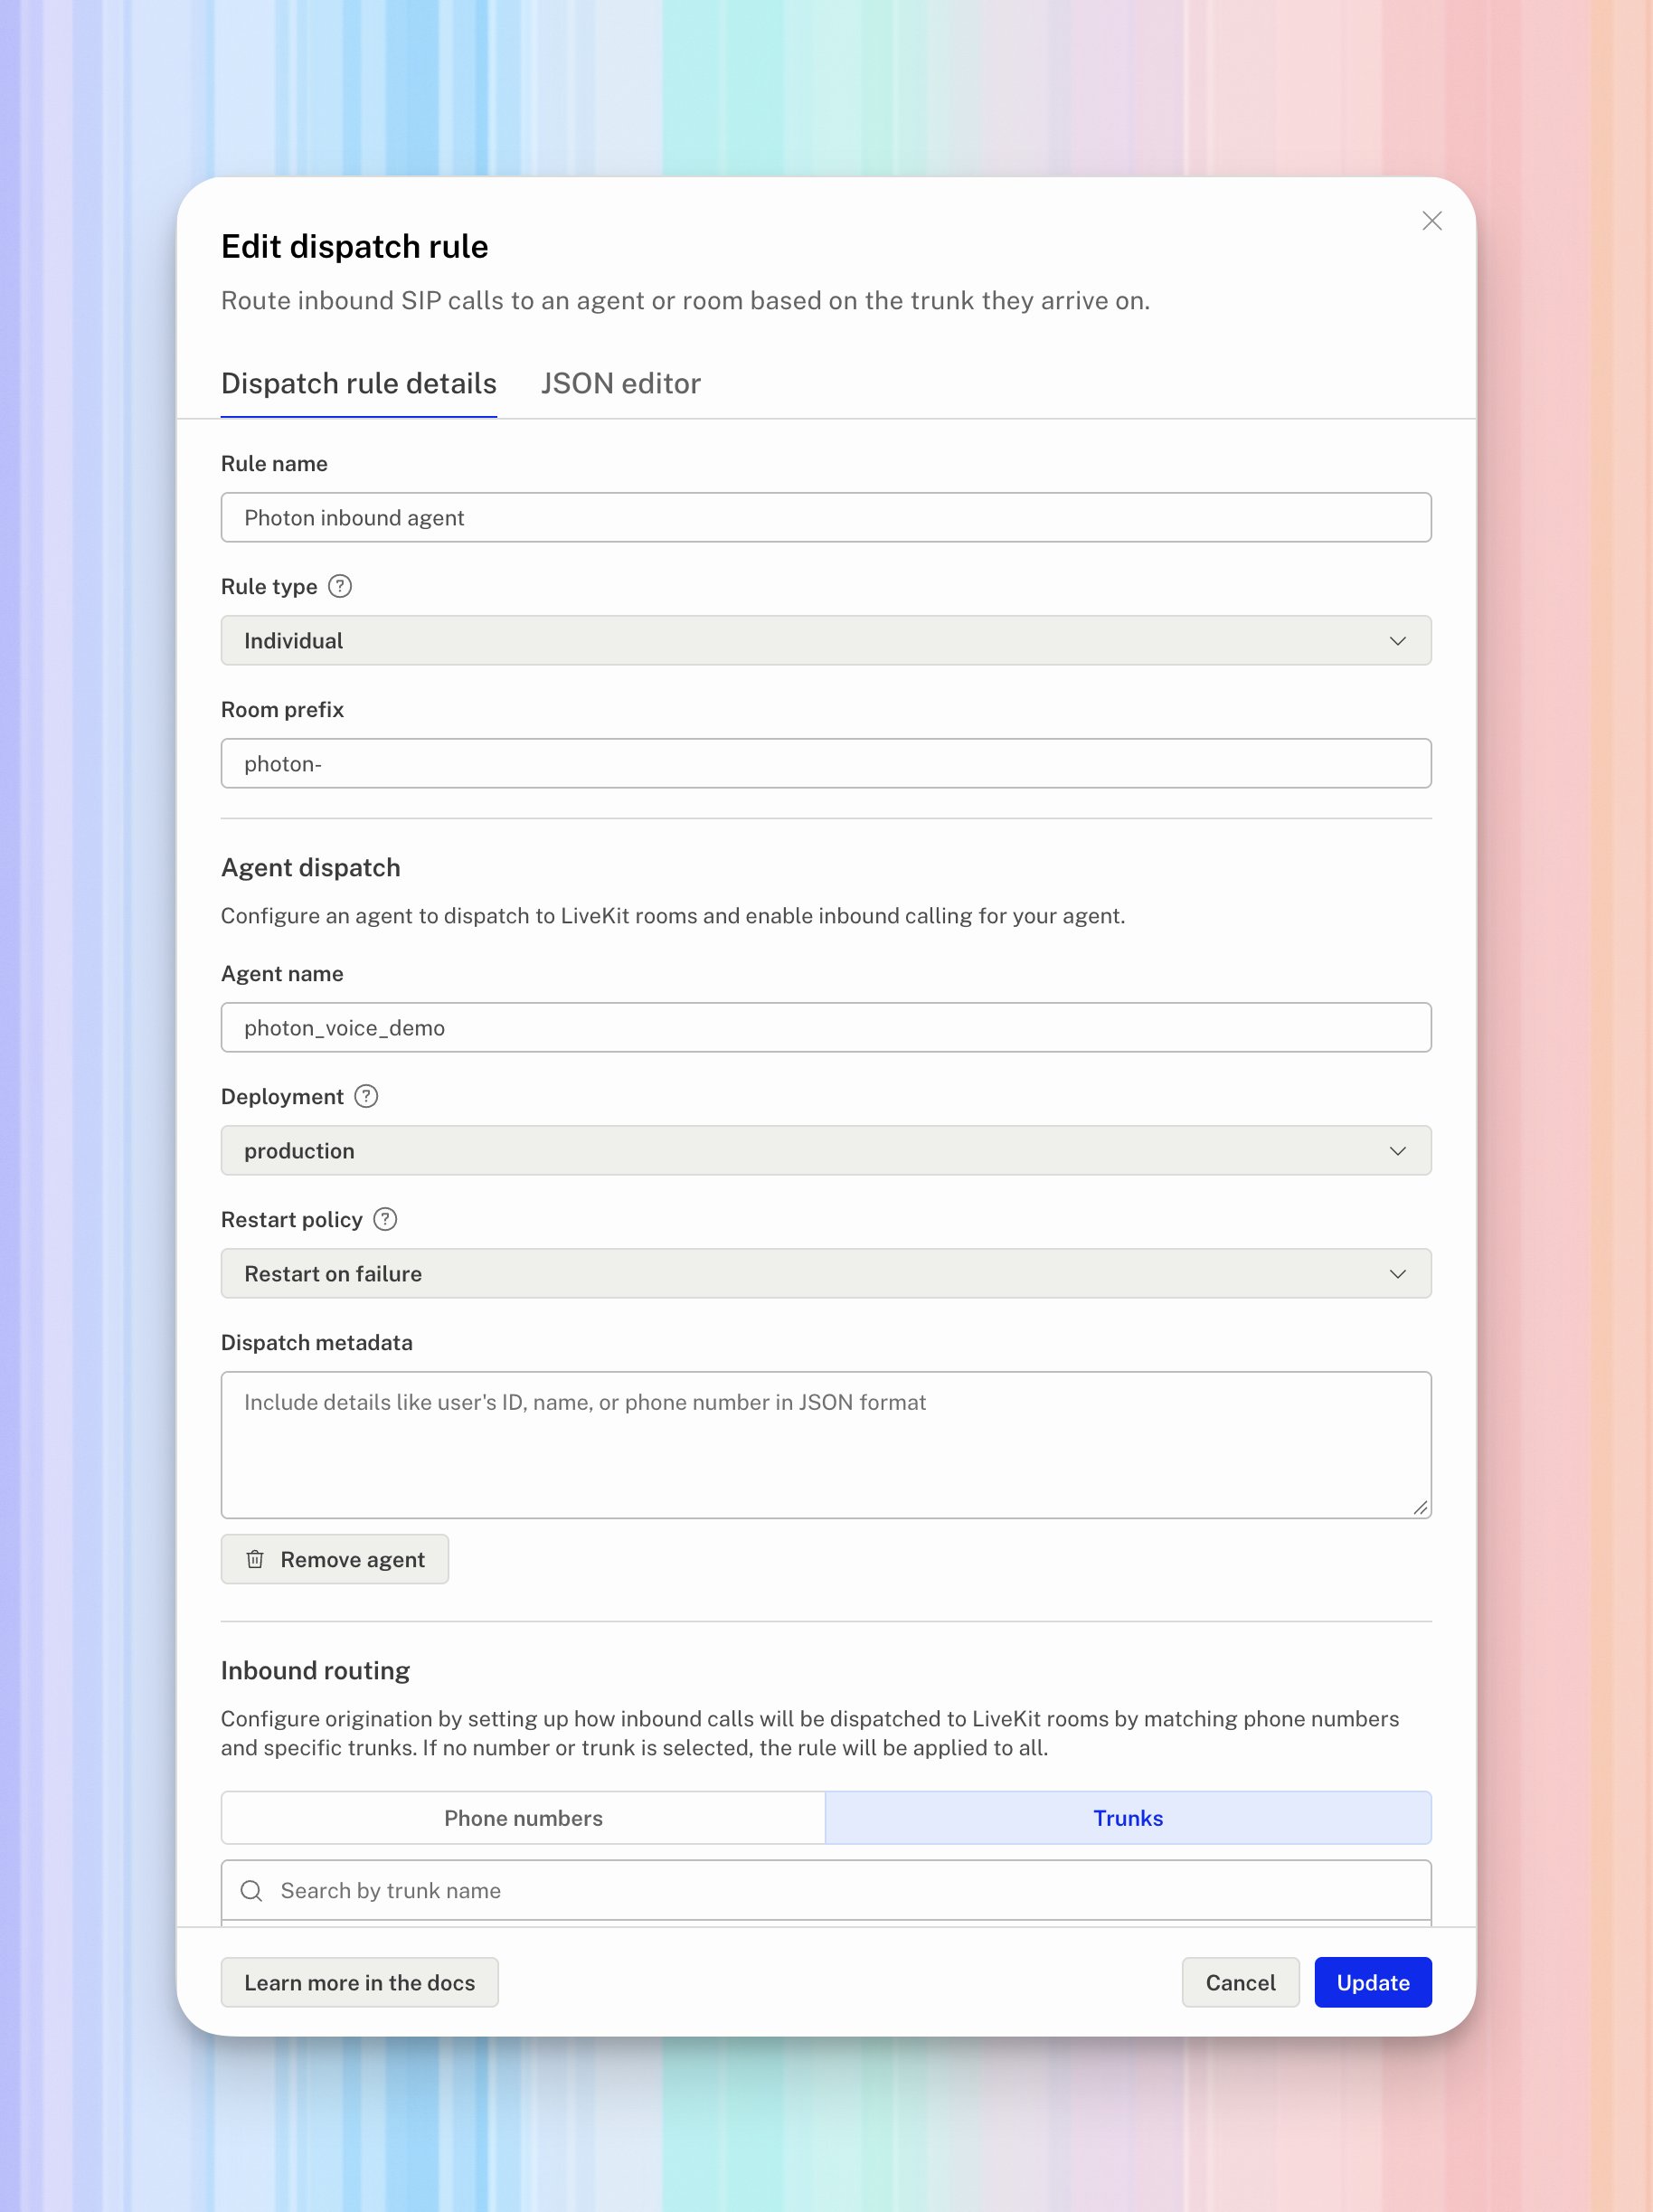
4. Set Photon’s receiving destination
Copy your project’s SIP URI from LiveKit’s SIP trunks page or project settings. It resemblessip:YOUR_PROJECT.sip.livekit.cloud.
Return to the Photon Voice profile used by your number. Under Inbound
calls, select Enable inbound.
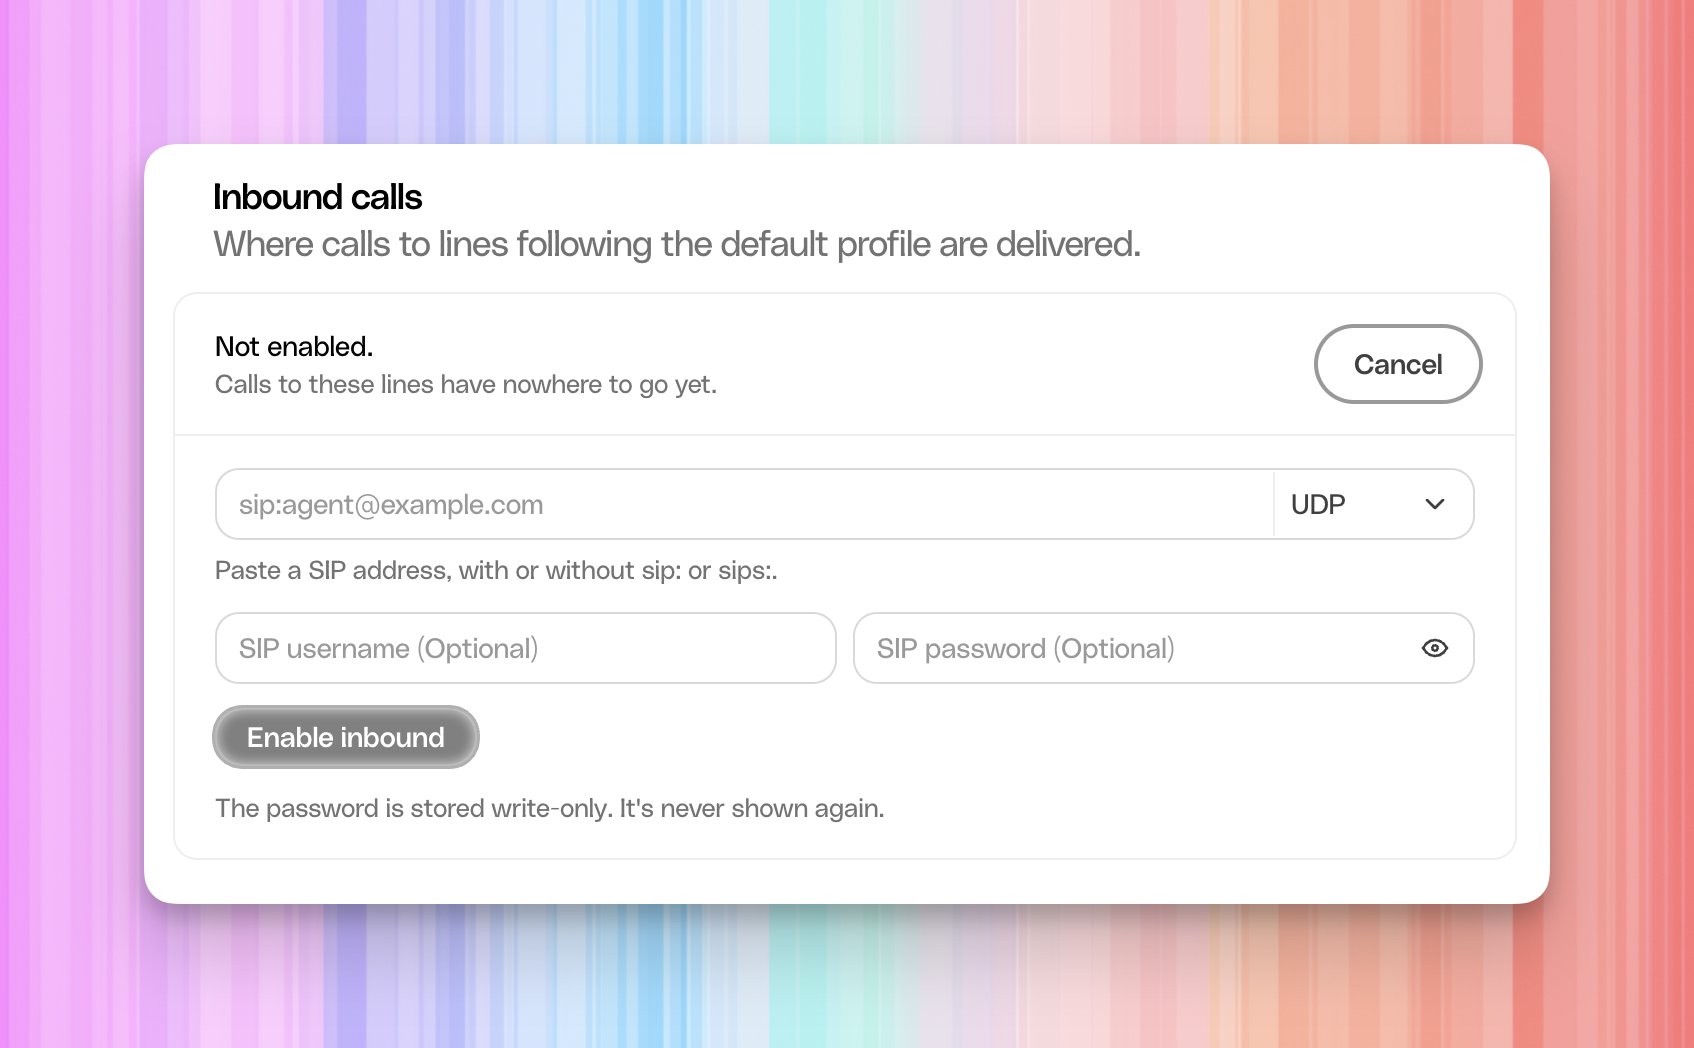
Photon formats a TLS address as
sips:. If you paste a URI ending in
;transport=tls, it can be reformatted to the equivalent sips: address.
Check that TLS remains selected.
Use the project’s SIP endpoint here. The dispatch rule supplies the room
routing and any optional agent dispatch. LiveKit’s WebSocket URL, which begins
with wss://, is a separate endpoint used by your application.
Select Enable inbound. For an existing configuration, update the
destination and credentials, then check the saved values.
Check an incoming call
- Call your Photon number from your separate phone.
- Open Telephony → Calls in LiveKit and inspect the call’s session to find its room name. It should start with the prefix you chose in the dispatch rule.
- Connect your LiveKit application to that exact room using an access token for the room. Publish your microphone audio and subscribe to and play the phone participant’s audio. If you configured agent dispatch, the agent can supply this audio instead.
- Confirm the phone and your application or agent can hear each other, then hang up and check the call’s outcome.
5. Prepare Photon outbound credentials
Skip the remaining setup if you only receive calls. Open Outbound calls in the Photon profile used by your number. For a new credential, select SHA-256 (recommended) under Digest algorithm, then select Enable outbound.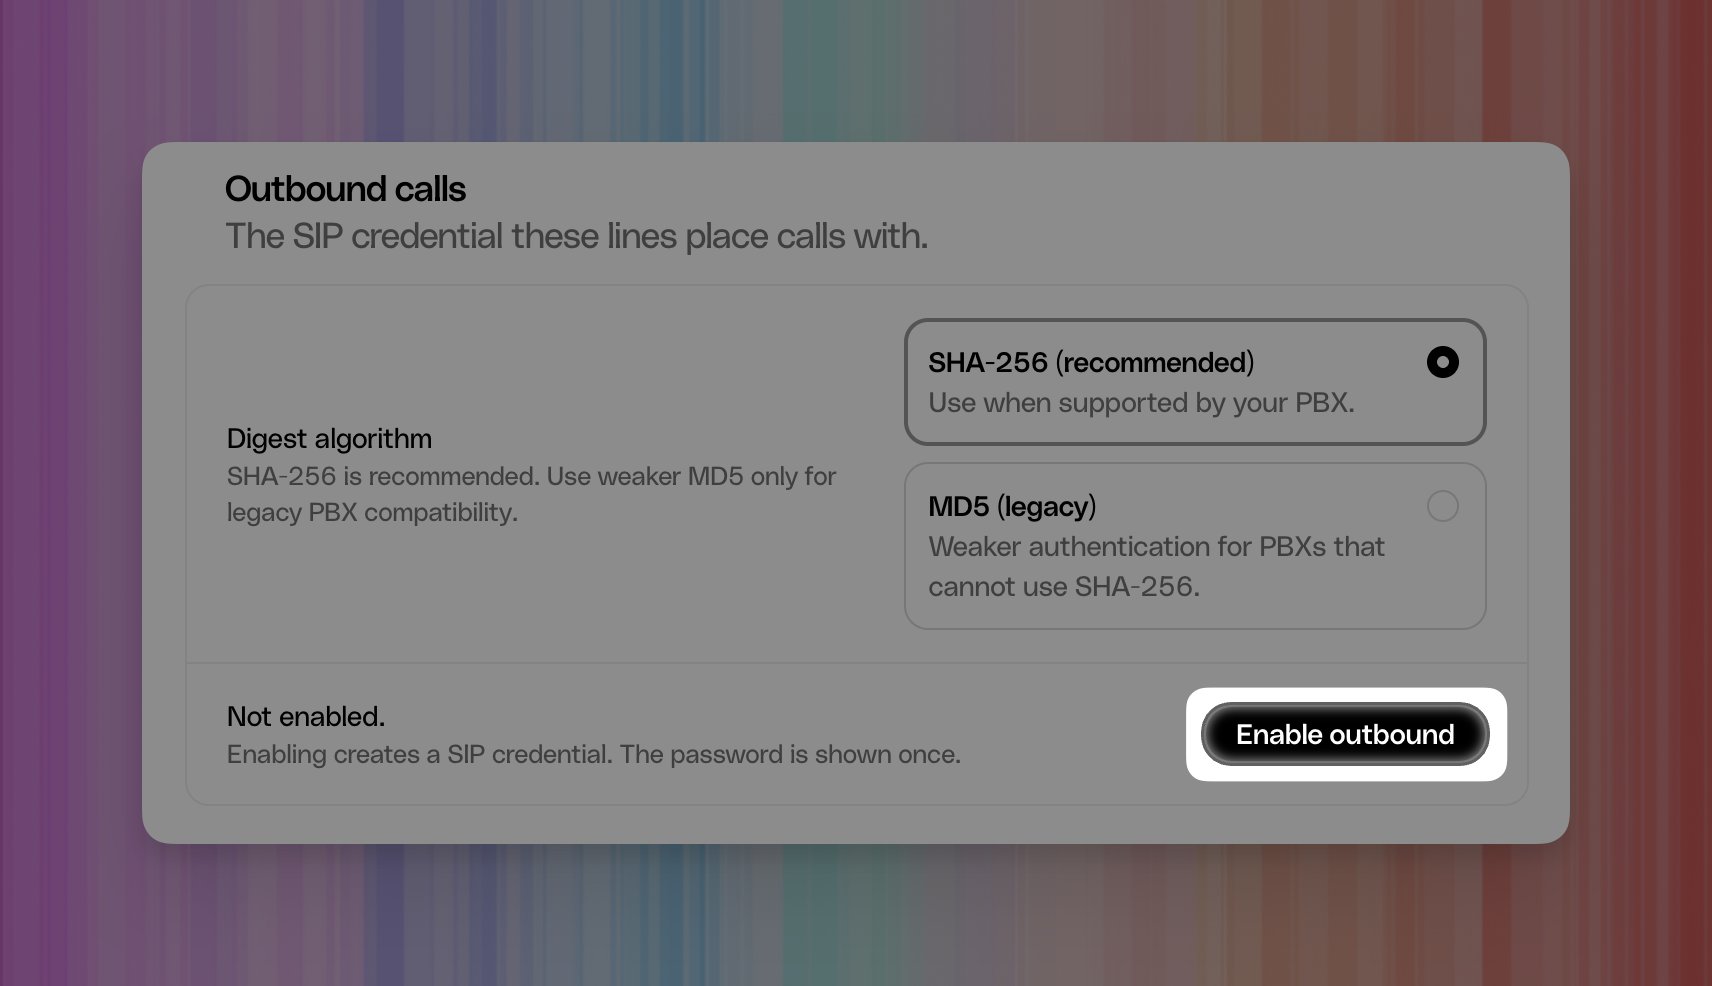
sip.photon.codes:5061; use the values displayed in your own
profile so the endpoint and credential belong to the same environment.
Authentication realm can differ from the SIP server. Use SIP connection
for LiveKit’s address.
These generated credentials authenticate LiveKit to Photon for outgoing calls.
The incoming-call credentials you chose earlier authenticate Photon to LiveKit.
6. Create a LiveKit outbound trunk
In LiveKit, return to Telephony → SIP trunks, select Create new trunk, and choose Outbound.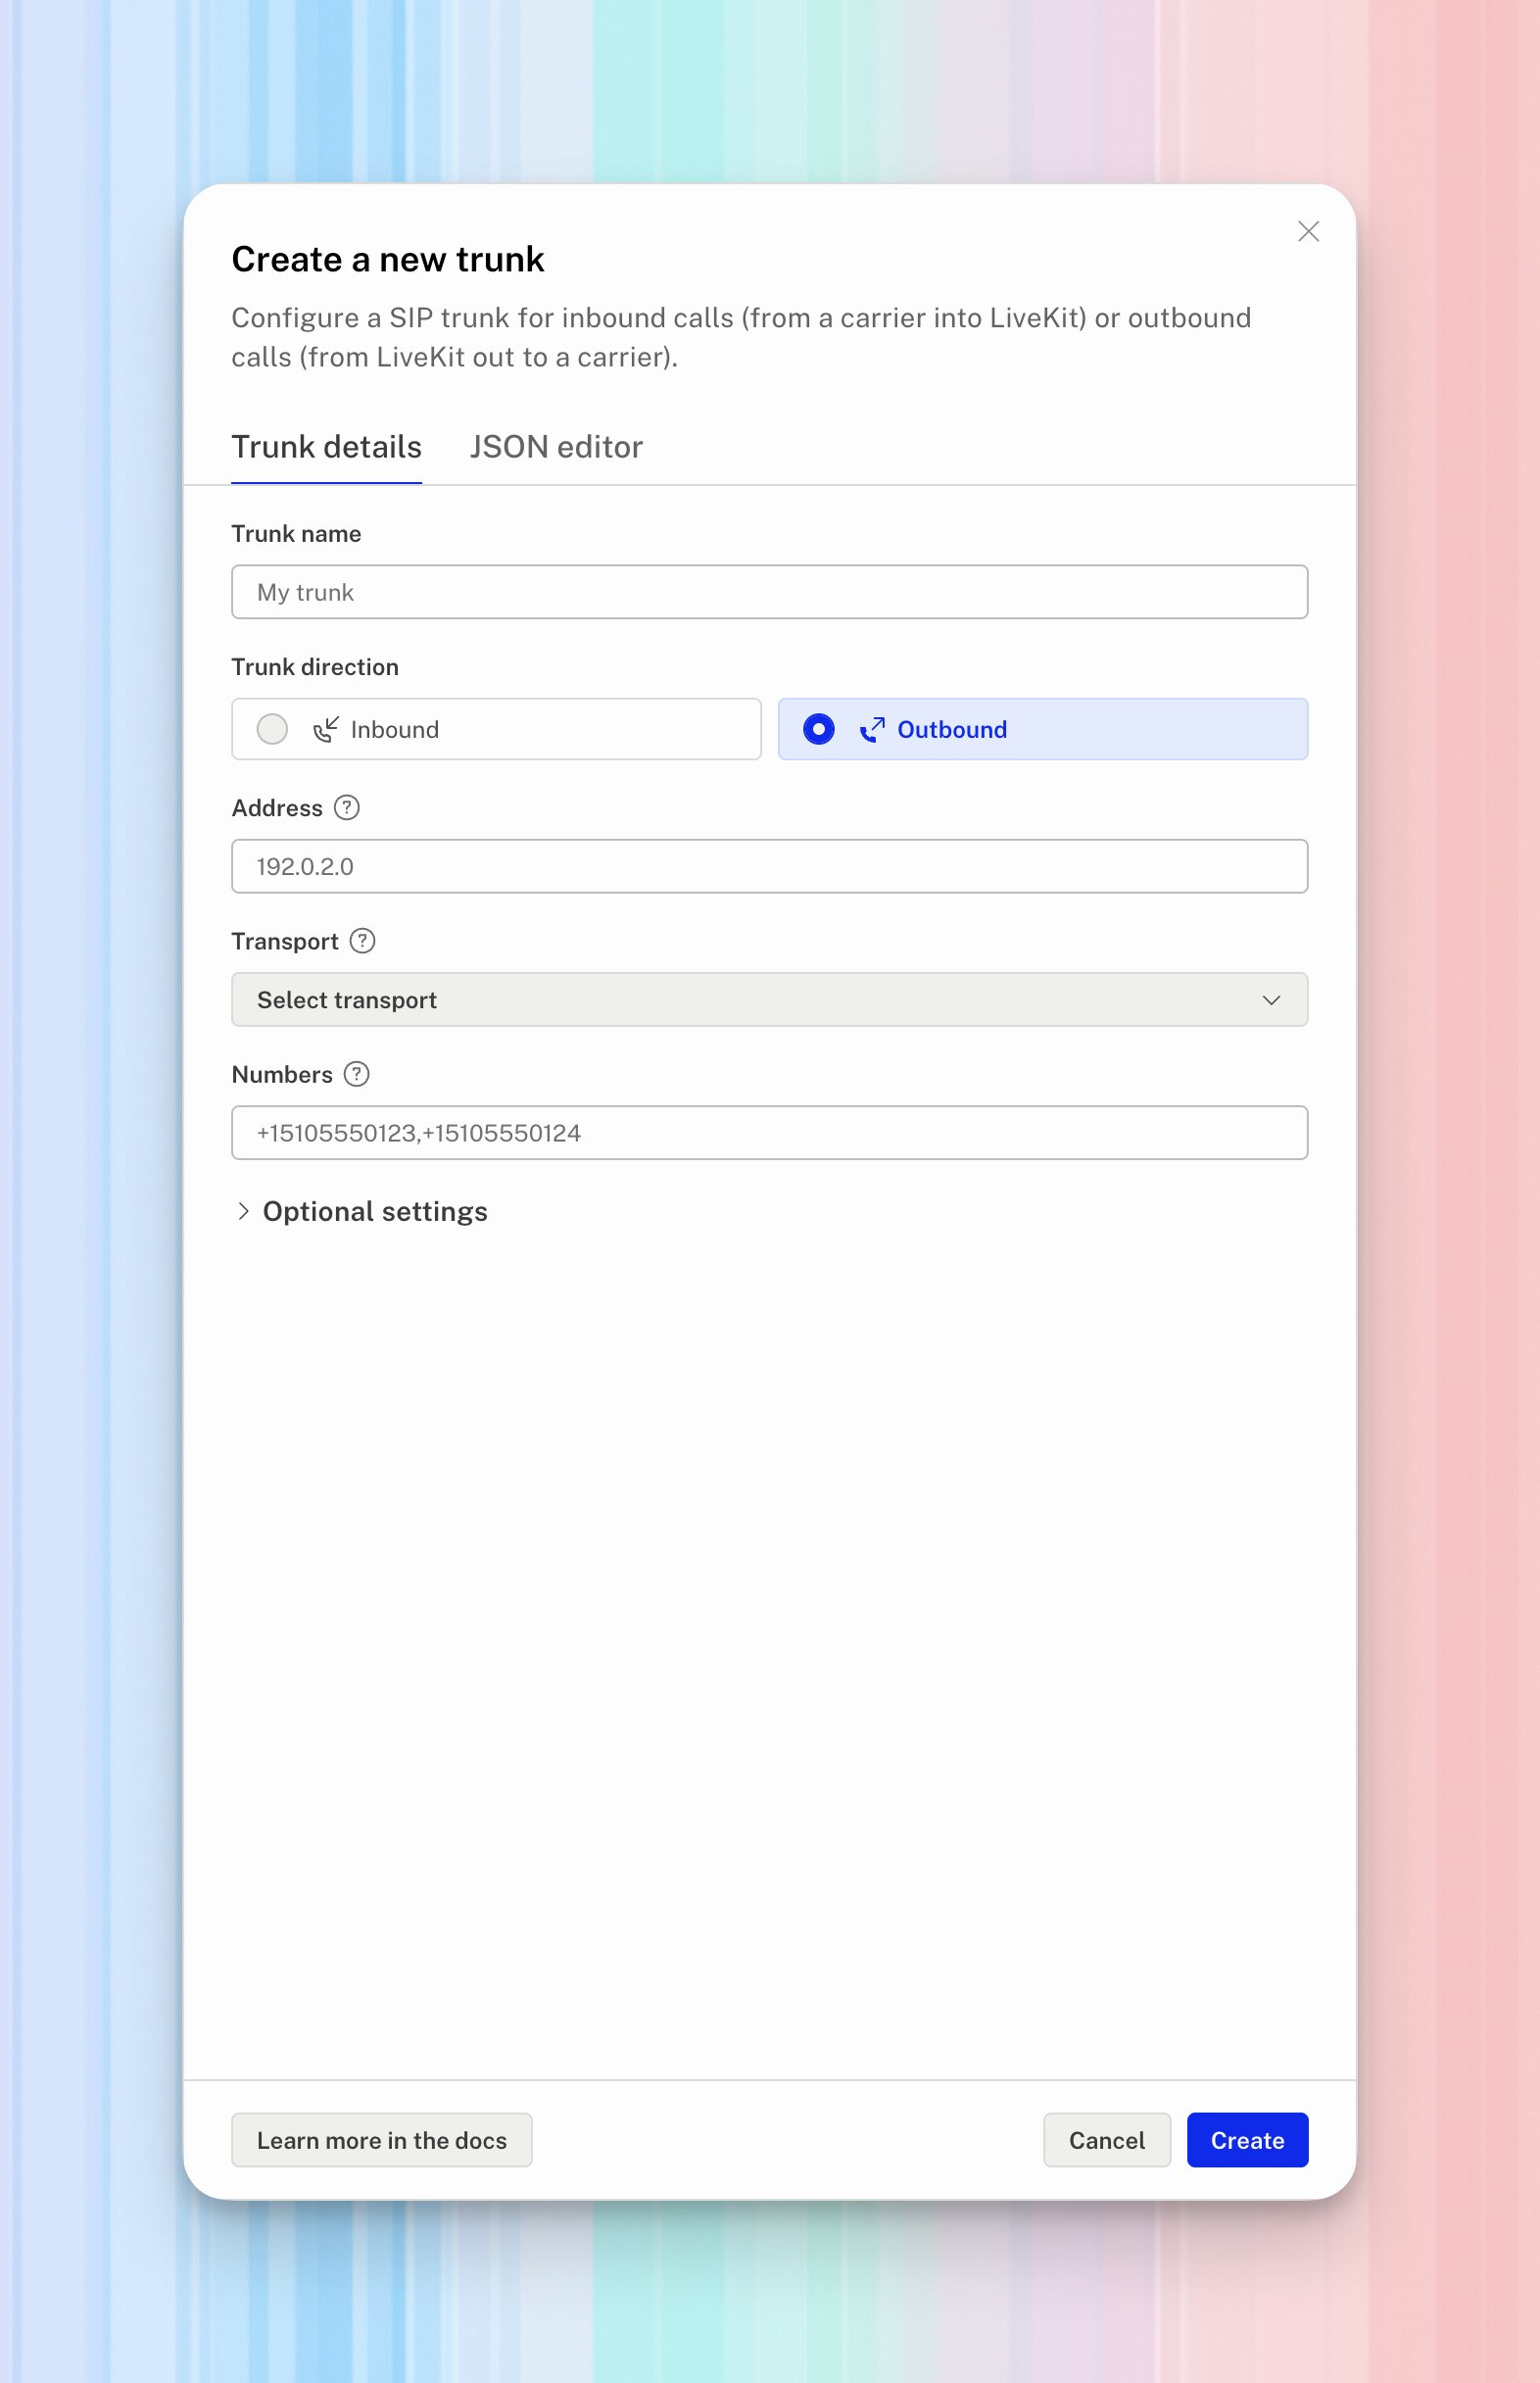
Select Create. Copy the Trunk ID, which begins with
ST_, from the
Outbound list. You will use it to start the call.
LiveKit outbound trunks.
7. Place an outgoing test call
Create a SIP participant to call a phone through the outbound trunk. The recipient joins the room you specify. Your application or an optional agent exchanges audio with that phone participant.Connect the CLI to your project
Follow the LiveKit CLI installation guide if needed. In your terminal, run:Prepare the room’s audio
Choose the room your recipient should join, such asphoton-outbound-test-1.
Connect your application to that room in the same LiveKit project, with audio
publishing and playback enabled. Use that exact name for YOUR_ROOM_NAME below.
For another test, choose a new room and connect your application to it.
Optional: use a LiveKit agent for the test
Optional: use a LiveKit agent for the test
You can use a deployed agent to supply the room’s audio. Before starting
the phone call, replace the placeholders and run:Use your agent’s exact dispatch name and the same project and room name
as the outgoing call. This requests the agent in the room; the SIP
participant command below starts dialing. For another test, use the new
room name in both commands.The inbound SIP dispatch rule applies to incoming calls. It does not
dispatch an agent for this outgoing test.
Start the call
Replace these placeholders before running the block in Bash or zsh:Call your separate test phone. Your Photon number is already configured
as caller ID on the trunk. Putting it in
sip_call_to calls that Photon line
and can route back through your inbound dispatch rule.wait_until_answered set to true, the CLI waits for the call to be
answered before returning participant details.
LiveKit outbound calls.
Answer your test phone. Check the Photon caller ID and confirm audio in both
directions with your application or agent. End the call and check its outcome in
LiveKit Telephony → Calls.
For calls triggered by your application, use LiveKit’s
SIP participant API.
If you also use an agent, request it with the
agent dispatch API.
Troubleshooting
Record the attempt time and SIP call ID when investigating a failed call.
See LiveKit’s SIP troubleshooting guide
for interpreting the call’s signaling and media details.